

Appearance
Adding Custom CSS & JavaScript
Matching your community to your brand often means going beyond the default settings. FluentCommunity gives you two flexible ways to add custom CSS (for styling) and JavaScript (for extra functionality), so you can choose the approach that fits your comfort level.
Use Case: You want your community header to use your brand's blue instead of the default color. A few lines of custom CSS in the built-in editor handle it in seconds, no plugins required.
The two methods are:
- The Built-in Editor — quick and recommended for most styling changes, done directly in FluentCommunity's settings.
- A Snippet Plugin — advanced control for larger code blocks, external files, or conditional logic.
Method 1: The Built-in Editor
For the vast majority of customizations, this is the safest and most straightforward method. It needs no extra plugins, and your changes are easy to find and manage later.
- From your WordPress Dashboard, go to FluentCommunity → Portal Settings.
- Open the Customizations tab.
- Scroll down to the Custom Snippets section.
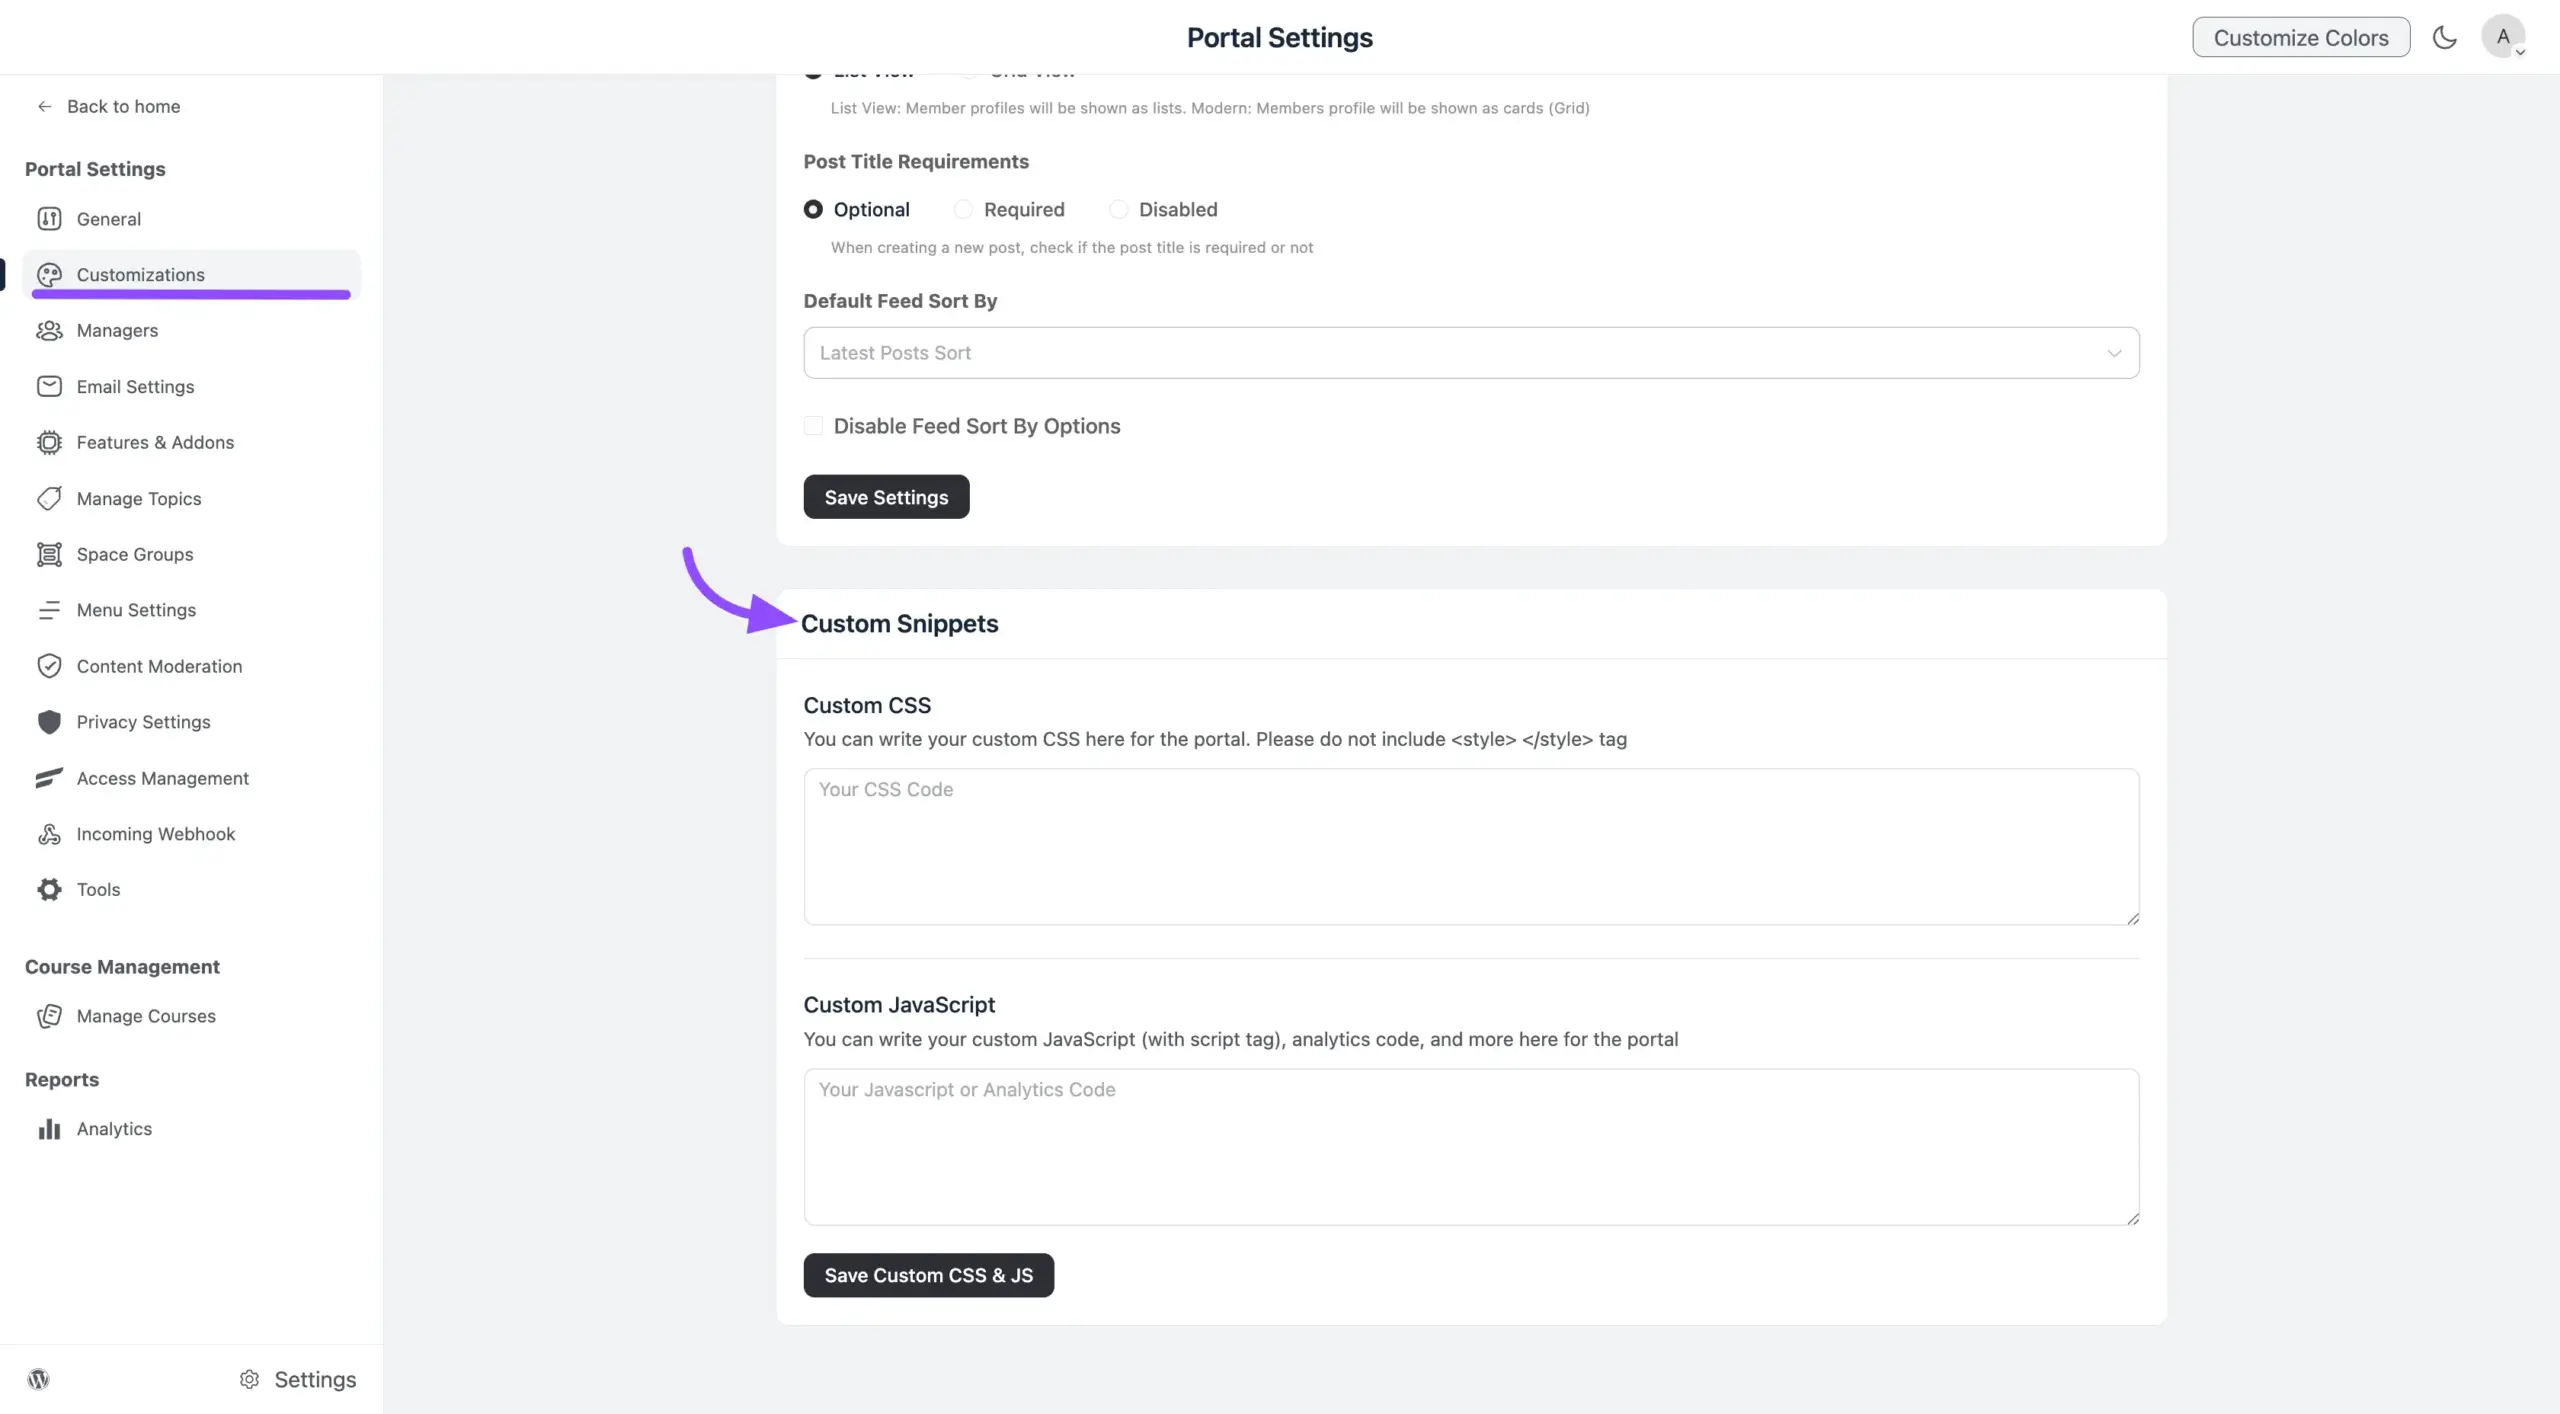
Adding Custom CSS
Paste your styling rules directly into the Custom CSS box.
✨ Note: Do not include
<style>or</style>tags here, just the raw CSS.
css
/* Make the main header blue with white text */
.fc-portal-header {
    background: #1e73be;
    color: #fff;
}
Adding Custom JavaScript
Paste your script directly into the Custom JavaScript box. Unlike the CSS box, here you should include the full <script> and </script> tags.
html
<script>
    console.log("FluentCommunity portal is ready!");
</script>
When you're done, click Save Custom CSS & JS to apply your changes.
Method 2: Using a Snippet Plugin
This method suits users who want to keep their code more organized or need more complex logic. It relies on FluentCommunity's developer hooks (add_action).
✨ Note: When you use a FluentCommunity hook like
add_action(...), you're writing PHP. So always create a PHP Snippet, even when the goal is to add CSS or JS inside it. This is the most common point of confusion.
Adding Custom CSS with a Snippet Plugin
- Create a new snippet in your chosen plugin (for example, FluentSnippets).
- Set the snippet type to PHP.
- Paste the structure below, placing your CSS rules inside the
<style>tags.
php
add_action('fluent_community/portal_head', function() {
    ?>
    <style>
        /* Add all your custom CSS rules here */
        .fc-portal-header {
            background: #1e73be;
            color: #fff;
        }
    </style>
    <?php
});
Adding Custom JavaScript with a Snippet Plugin
Use a PHP Snippet to hook your JavaScript into the page footer for the best performance.
- Create a new PHP Snippet.
- Paste the structure below, placing your JavaScript inside the
<script>tags.
php
add_action('fluent_community/portal_footer', function() {
    ?>
    <script>
        // Add your custom JavaScript here
        console.log("Custom JS loaded for FluentCommunity!");
    </script>
    <?php
});
Which Method Should You Use?
- Use the Built-in Editor if you're a beginner or need quick, simple style changes. This is the recommended method.
- Use a Snippet Plugin if you're a developer or advanced user who needs to organize a lot of code, link external files, or add conditional logic.
Troubleshooting
- CSS or JS doesn't work? Clear your browser cache and any caching plugins on your site first.
- Site looks broken after adding a snippet? Deactivate the last snippet you added; the culprit is usually a small typo.
- Code in a snippet not working? Double-check that you created a PHP Snippet and that your code sits correctly inside the
<style>or<script>tags.