

Appearance
Admin Dashboard
Welcome to the command center for your new community! After installing and activating FluentCommunity, this dashboard is the first page you'll see when you click on the FluentCommunity menu in your WordPress admin panel.
This page is designed to be your central hub, giving you quick and easy access to all the most important settings and management areas for your community.
The Dashboard Header
At the very top of the page, you'll find a welcome banner that confirms your community is ready to go. It contains three important action buttons:
- Go to the portal: This is the primary button you'll use to view your community from a member's perspective. It takes you directly to the front-end of your FluentCommunity portal.
- License Management: Click this button to view your license details, activate your pro license key, or manage your activated sites. The screen shows your plan status at a glance, with clear renewal and upgrade actions whenever your license needs attention.
- Join Official Community: This link takes you to the official FluentCommunity user group, where you can ask questions, get help from the community, and connect with the development team.
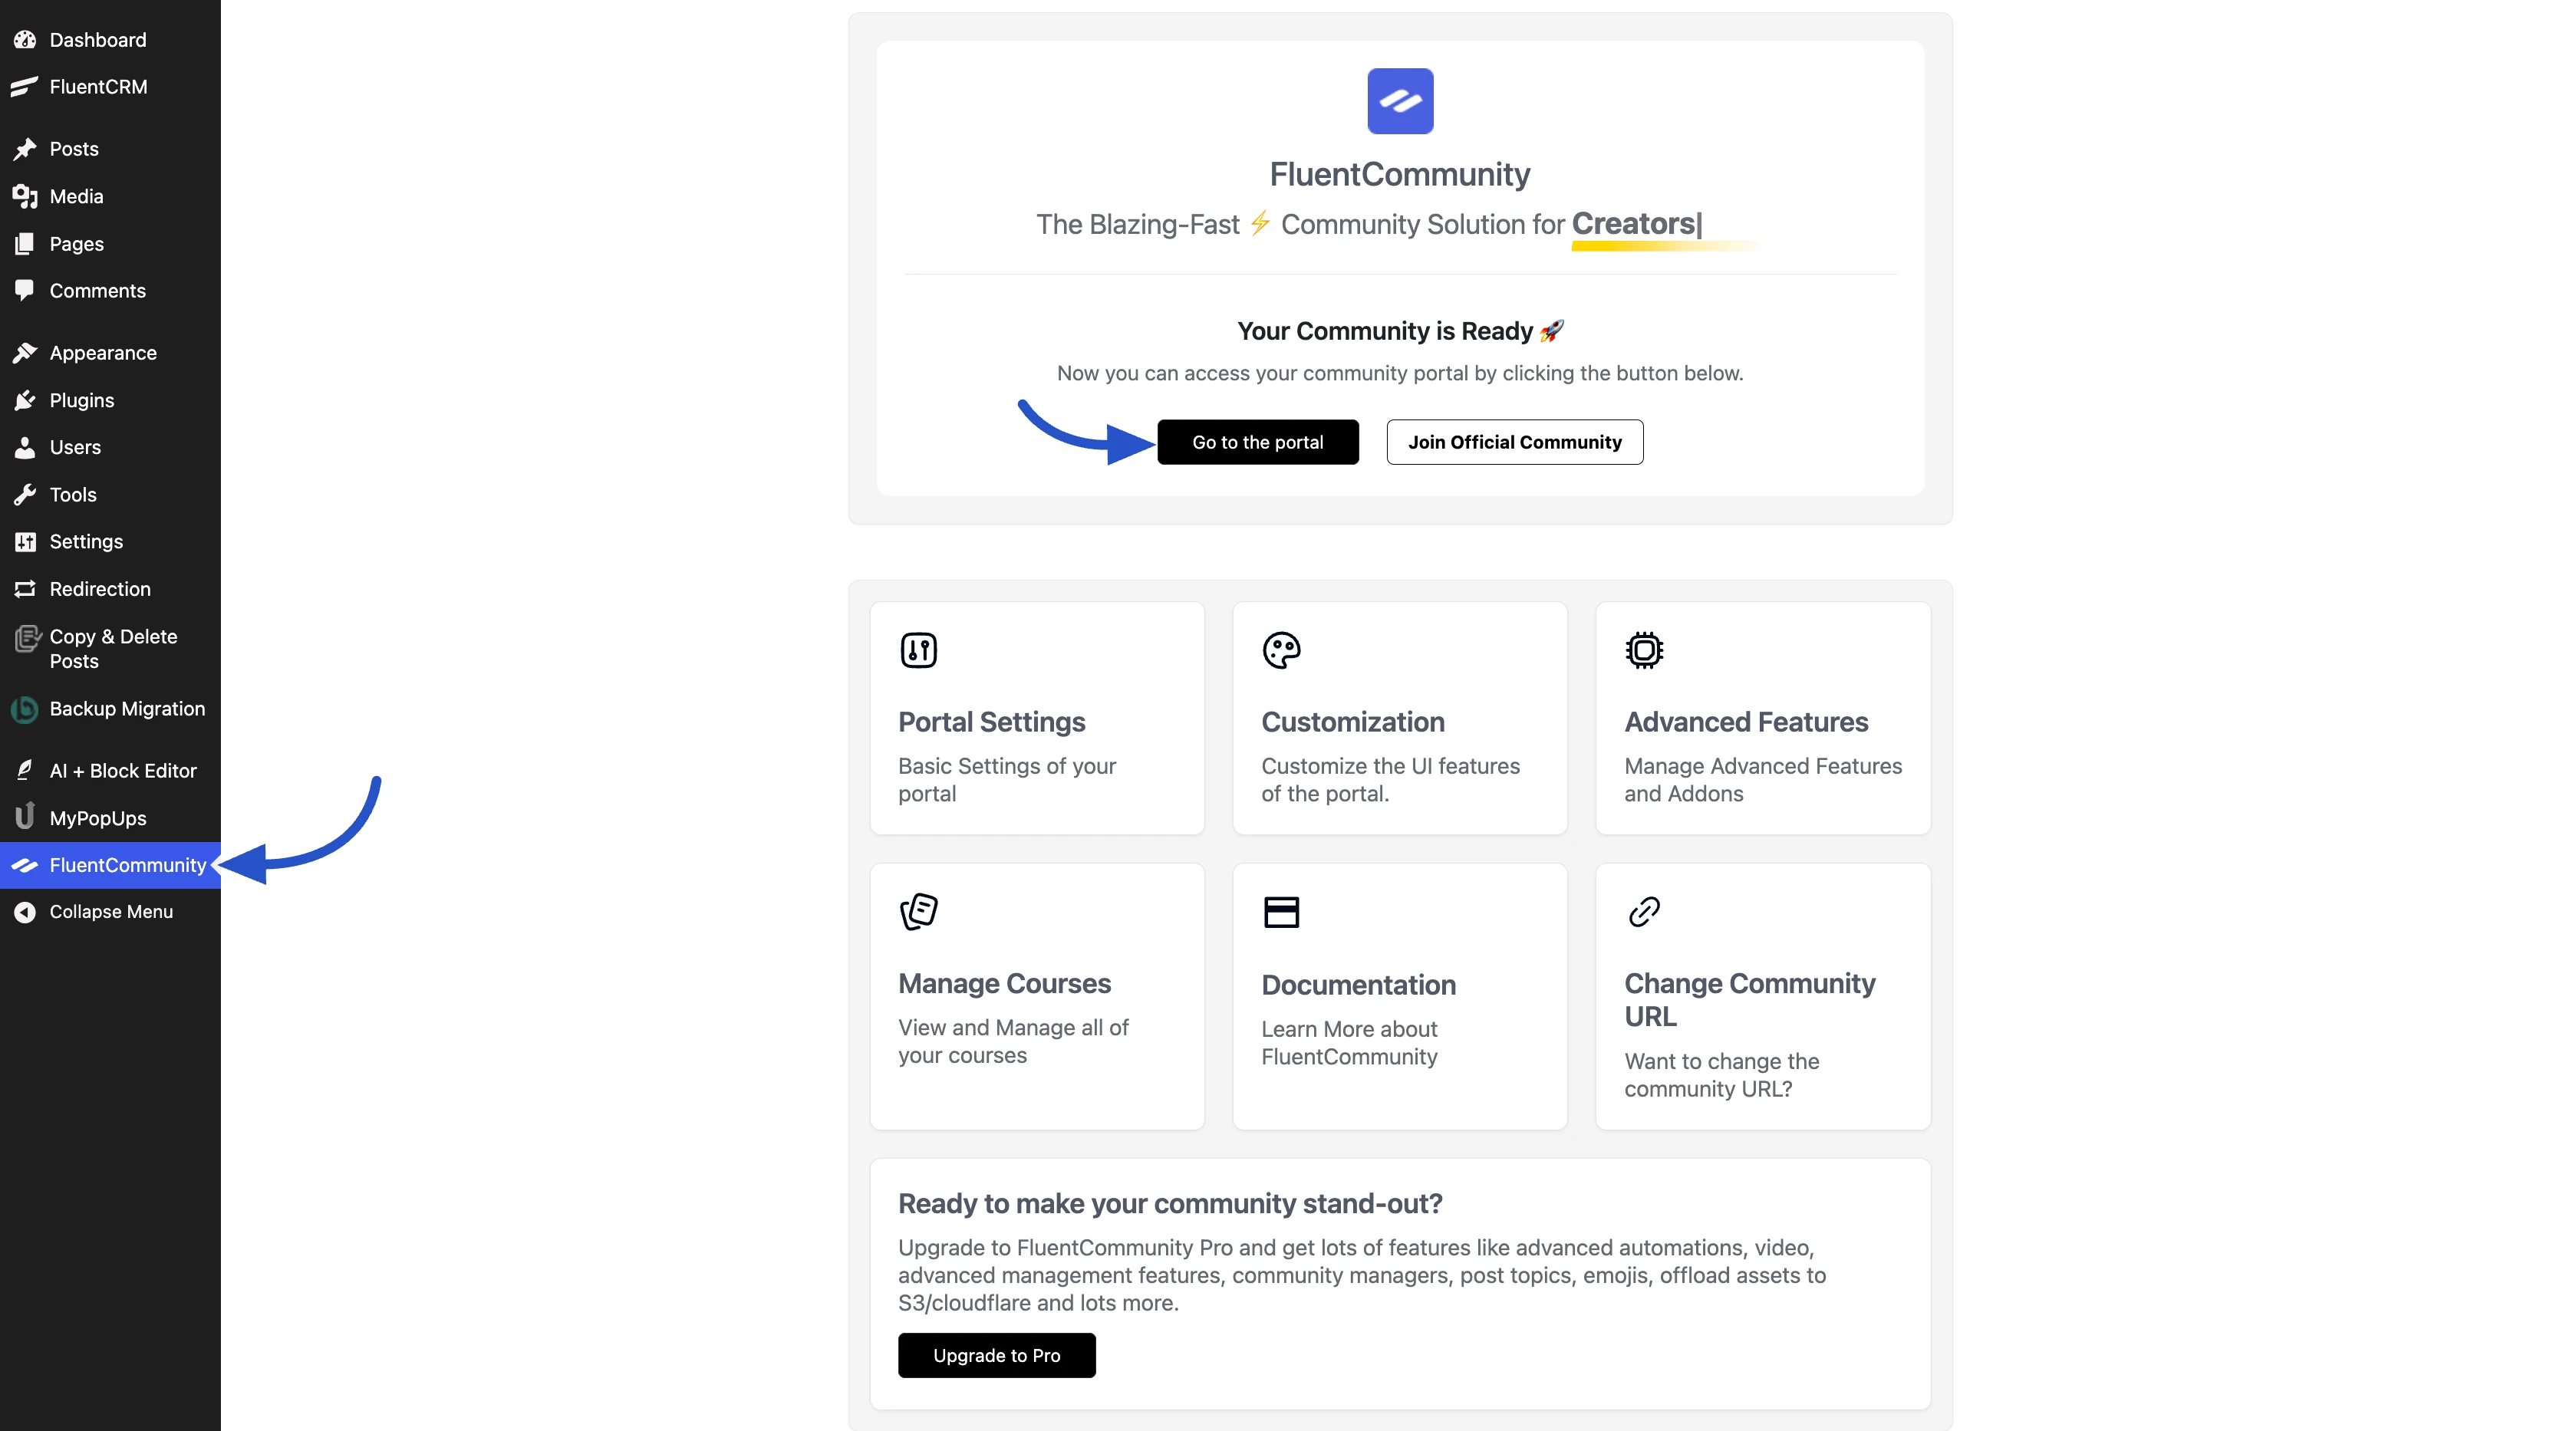
Dashboard Navigation
The main part of the dashboard consists of six navigation cards that link to the key areas of your community settings.
1. Portal Settings
This is where you'll configure the fundamental, basic settings for your community. This includes things like your community's name, logo, and other general operational settings. Explore Portal Settings for detailed configuration options.
2. Customization
Dive in here to control the look and feel of your community portal. You can adjust colors, layouts, and other User Interface (UI) elements to perfectly match your brand's style. Learn more about Layout & Appearance customization.
3. Advanced Features
This section unlocks the full power of FluentCommunity. You can manage powerful add-ons, enable or disable core modules (like Gamification or Courses) from the Features & Addons section, and configure other advanced settings.
4. Manage Courses
If you plan to use FluentCommunity's built-in Learning Management System (LMS), this is your starting point. Click here to create, view, and manage all of your courses, lessons, and quizzes. Learn more about Creating Your First Course.
5. Documentation
This card provides a direct link to the official FluentCommunity knowledge base. If you ever get stuck or want to learn more about a specific feature, this is the best place to start. You can also check our Frequently Asked Questions for quick answers.
6. Change Community URL
Every community has a unique web address (URL), such as yoursite.com/community. This link takes you to the settings page where you can easily change this URL slug to something else if needed.
Ready to make your community stand out?
This section is a notice for users of the free version of FluentCommunity, highlighting the premium features available when you upgrade to Pro (like advanced automations, video, and more).
Clicking the Upgrade to Pro button will take you to the official FluentCommunity website. This entire section will automatically disappear from your dashboard once you install and activate the Pro license.
At the bottom-right corner of the page, you can always find the Version Number of the plugin you are currently running. This is helpful information to have if you ever need to contact our support team for assistance.
Now that you're familiar with the Admin Dashboard, you're ready to start building your community.