Appearance
Membership Invitations
FluentCommunity gives you a dedicated Invitations feature so you can generate special links that invite new members straight into a specific Space. This guide walks you through creating, tracking, and sharing those invitation links.
Use Case: You're running a special promotion and want to invite exactly 50 people to your VIP Space. You can create a link titled "Promo 50," cap it at 50 uses, and set it to expire on Friday, which builds urgency while keeping the group exclusive.
Before you begin, make sure you're logged into your WordPress dashboard and that you have Administrator or Moderator privileges for the Space you want to invite members to.
How to Send Membership Invitations
Step 1: Open the Invitations Menu
First, open the invitation dashboard for the Space you want to grow.
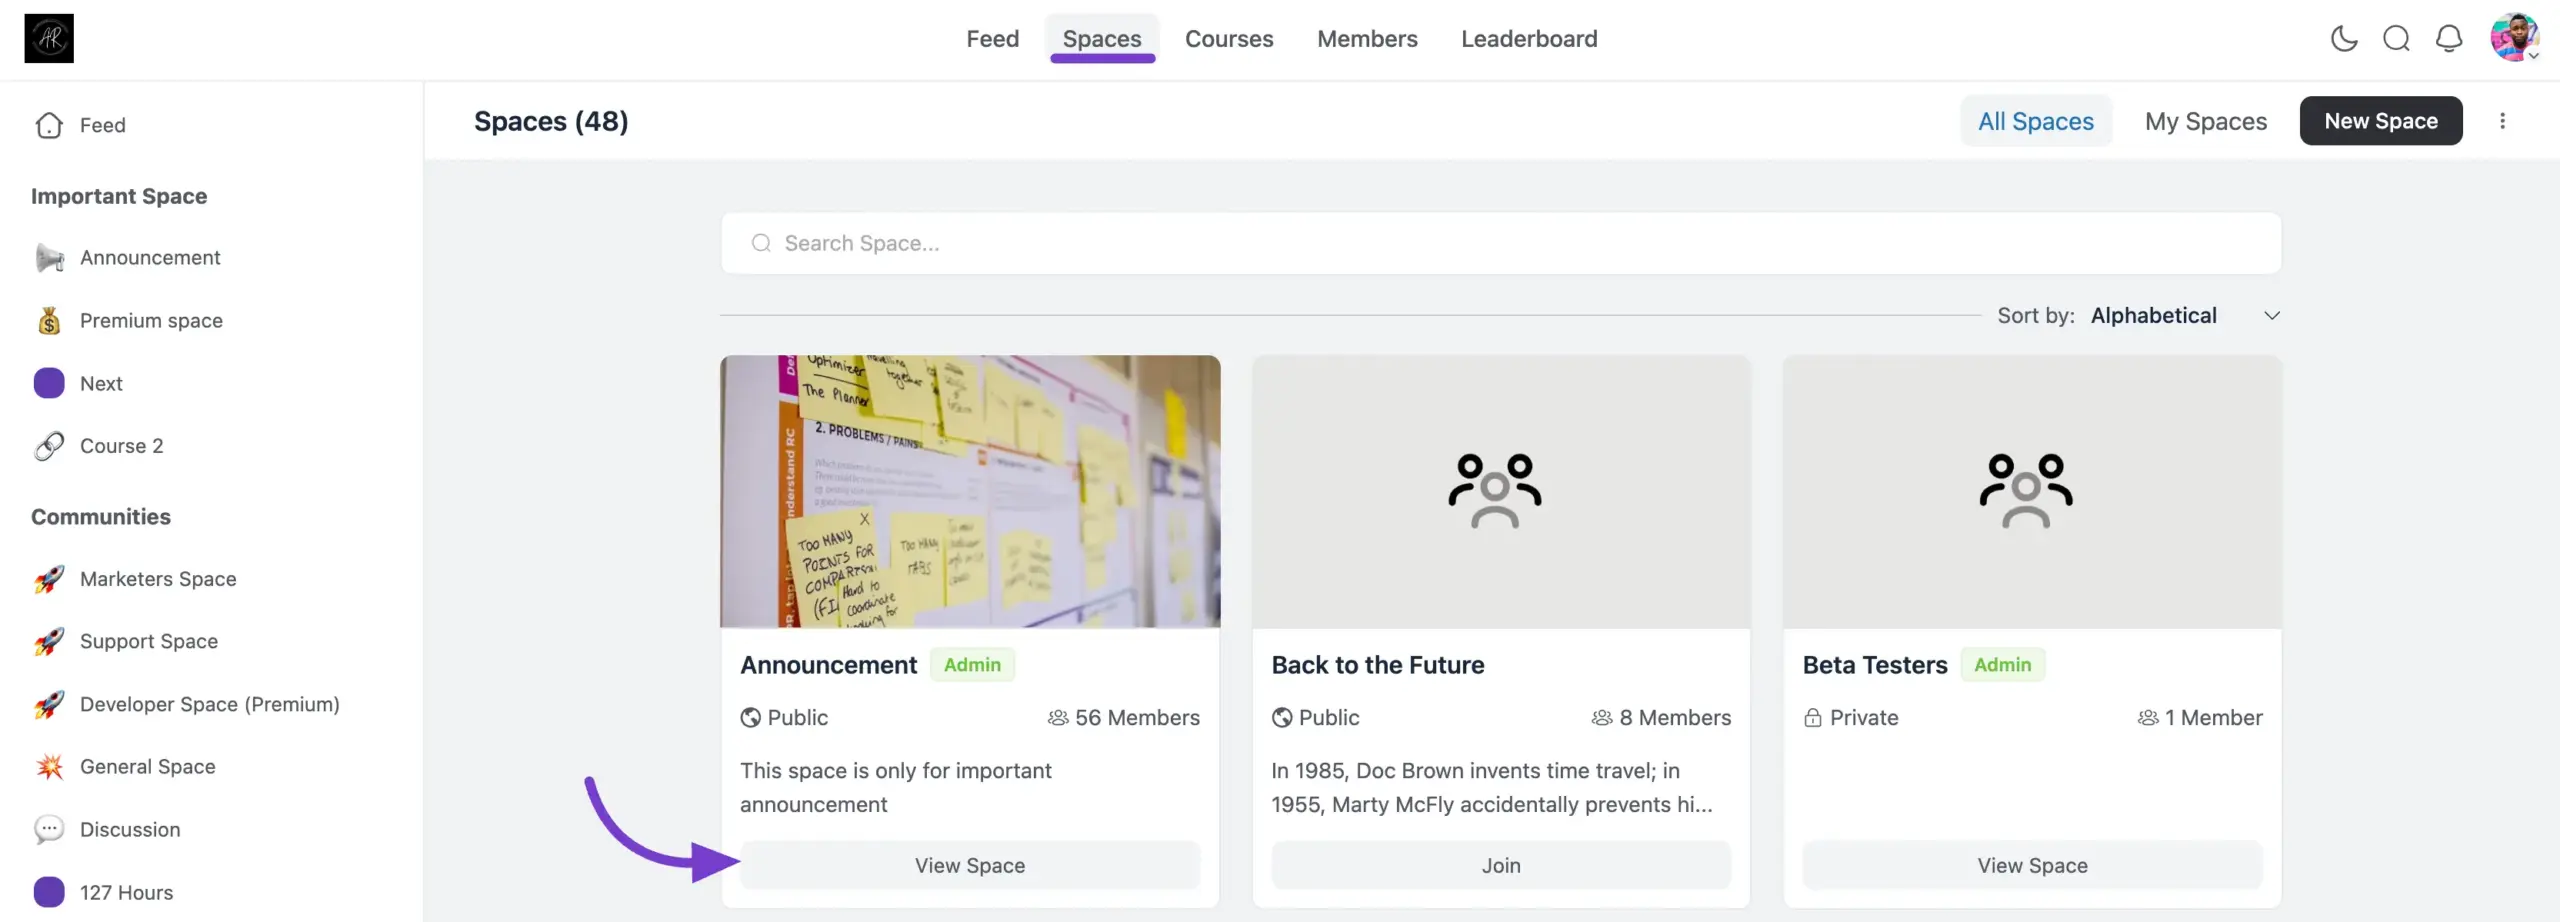
- From your community portal, select Spaces in the main top navigation.
- Find the Space you want to grow and click the View Space button.
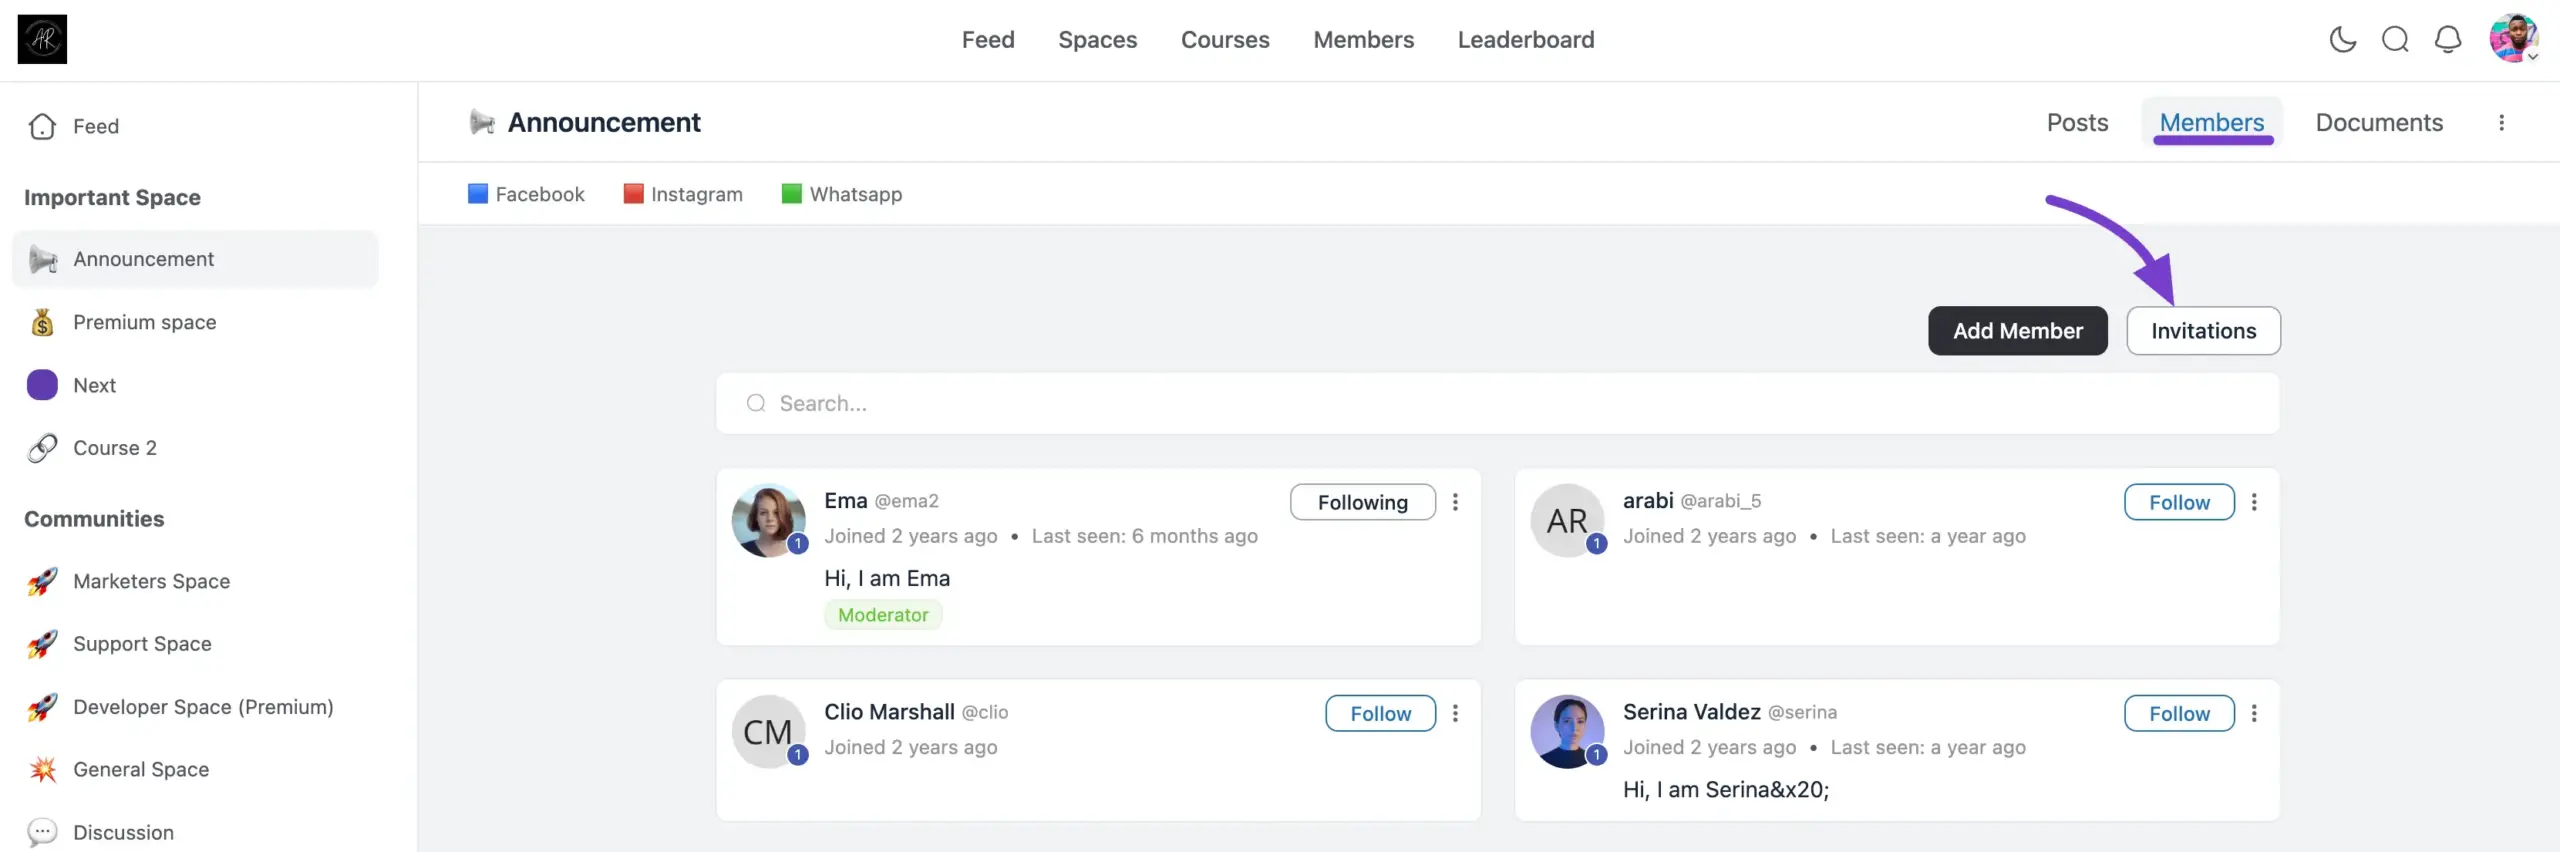
- Inside the Space, click the Members tab in the top-right menu.
- Click the Invitations button, located right next to the Add Member button.
Step 2: Track Your Active Invitations
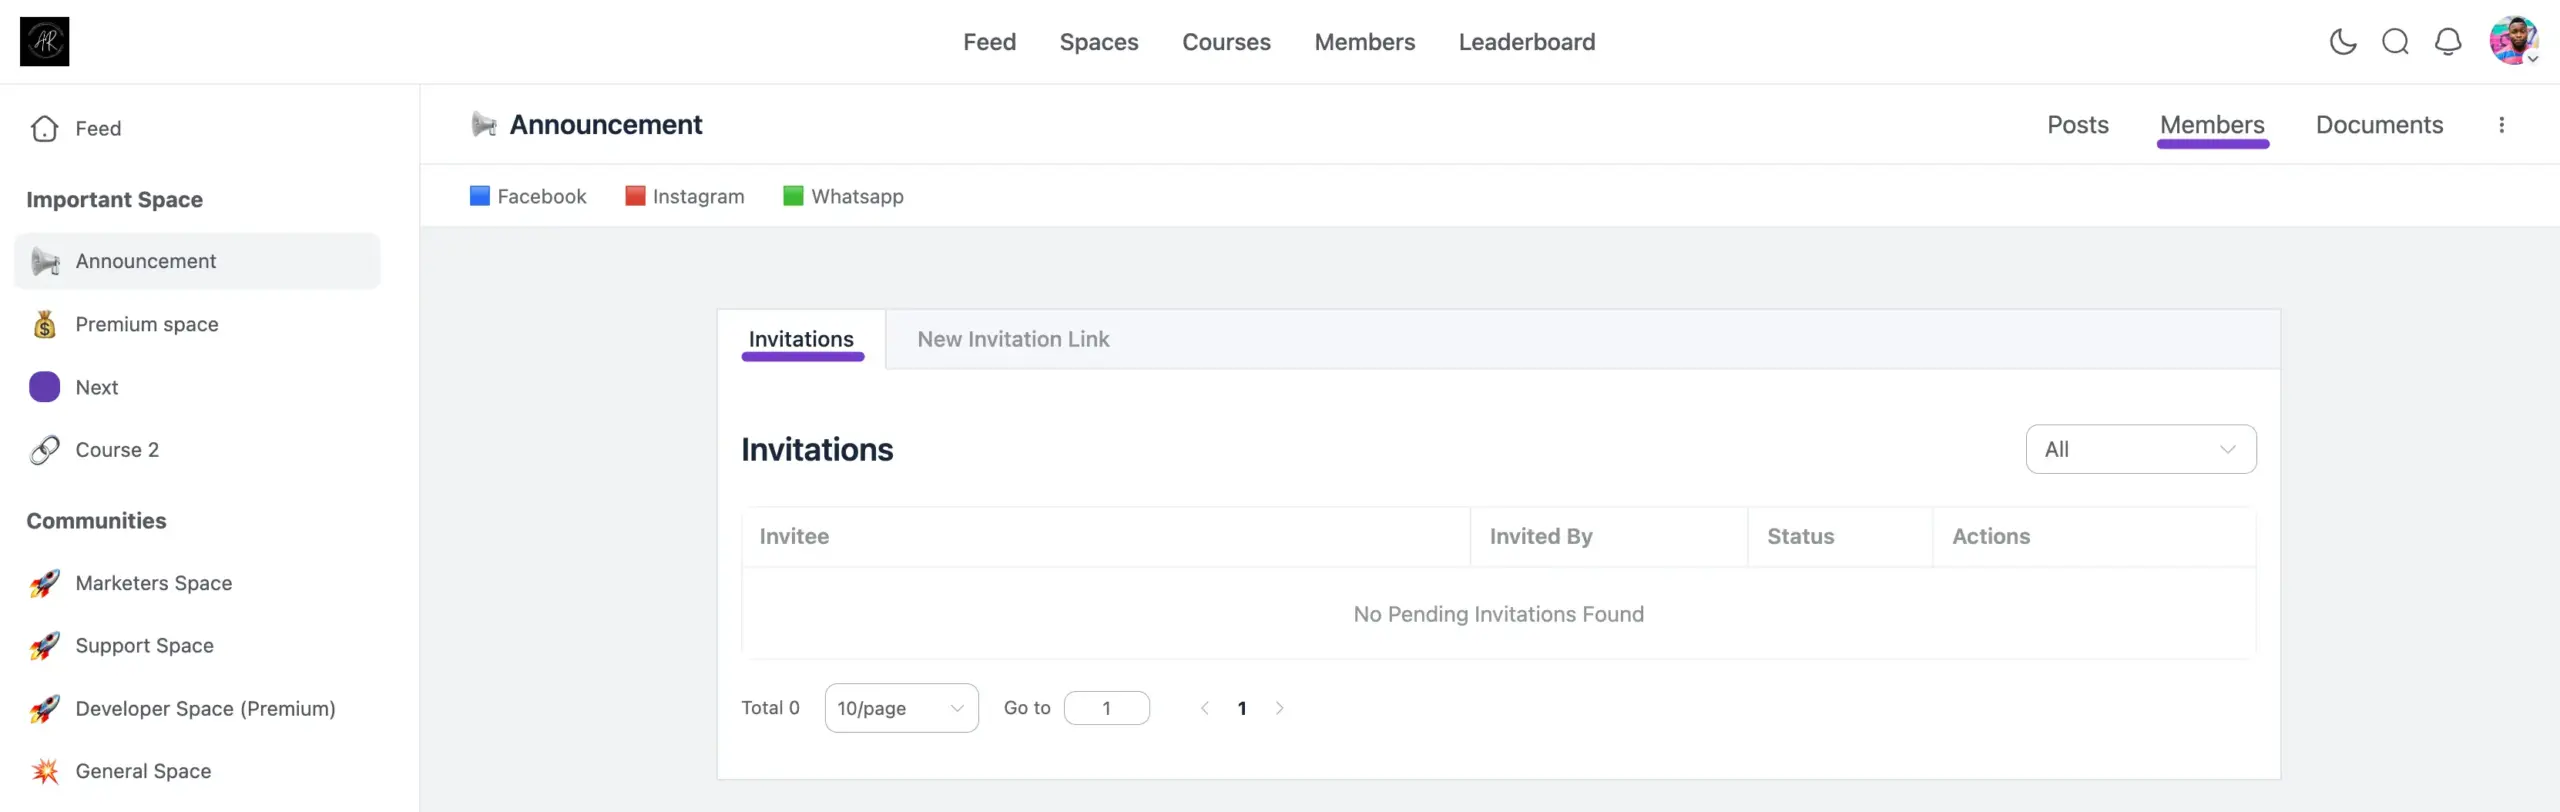
When you open the Invitations area, you'll land on the Invitations tab. This is your command center for tracking the status of every invite you've sent.
- Invitee: Lists the invitation links you've created or the specific users you've invited.
- Invited By: Shows the profile of the host or admin who generated the invitation.
- Status: Tells you at a glance whether a link is Pending, Accepted, Active, or Expired.
- Actions: Delete any specific invitation from the list to keep things tidy.
- Filter: Use the dropdown in the top-right to filter the list by status, so you can quickly find expired or pending links.
Step 3: Create a New Invitation Link
Generating a shareable link is the easiest way to invite a group of people at once.
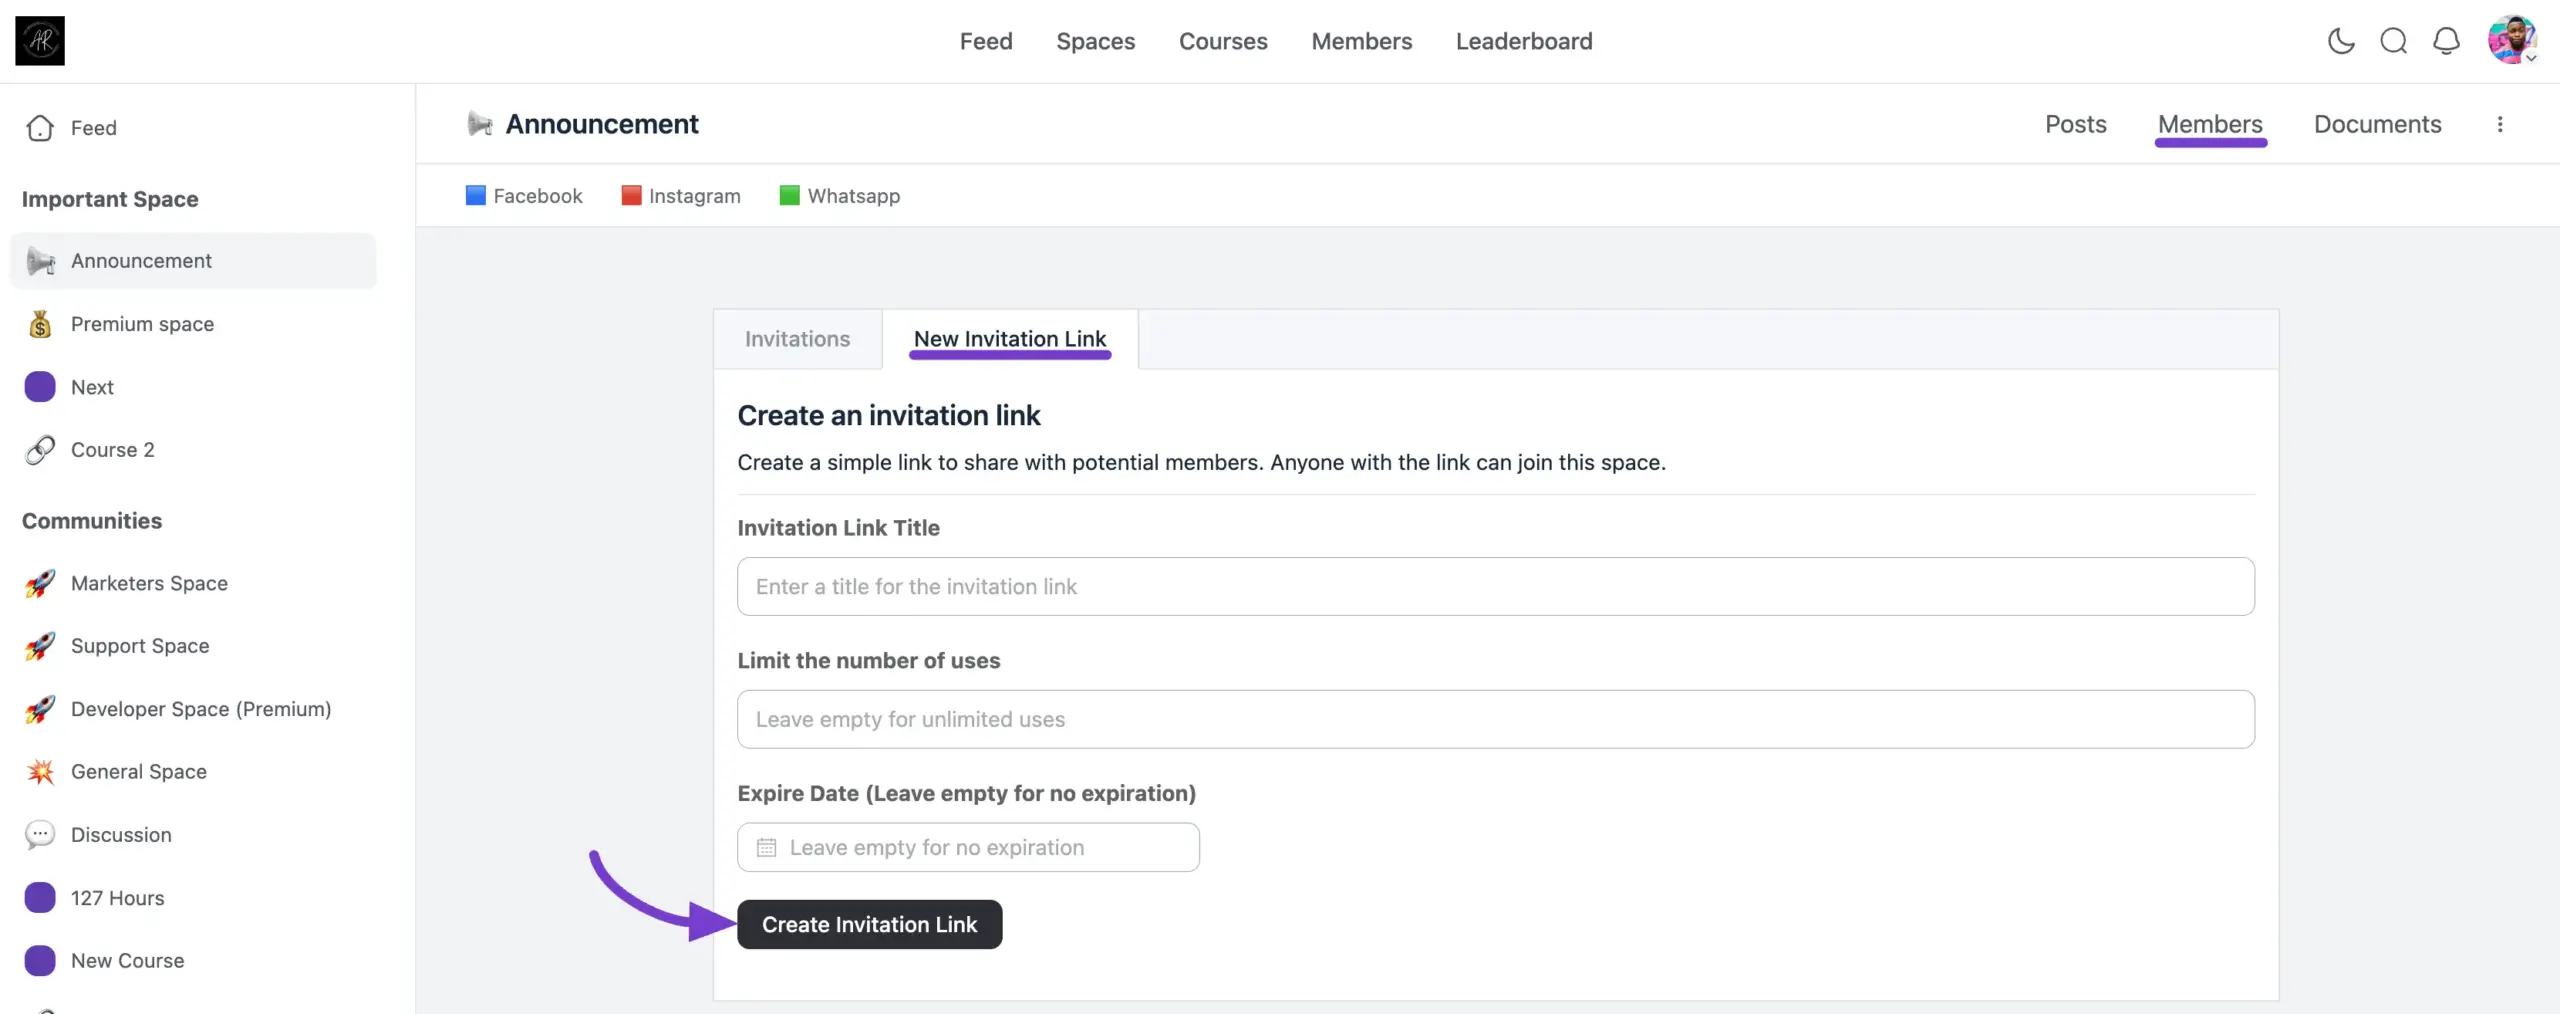
- From the Invitations dashboard, click the New Invitation Link tab.
- Invitation Link Title: Give your link a clear name (e.g., "Spring 2026 VIP Invite") so you can track it later.
- Limit the number of uses: Enter a number to cap how many people can use this link, or leave it empty for unlimited uses.
- Expire Date: Click the calendar field to set a date for the link to stop working, or leave it empty to keep the link active permanently.
- Click the Create Invitation Link button.
Once the link is created, copy it and share it via email, social media, or direct message with the people you want to add.
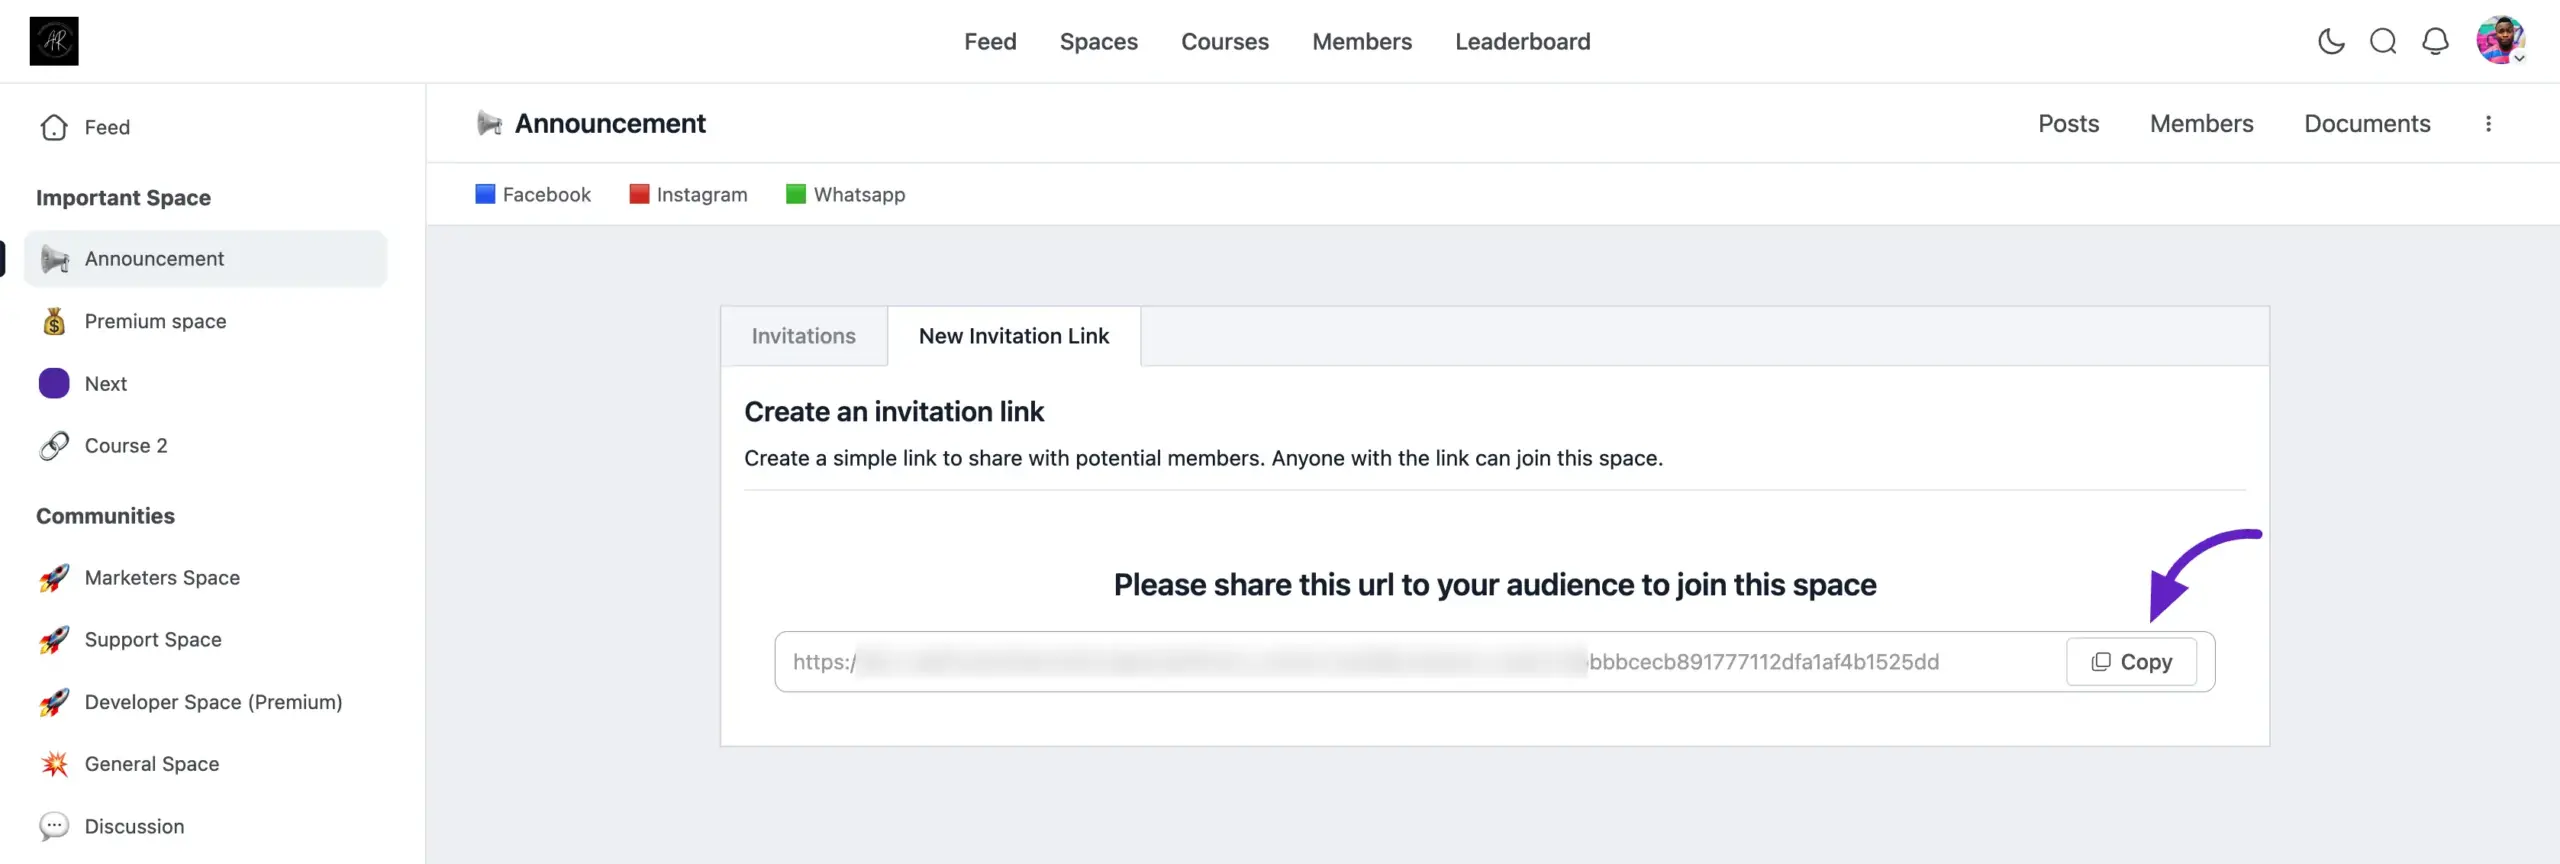
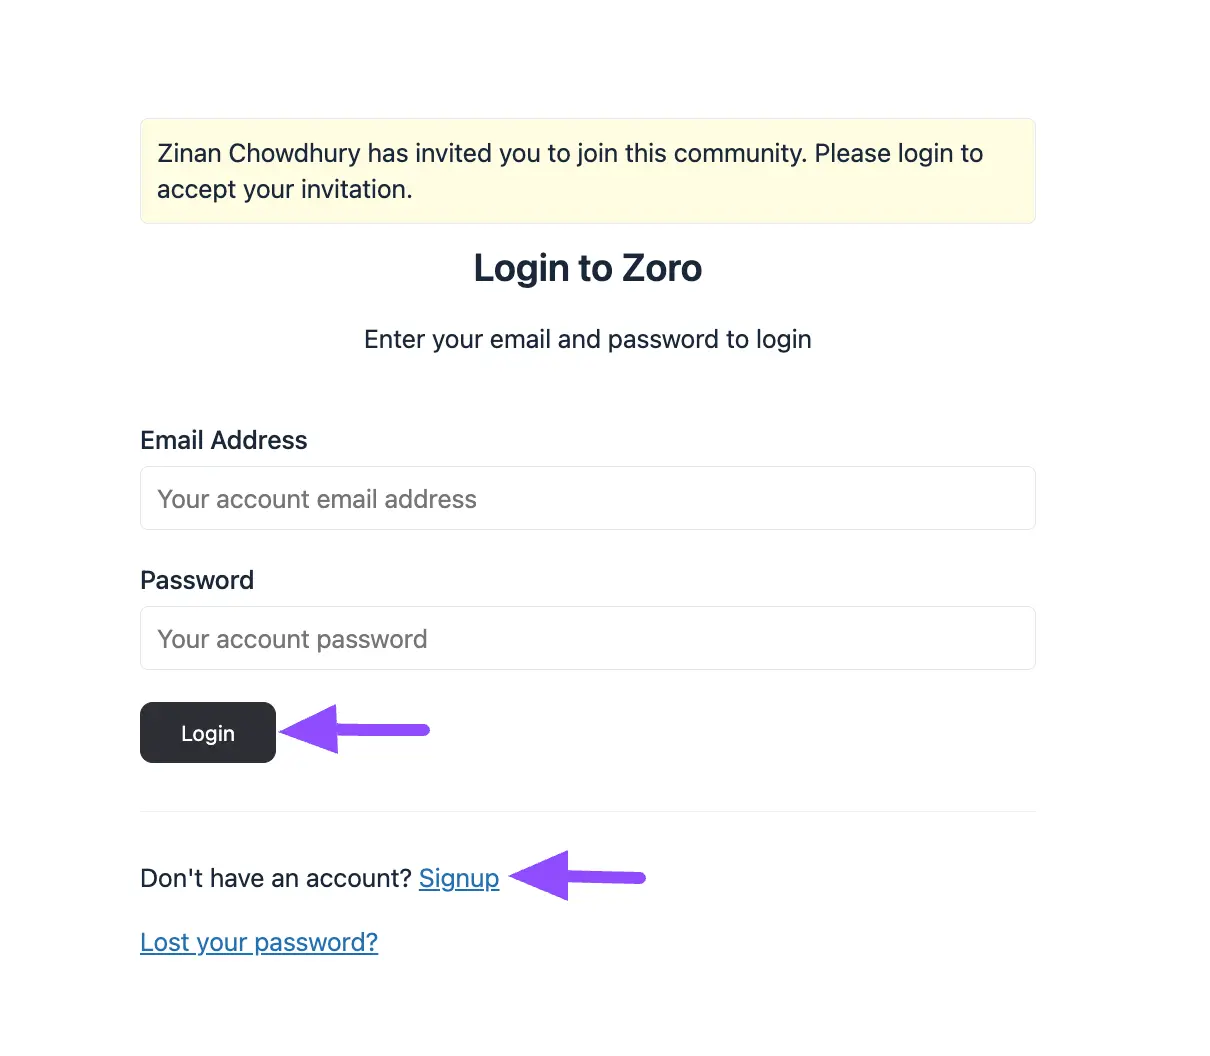
✨ Note: When someone clicks your invitation link, the system handles the rest. If they're already logged into your community, they're instantly added to the Space. If they're brand new, they're prompted with a friendly Login/Signup form to create their account before joining.