Appearance
Connecting with Pusher
Pusher is a powerful, cloud-based service that handles real-time data delivery. It's one of the real-time drivers that powers your community's group chat — connecting it lets your members enjoy a seamless, live conversation experience without ever refreshing their page.
Use Case: You want reliable real-time chat but would rather not run your own socket server, so you connect Pusher's managed cloud service to handle message delivery for you.
This guide walks you through setting up a Pusher account, creating your channel app, and securely connecting it to FluentCommunity.
How to Connect Pusher
Step 1: Create a Channel App in Pusher
To get the connection keys, first go to the Channels app within your Pusher dashboard.
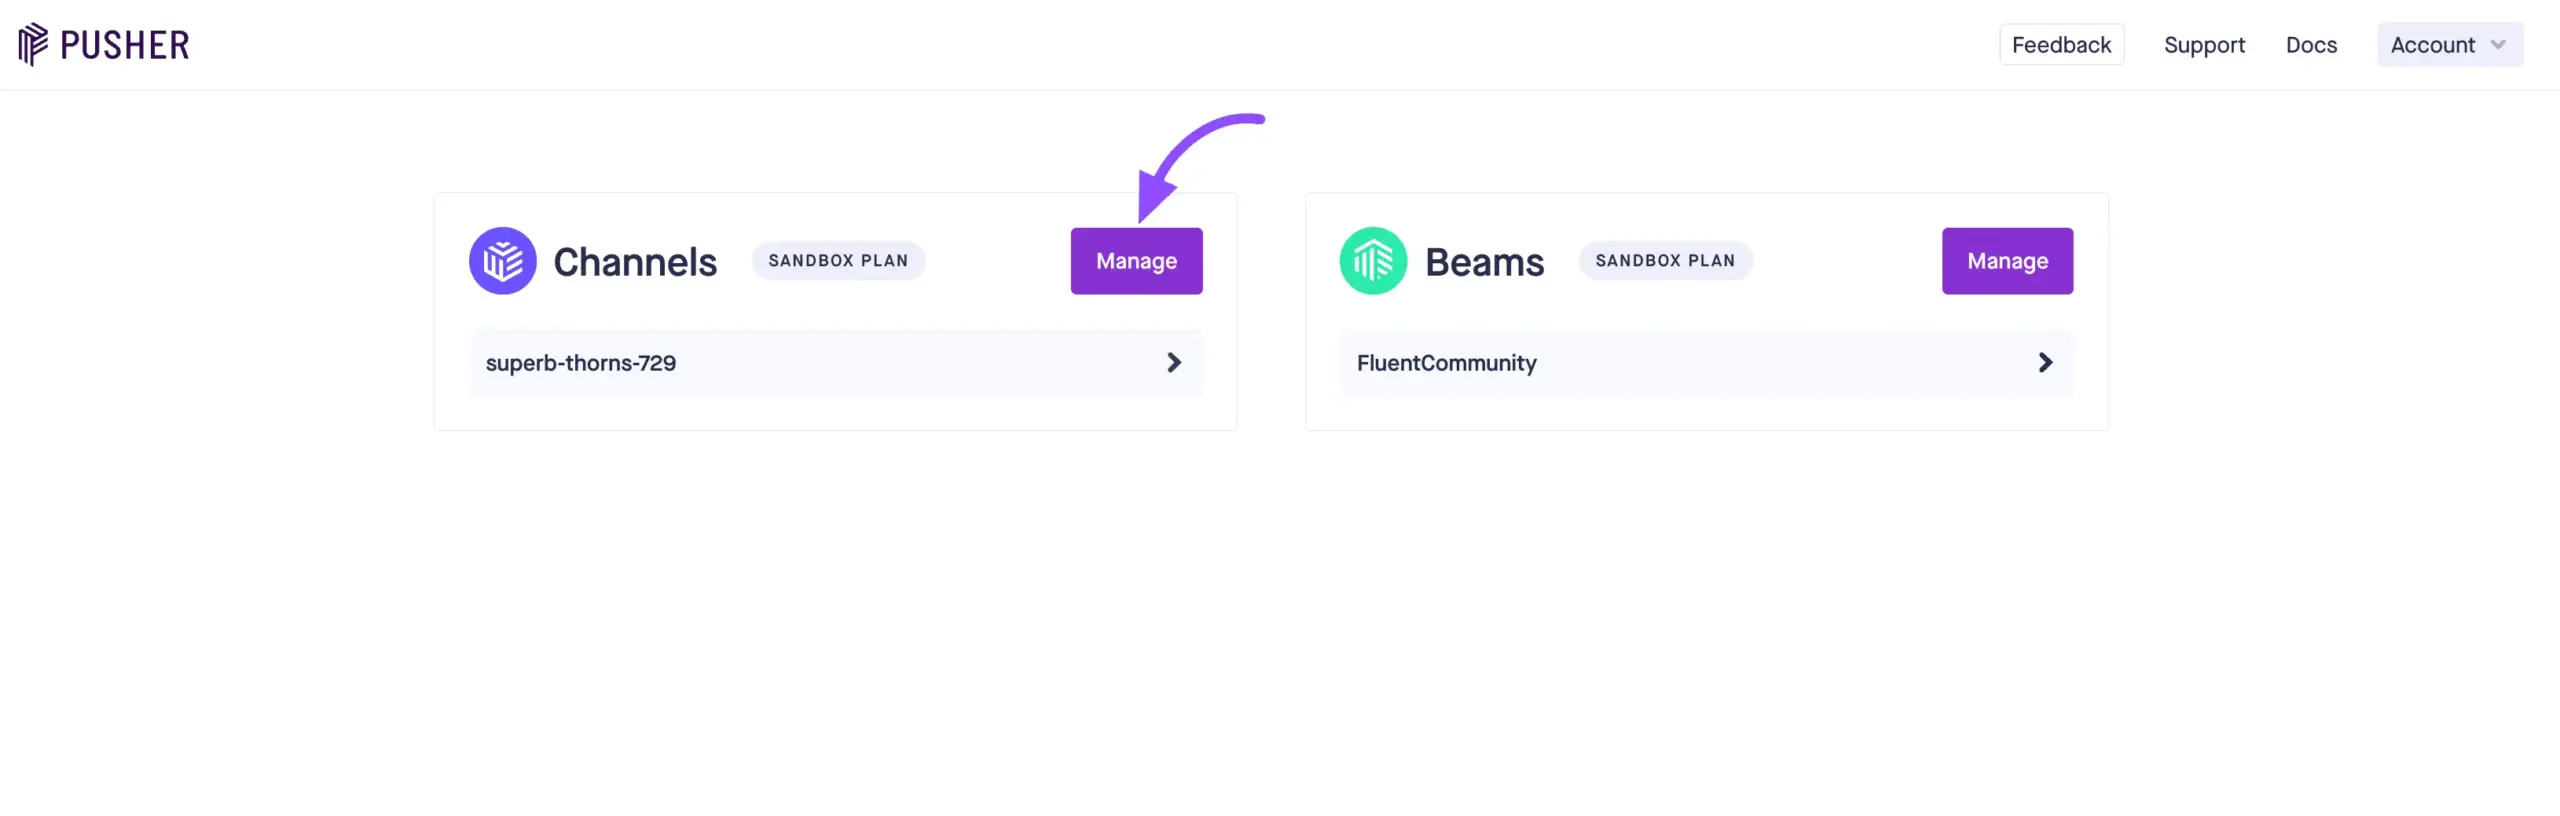
- Sign in to your Pusher account dashboard.
- Select the Channels product from your main dashboard and click Manage.
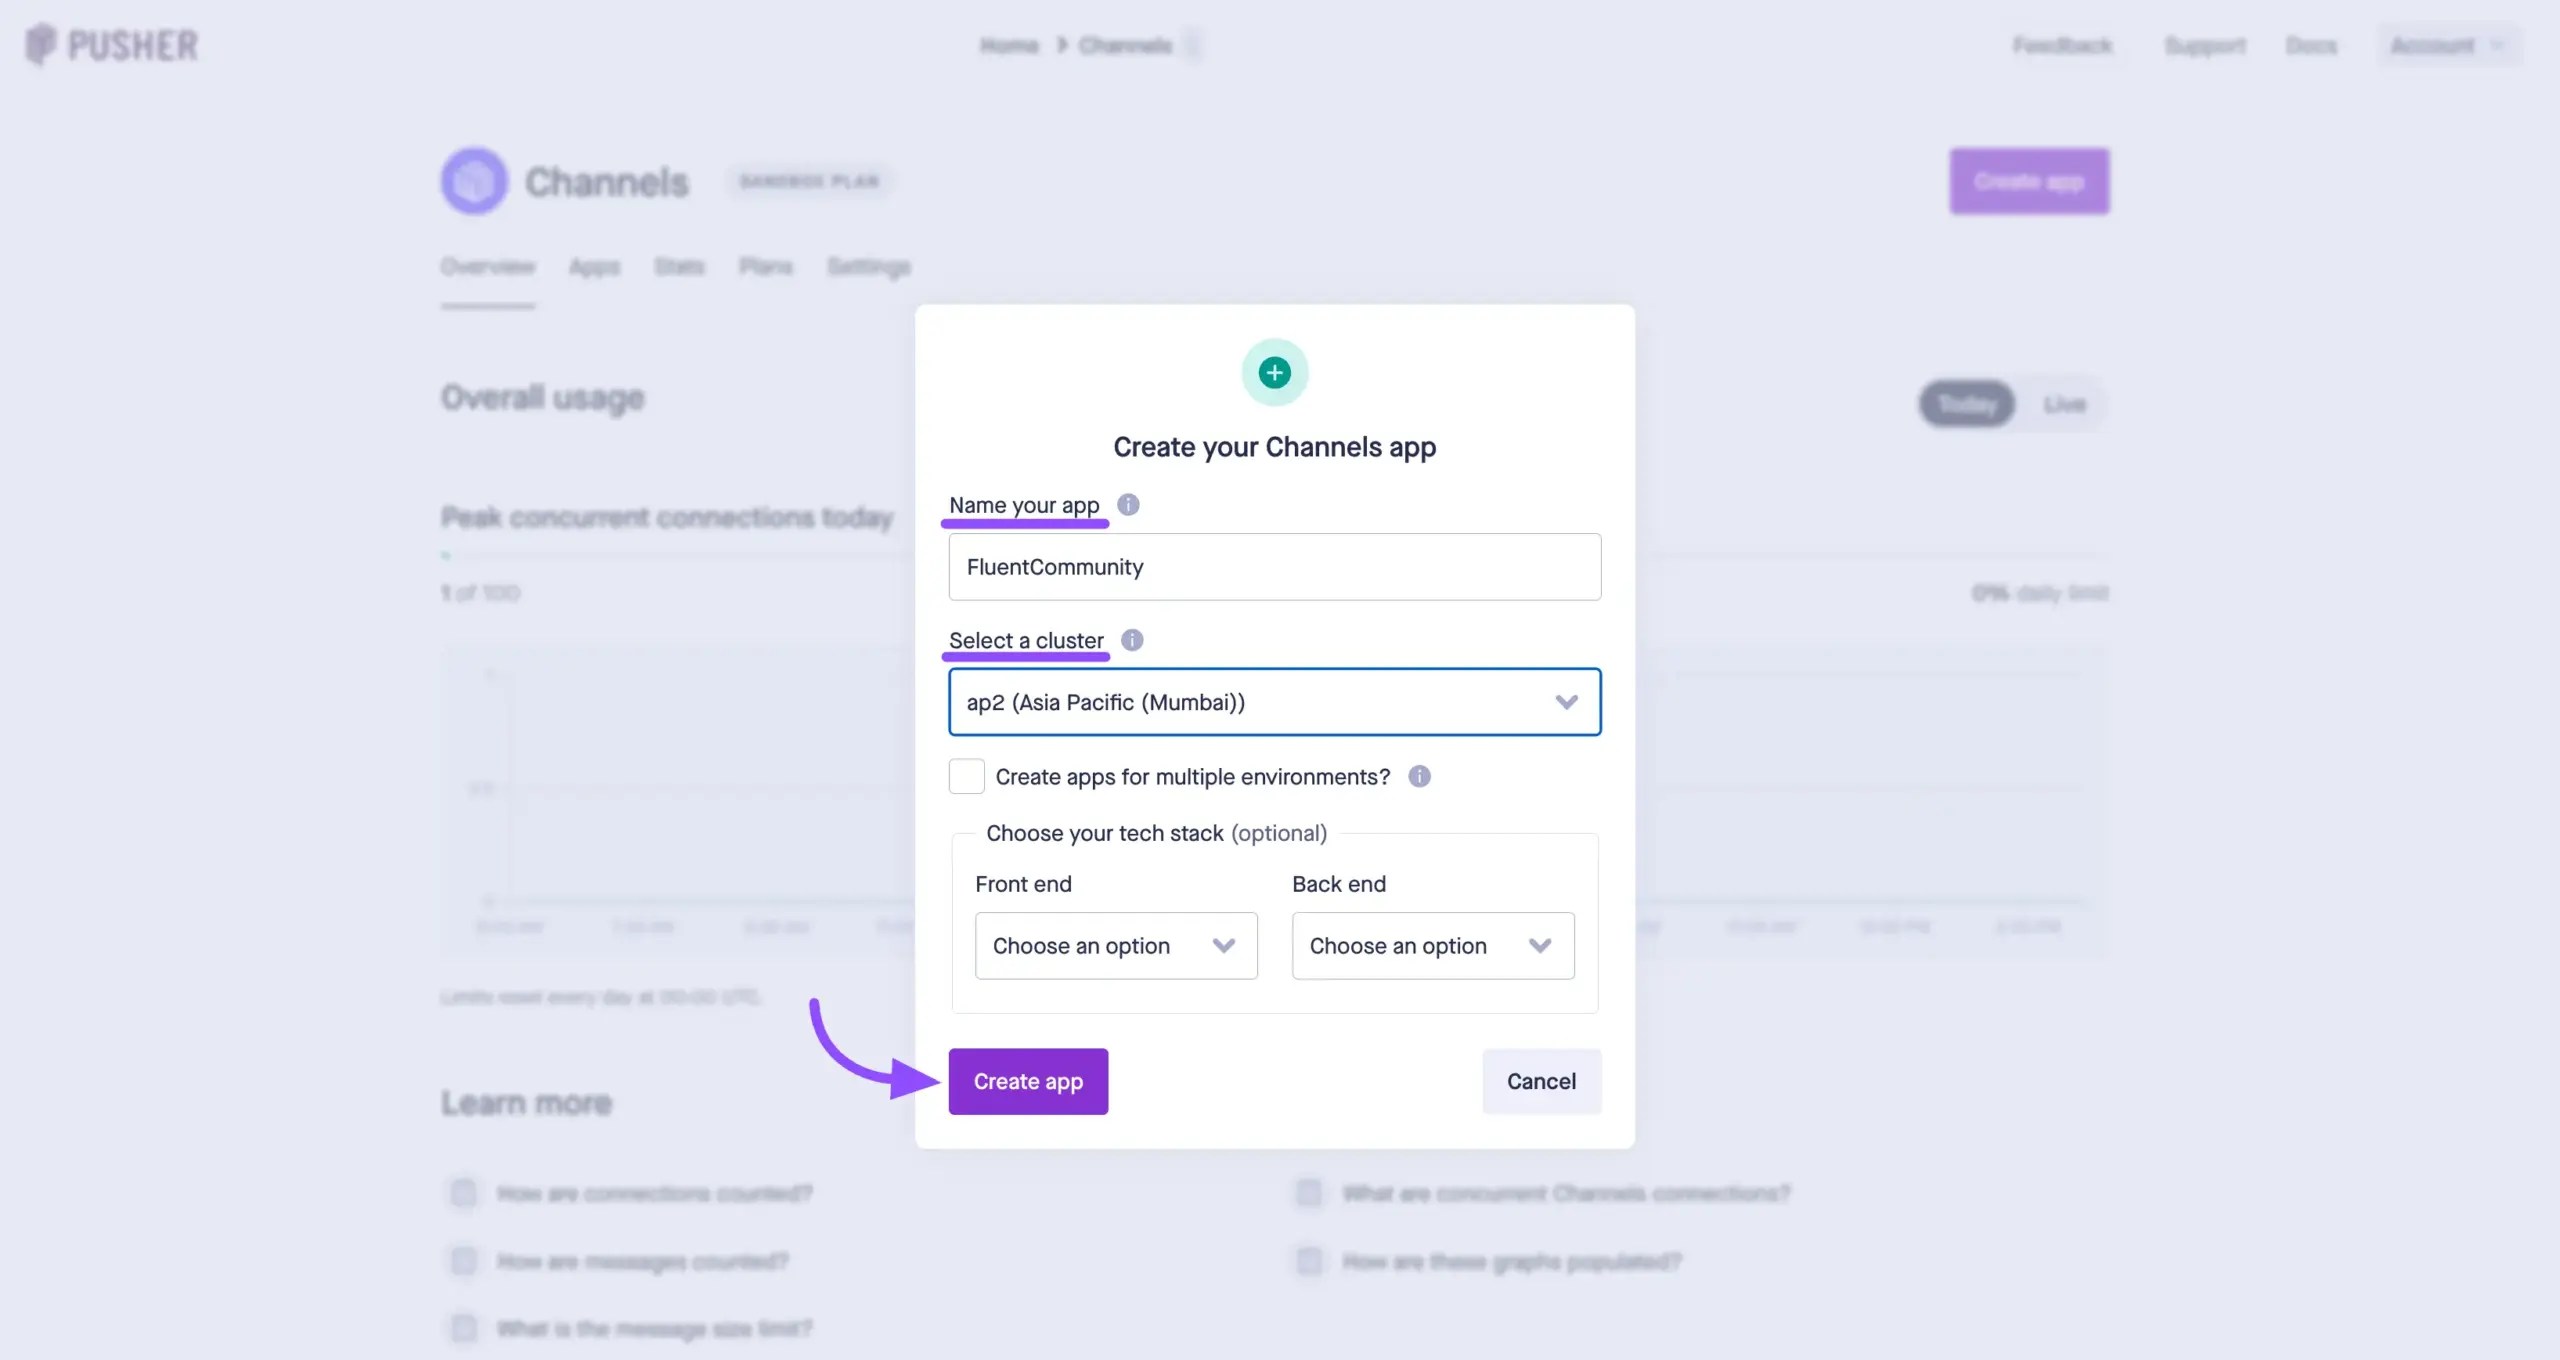
Now create and configure your app:
- Click the Create app button.
- Name your app: Give it a recognizable name, such as "FluentCommunity Chat".
- Select a Cluster: Choose the cluster (server location) closest to where your website is hosted for the fastest response times.
- Click the Create app button to generate your new connection.
Step 2: Collect Your Credentials
Once your app is created, Pusher generates a set of unique security keys. You'll need these to authorize the connection from your WordPress site.
- In your new Pusher app dashboard, click the App Keys tab in the left-hand menu.
- Copy and safely store the following four items: app_id, key, secret, and cluster.
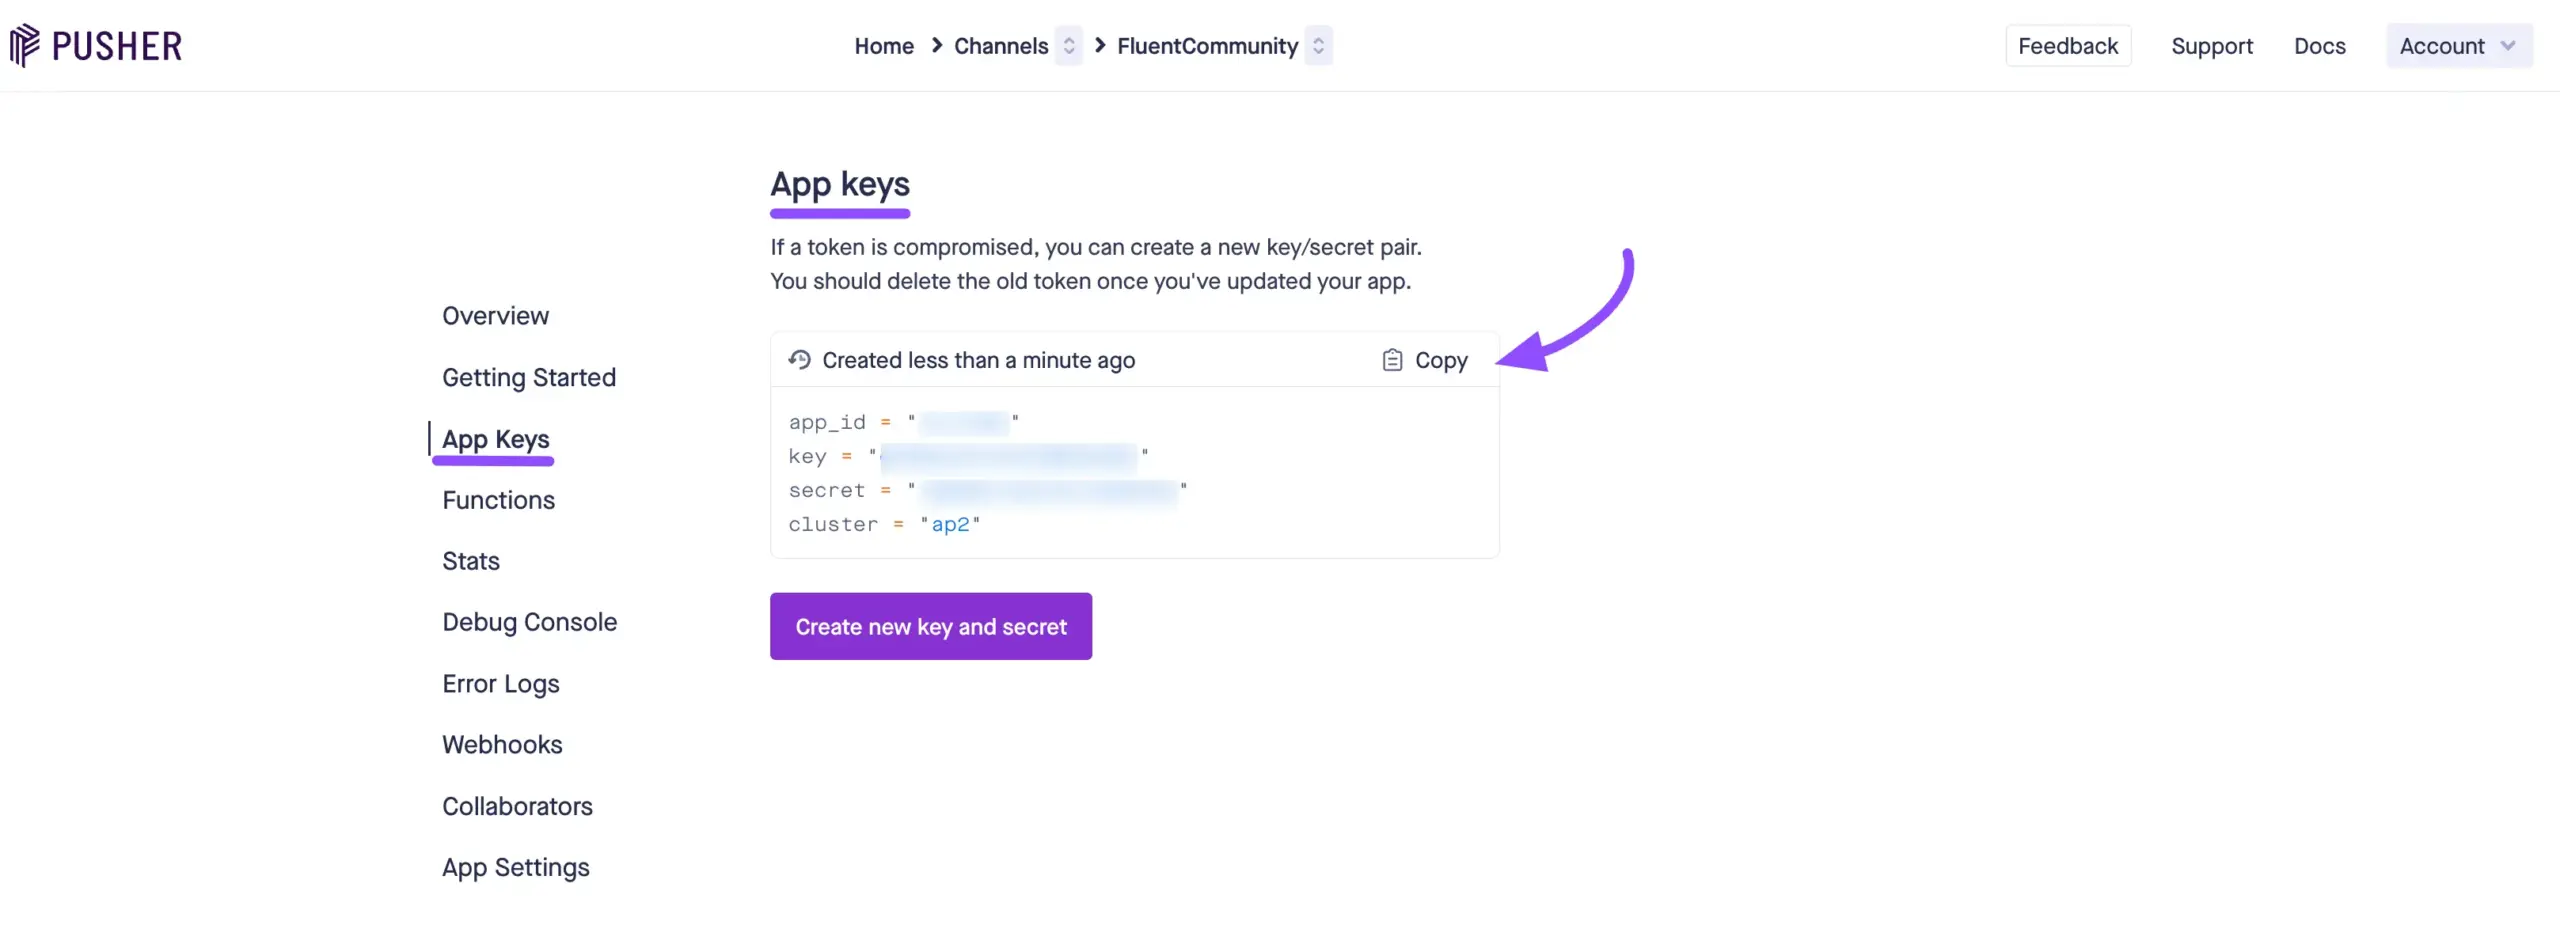
✨ Note: Keep these keys strictly confidential. They're the secure passwords that let your website push data through your Pusher account.
Step 3: Connect Pusher to FluentCommunity
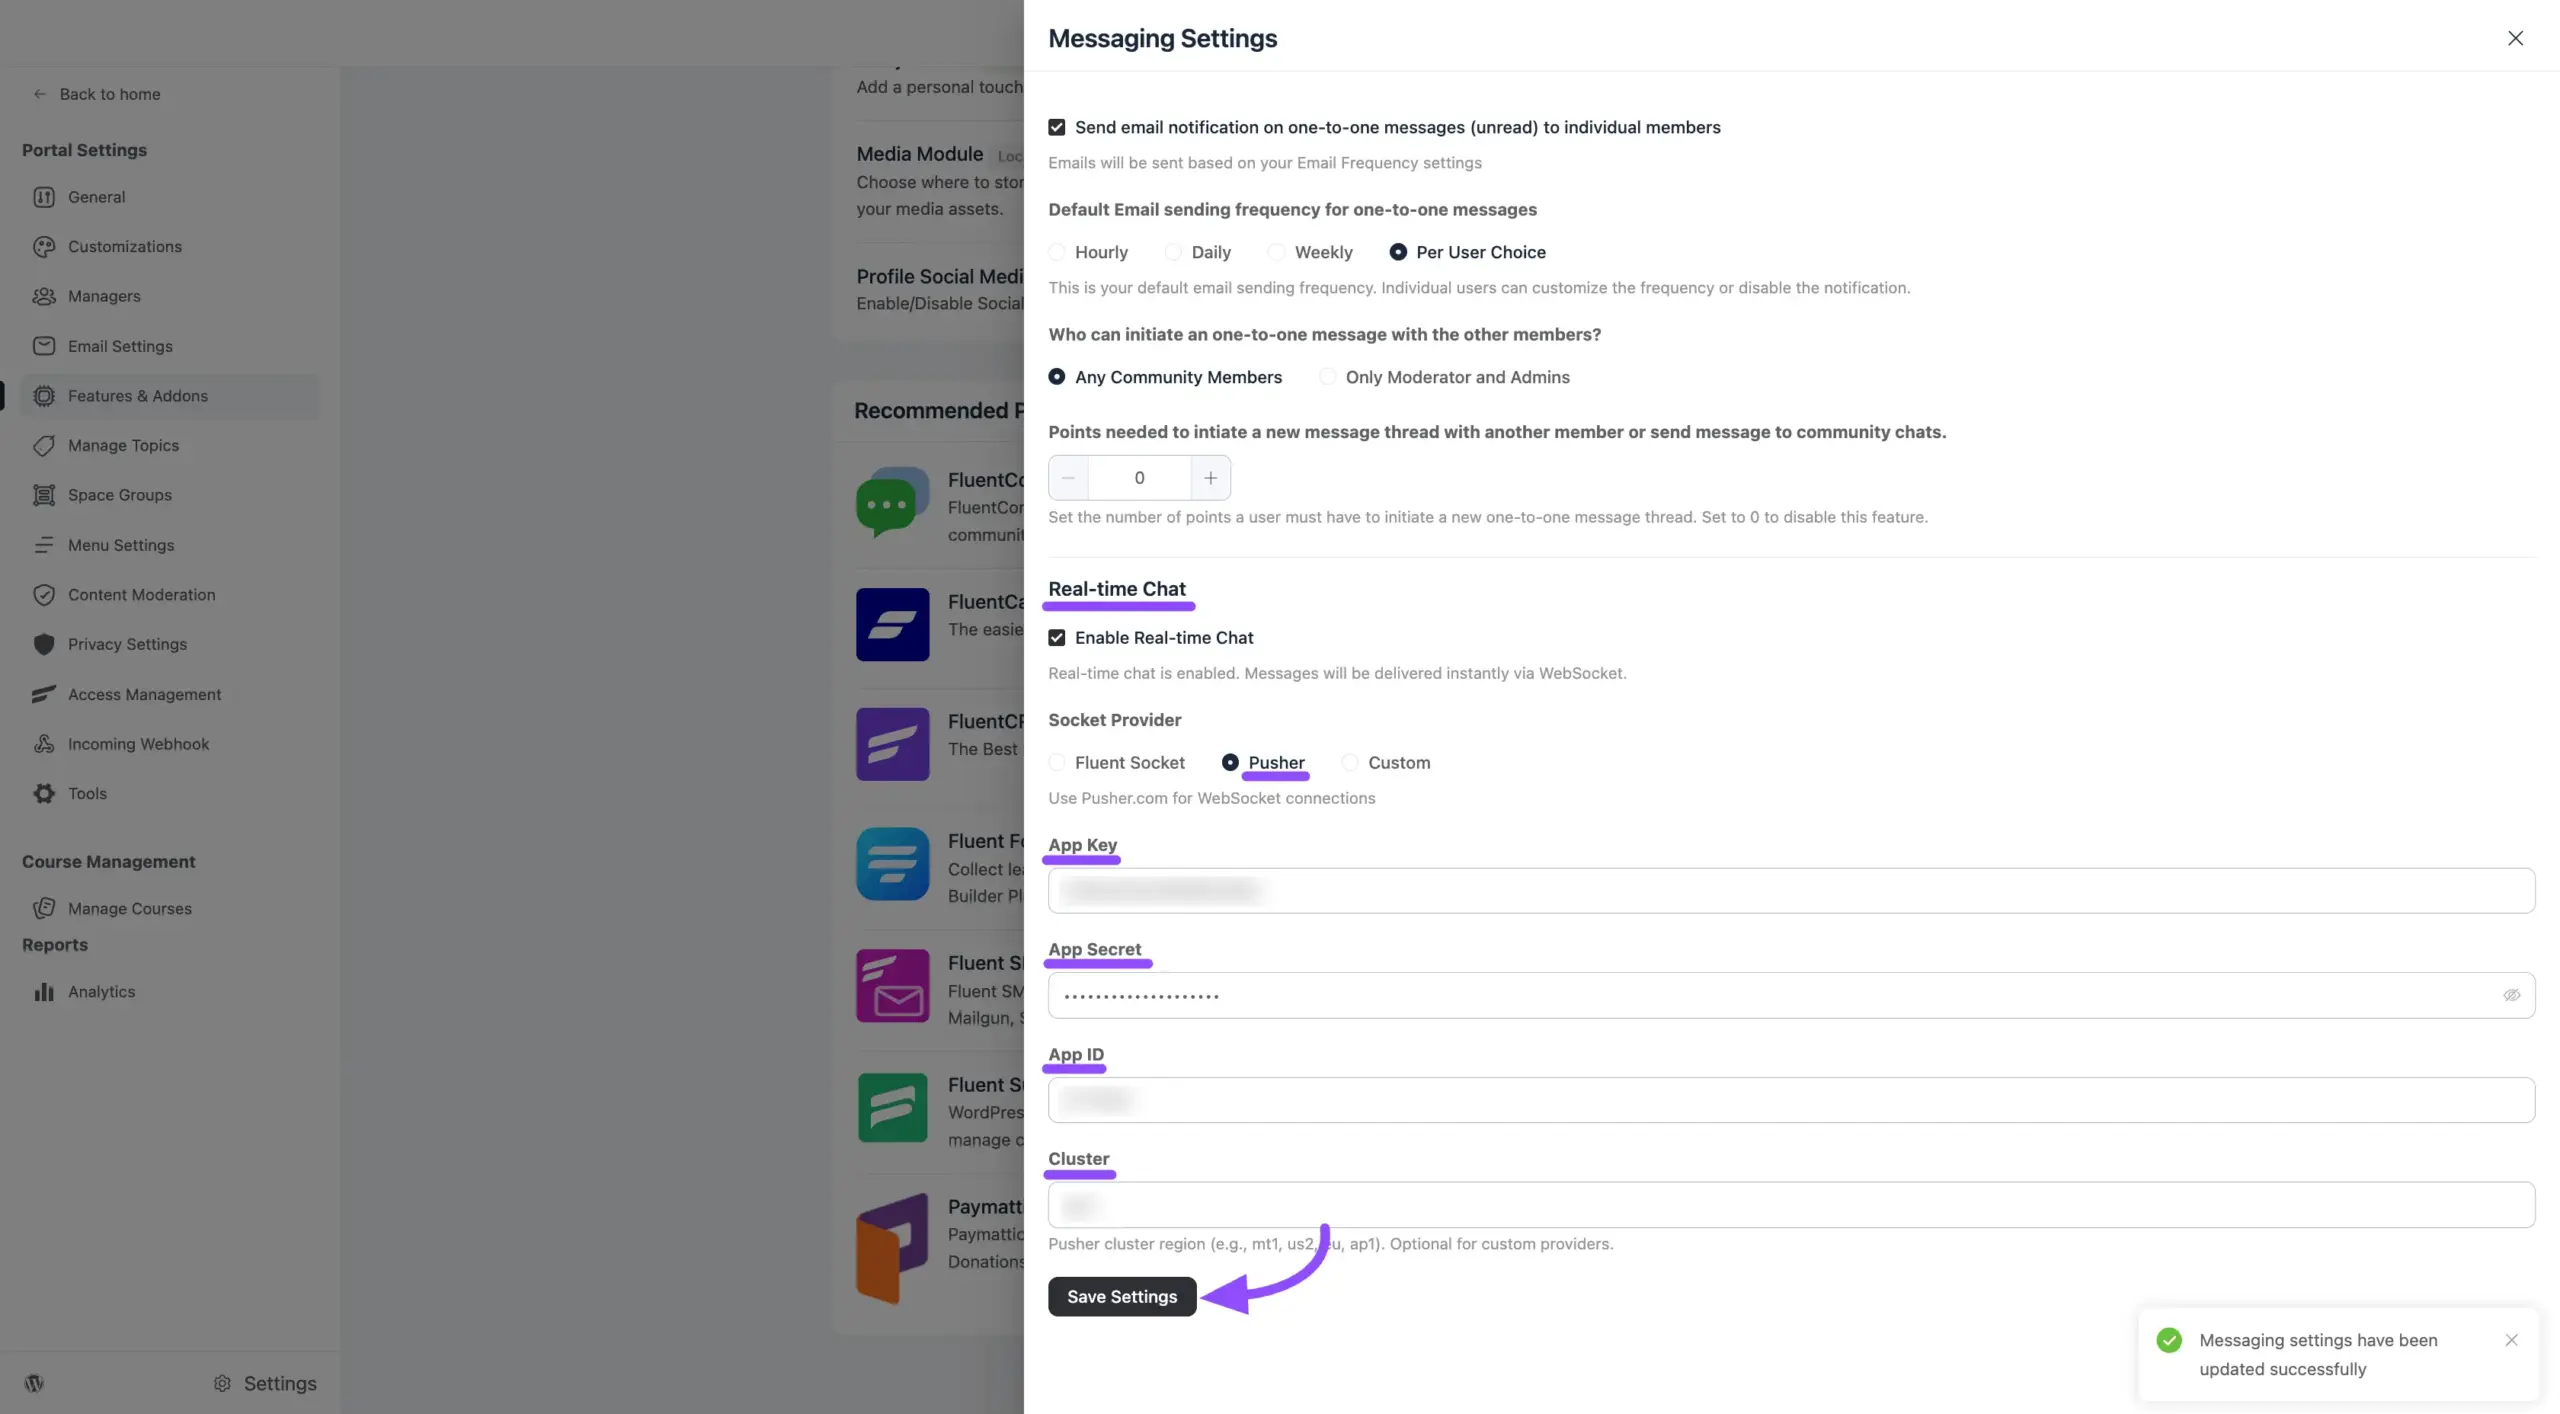
Now plug your Pusher credentials into your community settings to bring your chat to life.
- Go to your WordPress dashboard and navigate to FluentCommunity > Settings.
- Click Features & Addons in the left sidebar, locate the Group Chat module, and click the Messaging Settings button.
- Find the Enable Real-Time Messaging toggle and switch it On.
- From the driver dropdown menu, select Pusher.
- Paste your App ID, App Key, App Secret, and Cluster into their matching fields.
- Click the Save Settings button at the bottom of the screen.