

Appearance
The Setup Wizard
After activating FluentCommunity for the first time, you will be automatically guided through our quick Setup Wizard. This simple 3-step process is the easiest and fastest way to configure the essential settings for your new community.
Don't worry, you can change any of these settings later!
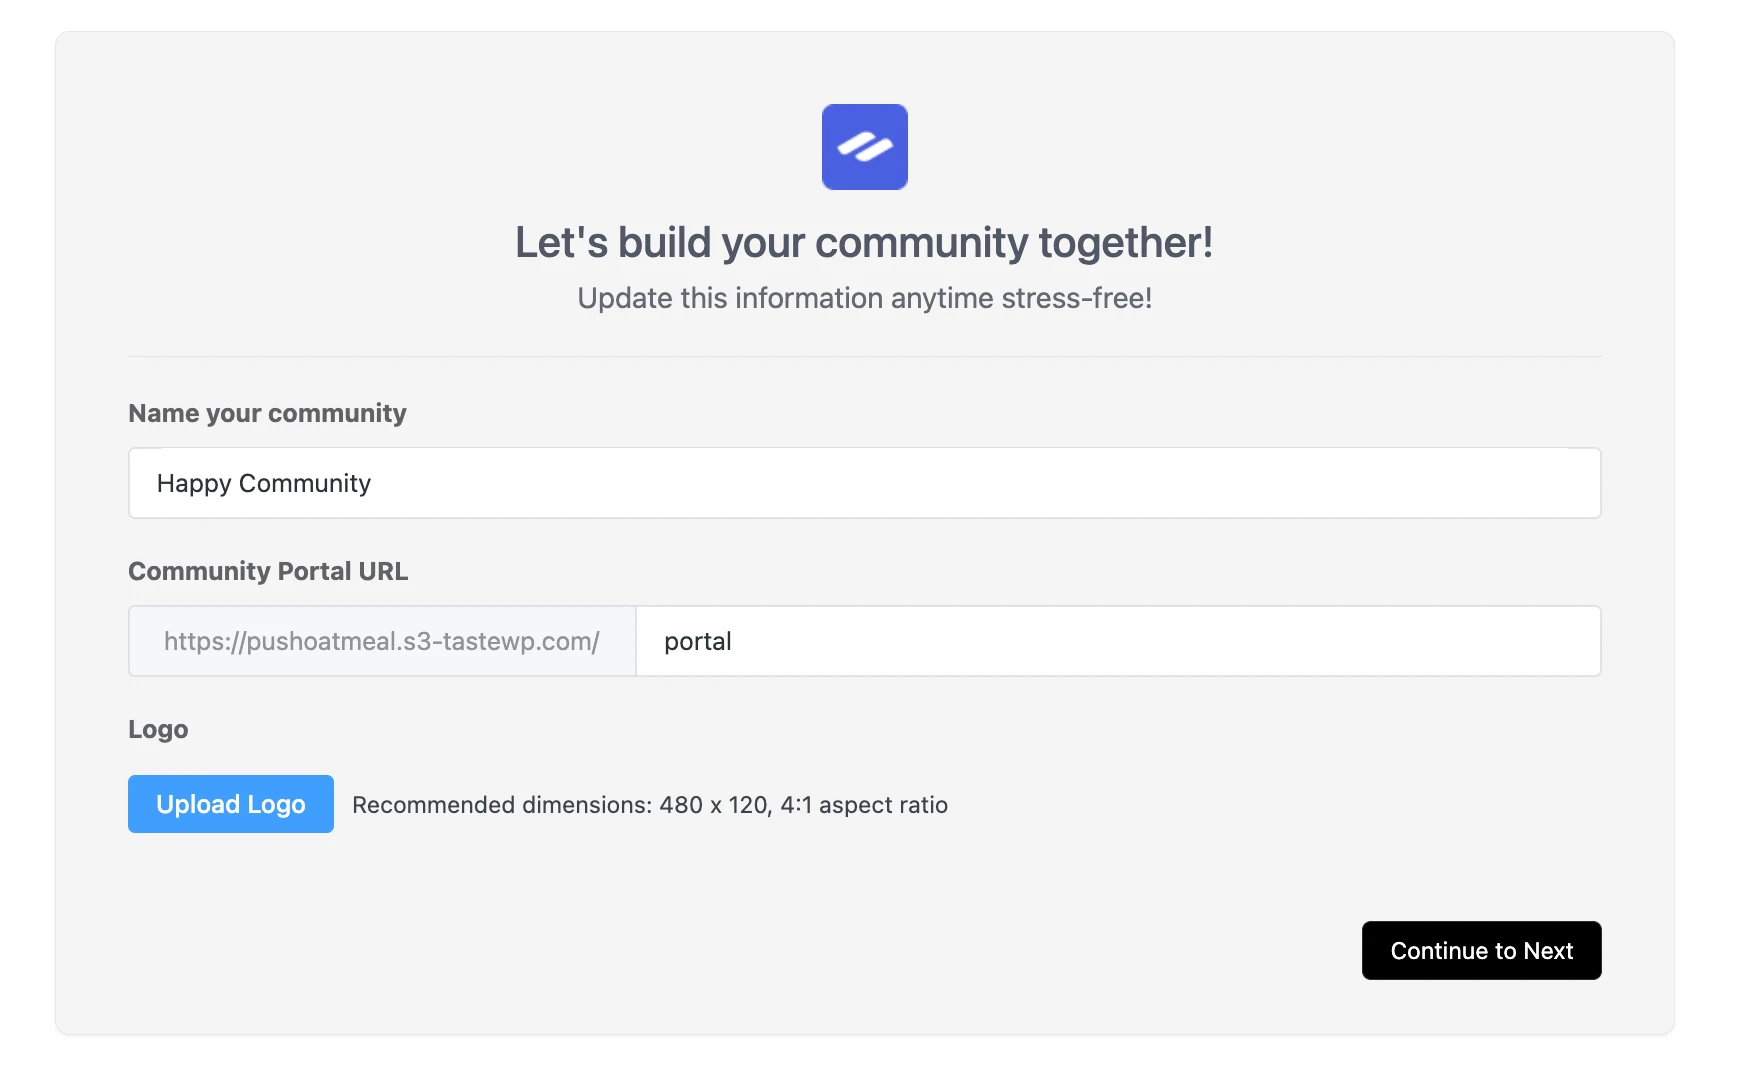
Step 1: Let's Build Your Community
The first step is to give your community its unique identity and brand.
- Name your community: Enter the name for your community (e.g., "Happy Community," "My Product Users"). This will be displayed throughout your community portal.
- Community Portal URL: This is the unique web address (or "slug") for your community. By default, it is set to
portal, making your community page accessible atyoursite.com/portal. You can change this to anything you like, such asmembersorhub. - Logo: Click Upload Logo to add your brand's logo. This will appear at the top of your community portal. For best results, we recommend using an image with a 4:1 aspect ratio, such as 480px wide by 120px tall.
Click Continue to Next to proceed.
Step 2: Pick a FluentCommunity Template
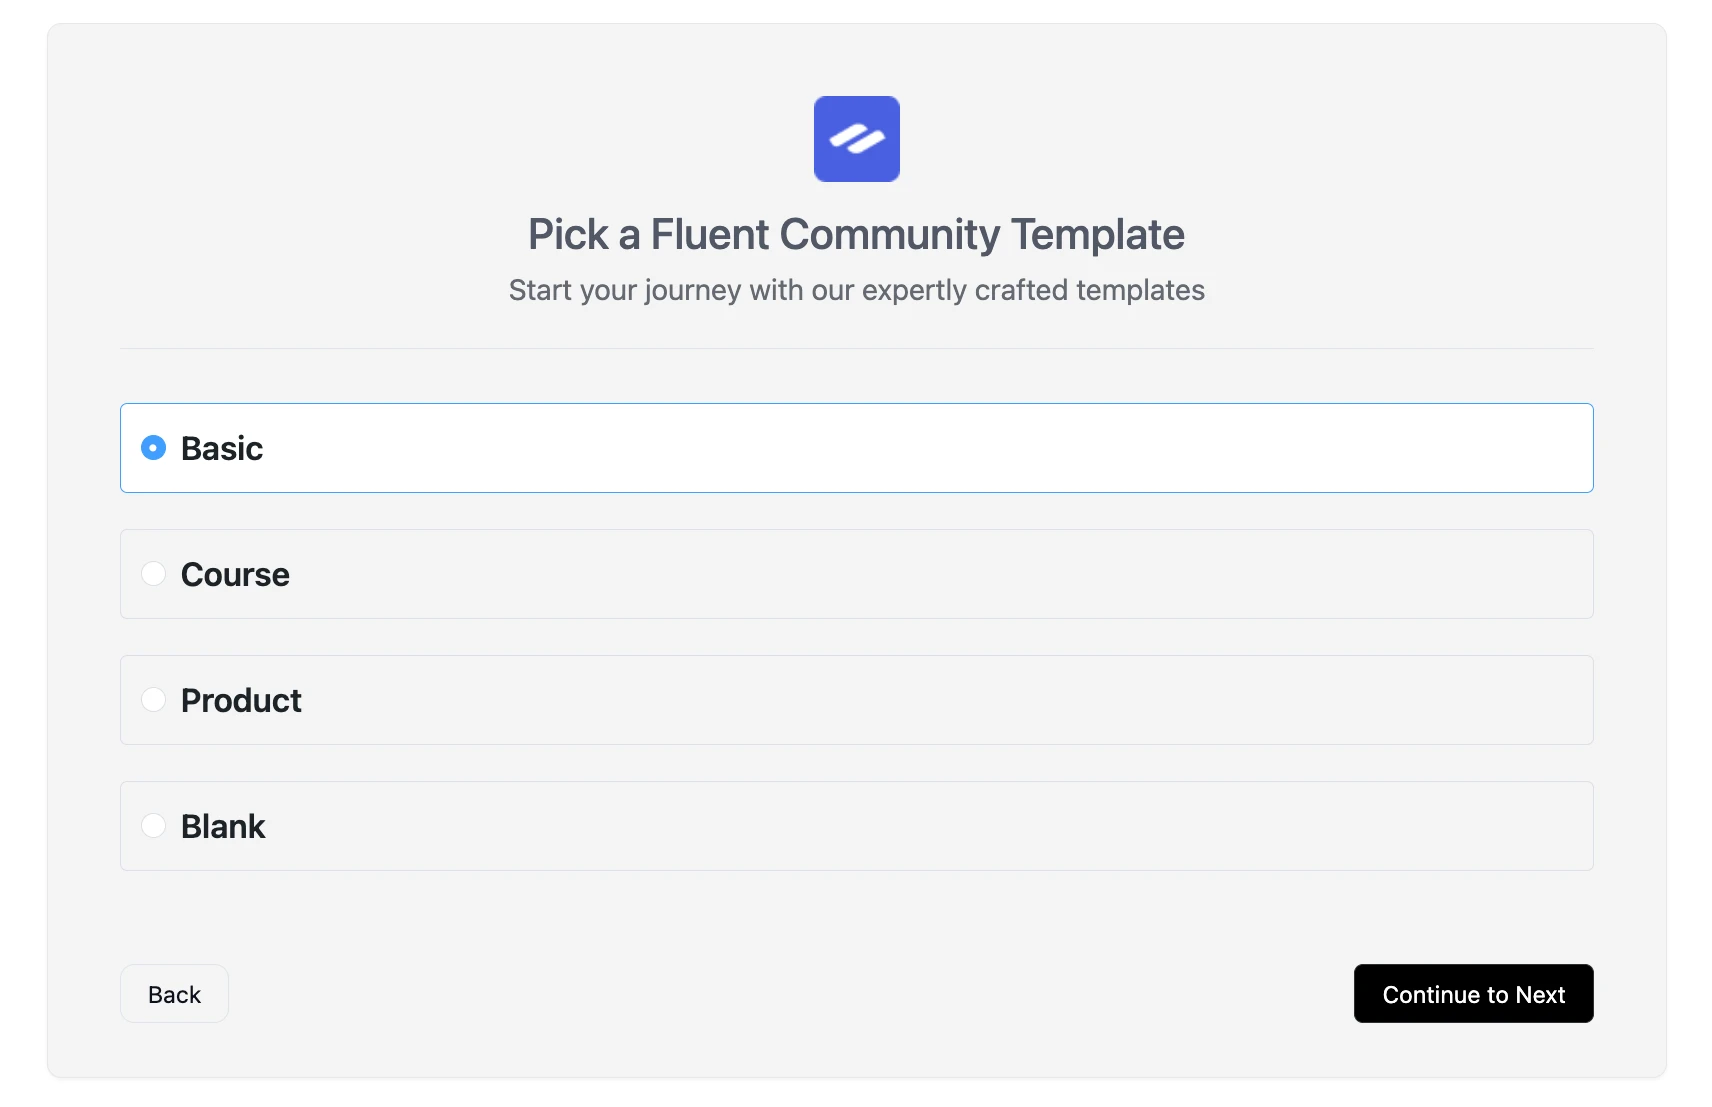
Next, you'll choose a template that best fits your community's goal. This helps start you off with the right layout and features.
- Basic: This is a general-purpose template, perfect for most discussion-based communities.
- Course: Choose this if the primary goal of your community is to support your students and online courses.
- Product: This template is ideal for building a community around a product, which is great for customer feedback, support, and engagement.
- Blank: Select this if you're an advanced user and want to build your community from a completely clean slate.
Select your preferred template and click Continue to Next.
Step 3: Access & Features
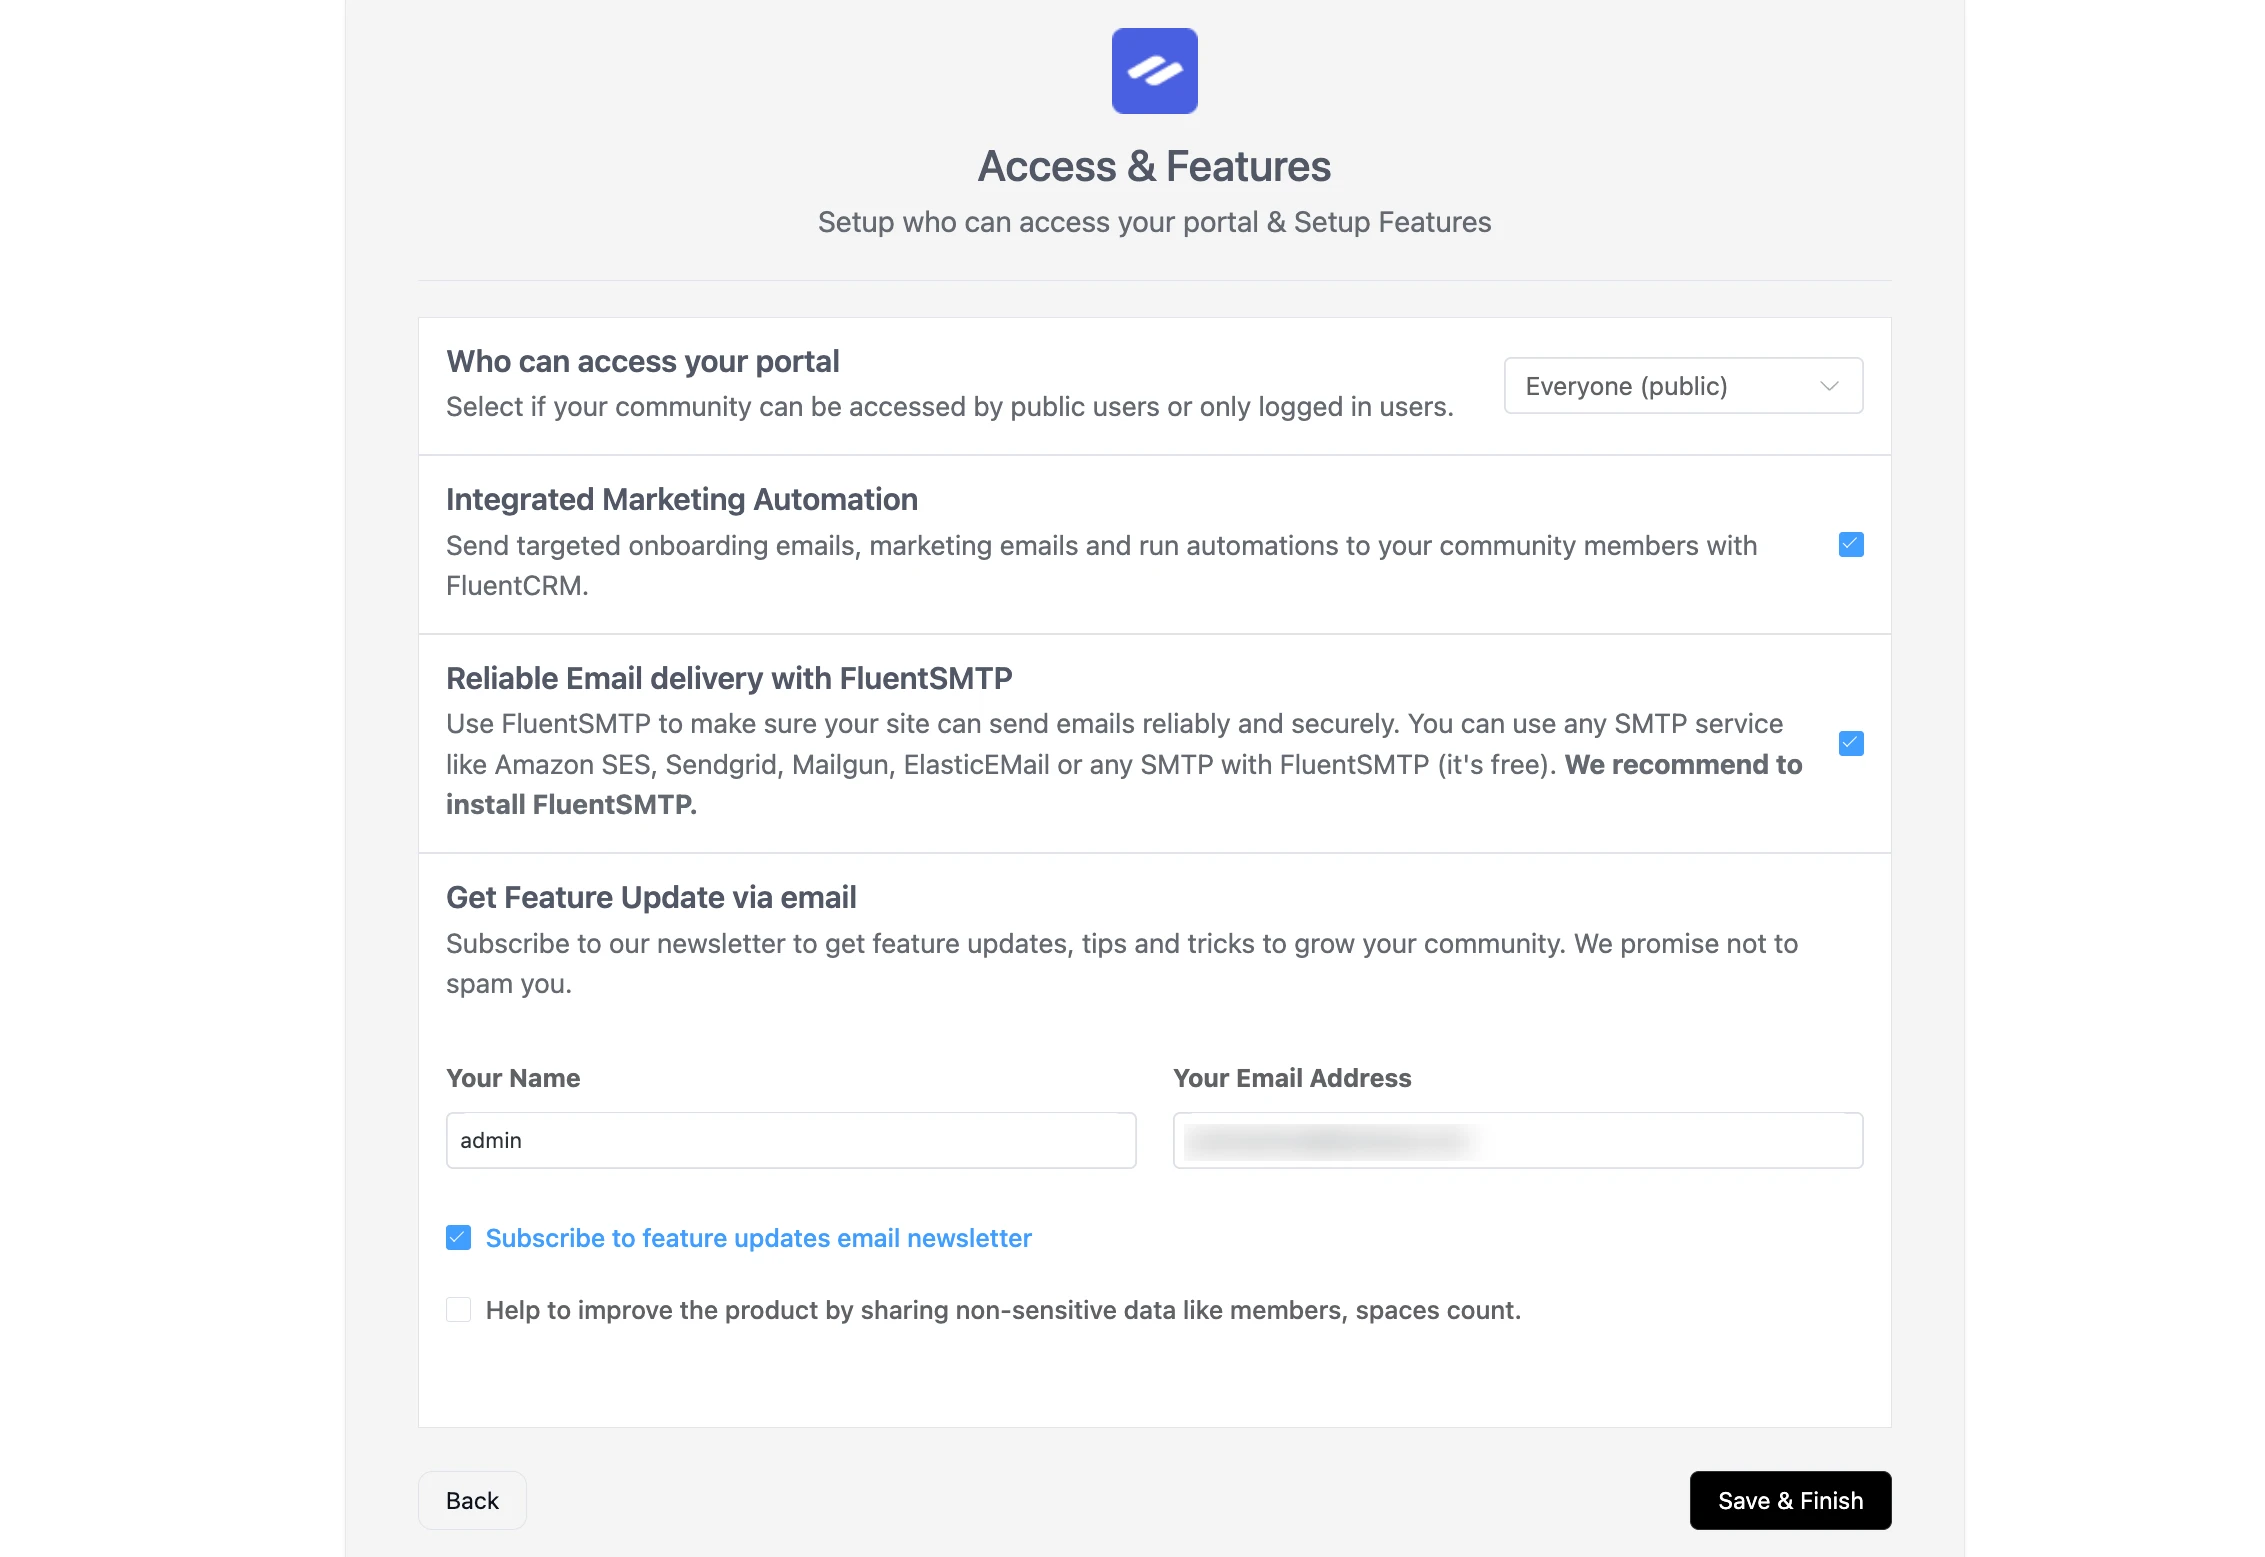
This final step helps you configure your community's privacy and enable powerful integrations.
- Who can access your portal: This is a crucial privacy setting. You can choose:
- Everyone (public): Anyone can visit your community and see public content.
- Logged-in users only: This makes your community private. Only registered members can access it.
- Integrated Marketing Automation: Check this box to enable a deep integration with FluentCRM. This allows you to run powerful automations, send onboarding emails, and segment your members.
- Reliable Email delivery with FluentSMTP: Check this box to ensure your community's emails (like notifications, password resets, etc.) are delivered reliably. We highly recommend using the free FluentSMTP plugin to connect your site to a dedicated email service.
- Get Feature Update via email: Enter your name and email to subscribe to our newsletter. We'll send you helpful tips, tricks, and news about new features to help you grow your community.
- Help improve the product...: Check this box to help us make FluentCommunity better by sharing non-sensitive usage data.
Click Save & Finish to complete the setup.
What's Next?
Congratulations, your community is now live!
You will be redirected to the main FluentCommunity Admin Dashboard. This is your new command center for managing your community.
From here, you can start exploring:
- Create your first Space to organize discussions.
- Explore Portal Settings to further customize your community's appearance.
- Start inviting your members.