Appearance
Course Privacy
Every course in FluentCommunity can be set to one of three privacy levels: Public, Private, or Secret. This lets you decide exactly who can find, view, and enroll in your course content.
Use Case: You want your free "Getting Started" course open to everyone, but keep your premium "Advanced Masterclass" locked behind a paywall with a custom sales page that non-members see before they enroll.
How to Set Course Privacy
Privacy is configured from inside the course editor, so you'll start by opening the course you want to update.
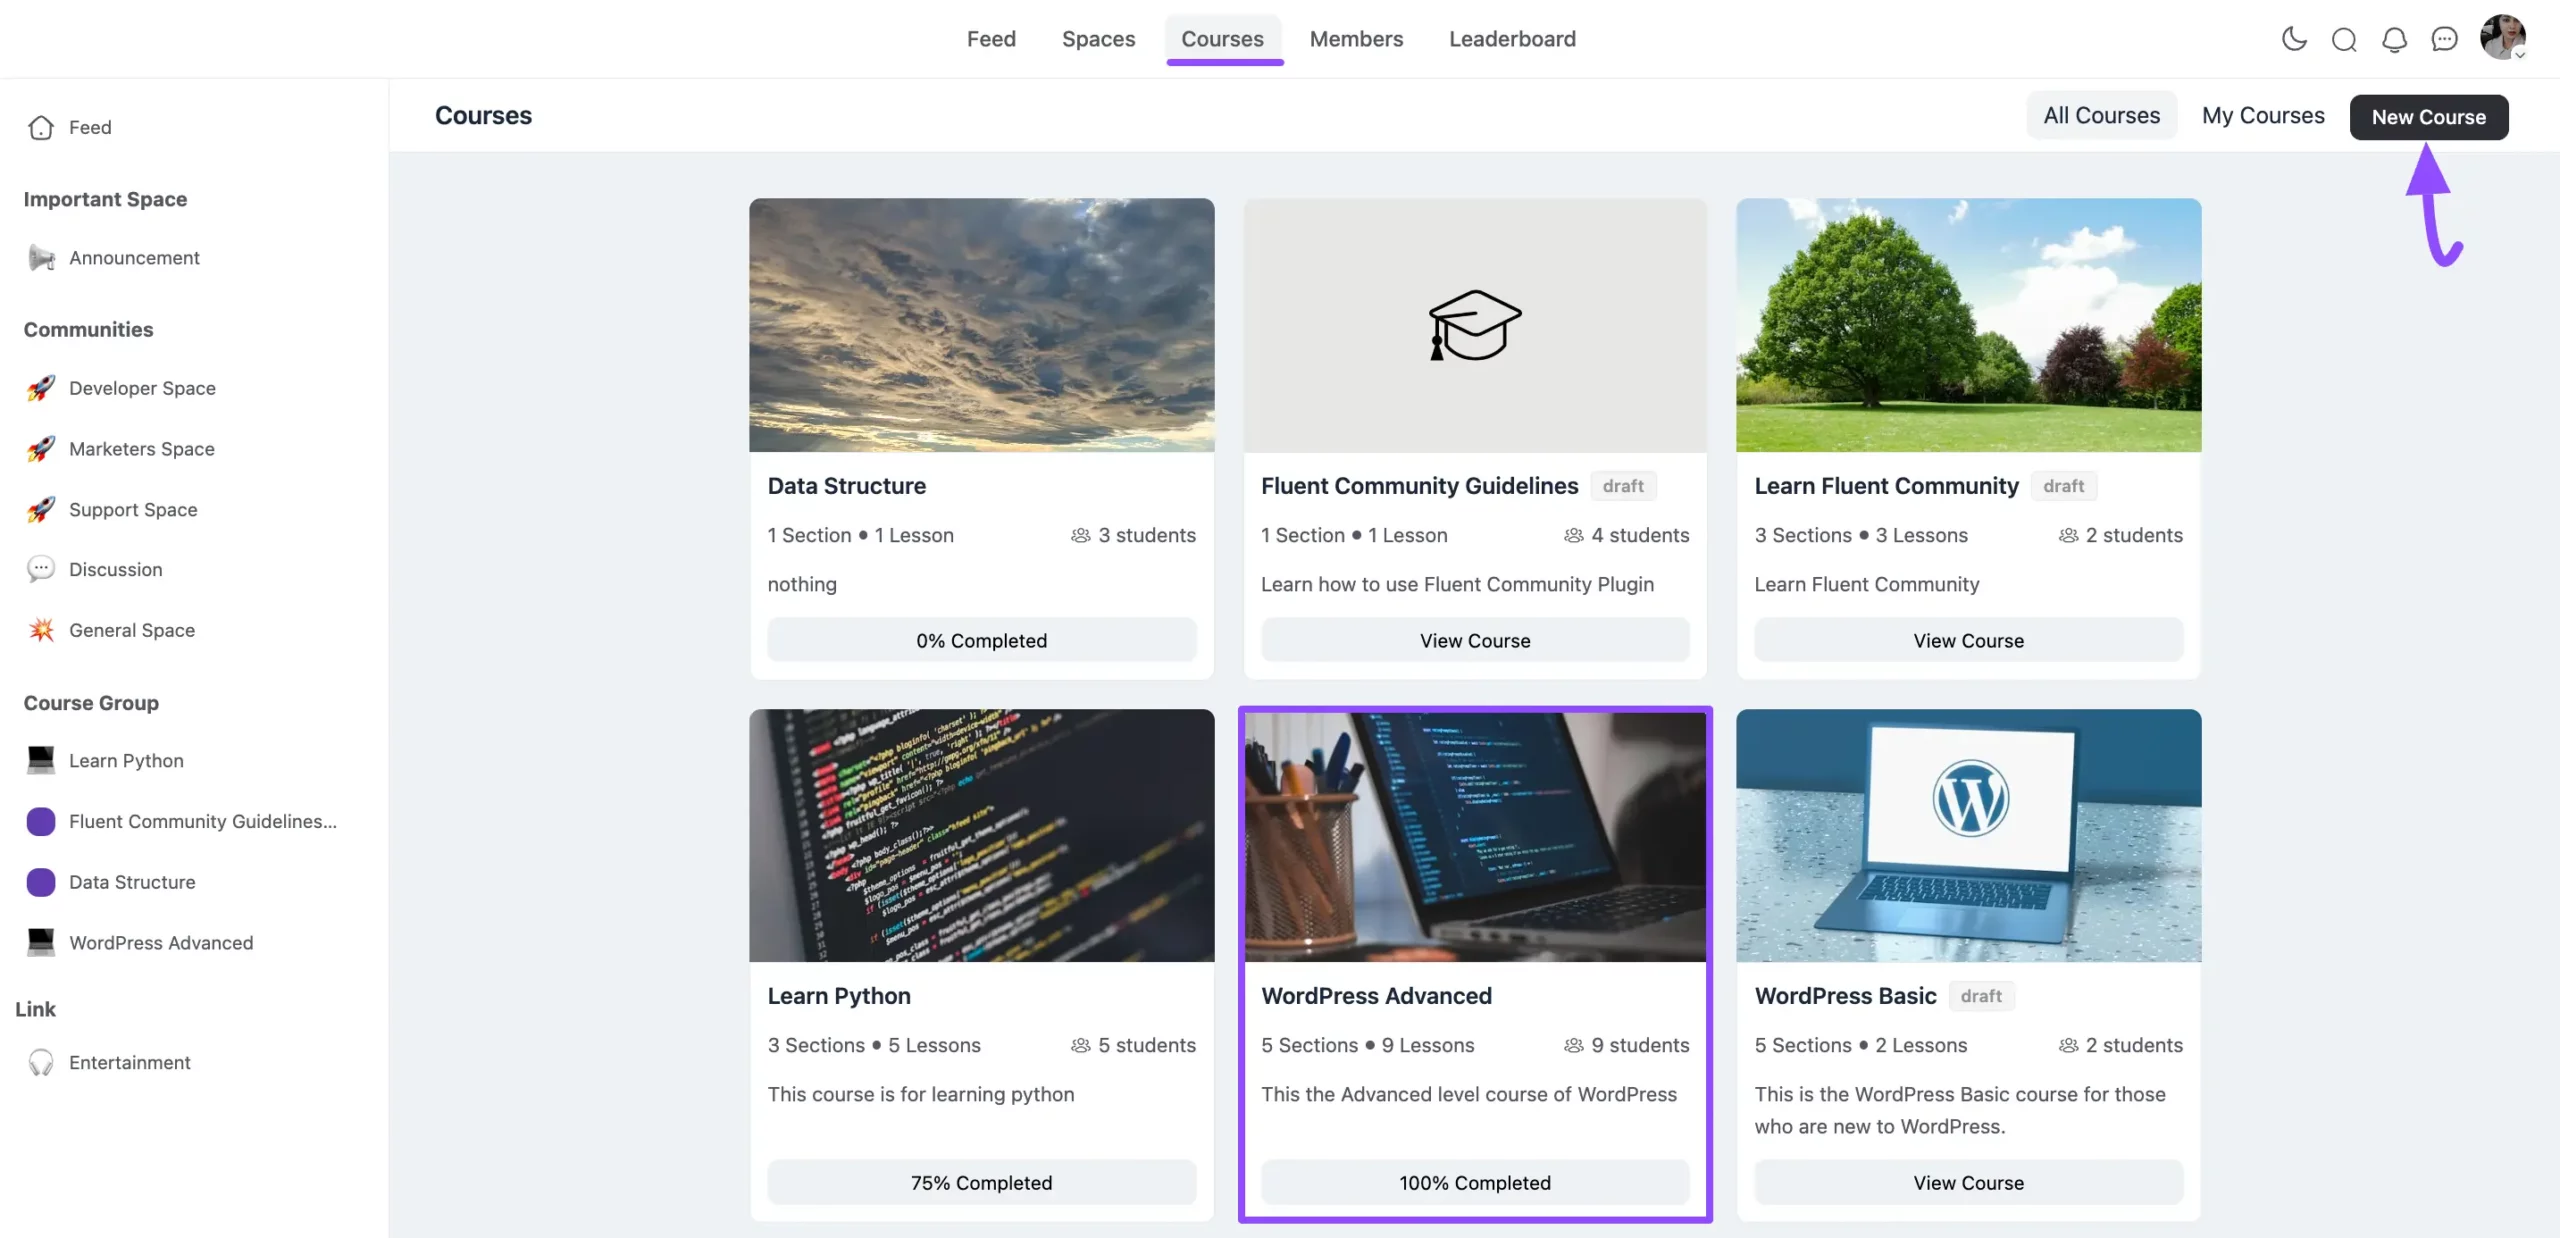
- From the FluentCommunity navbar, open the Courses section and click into the course you want to edit. If you haven't built one yet, you can click New Course in the top-right corner to start from scratch.
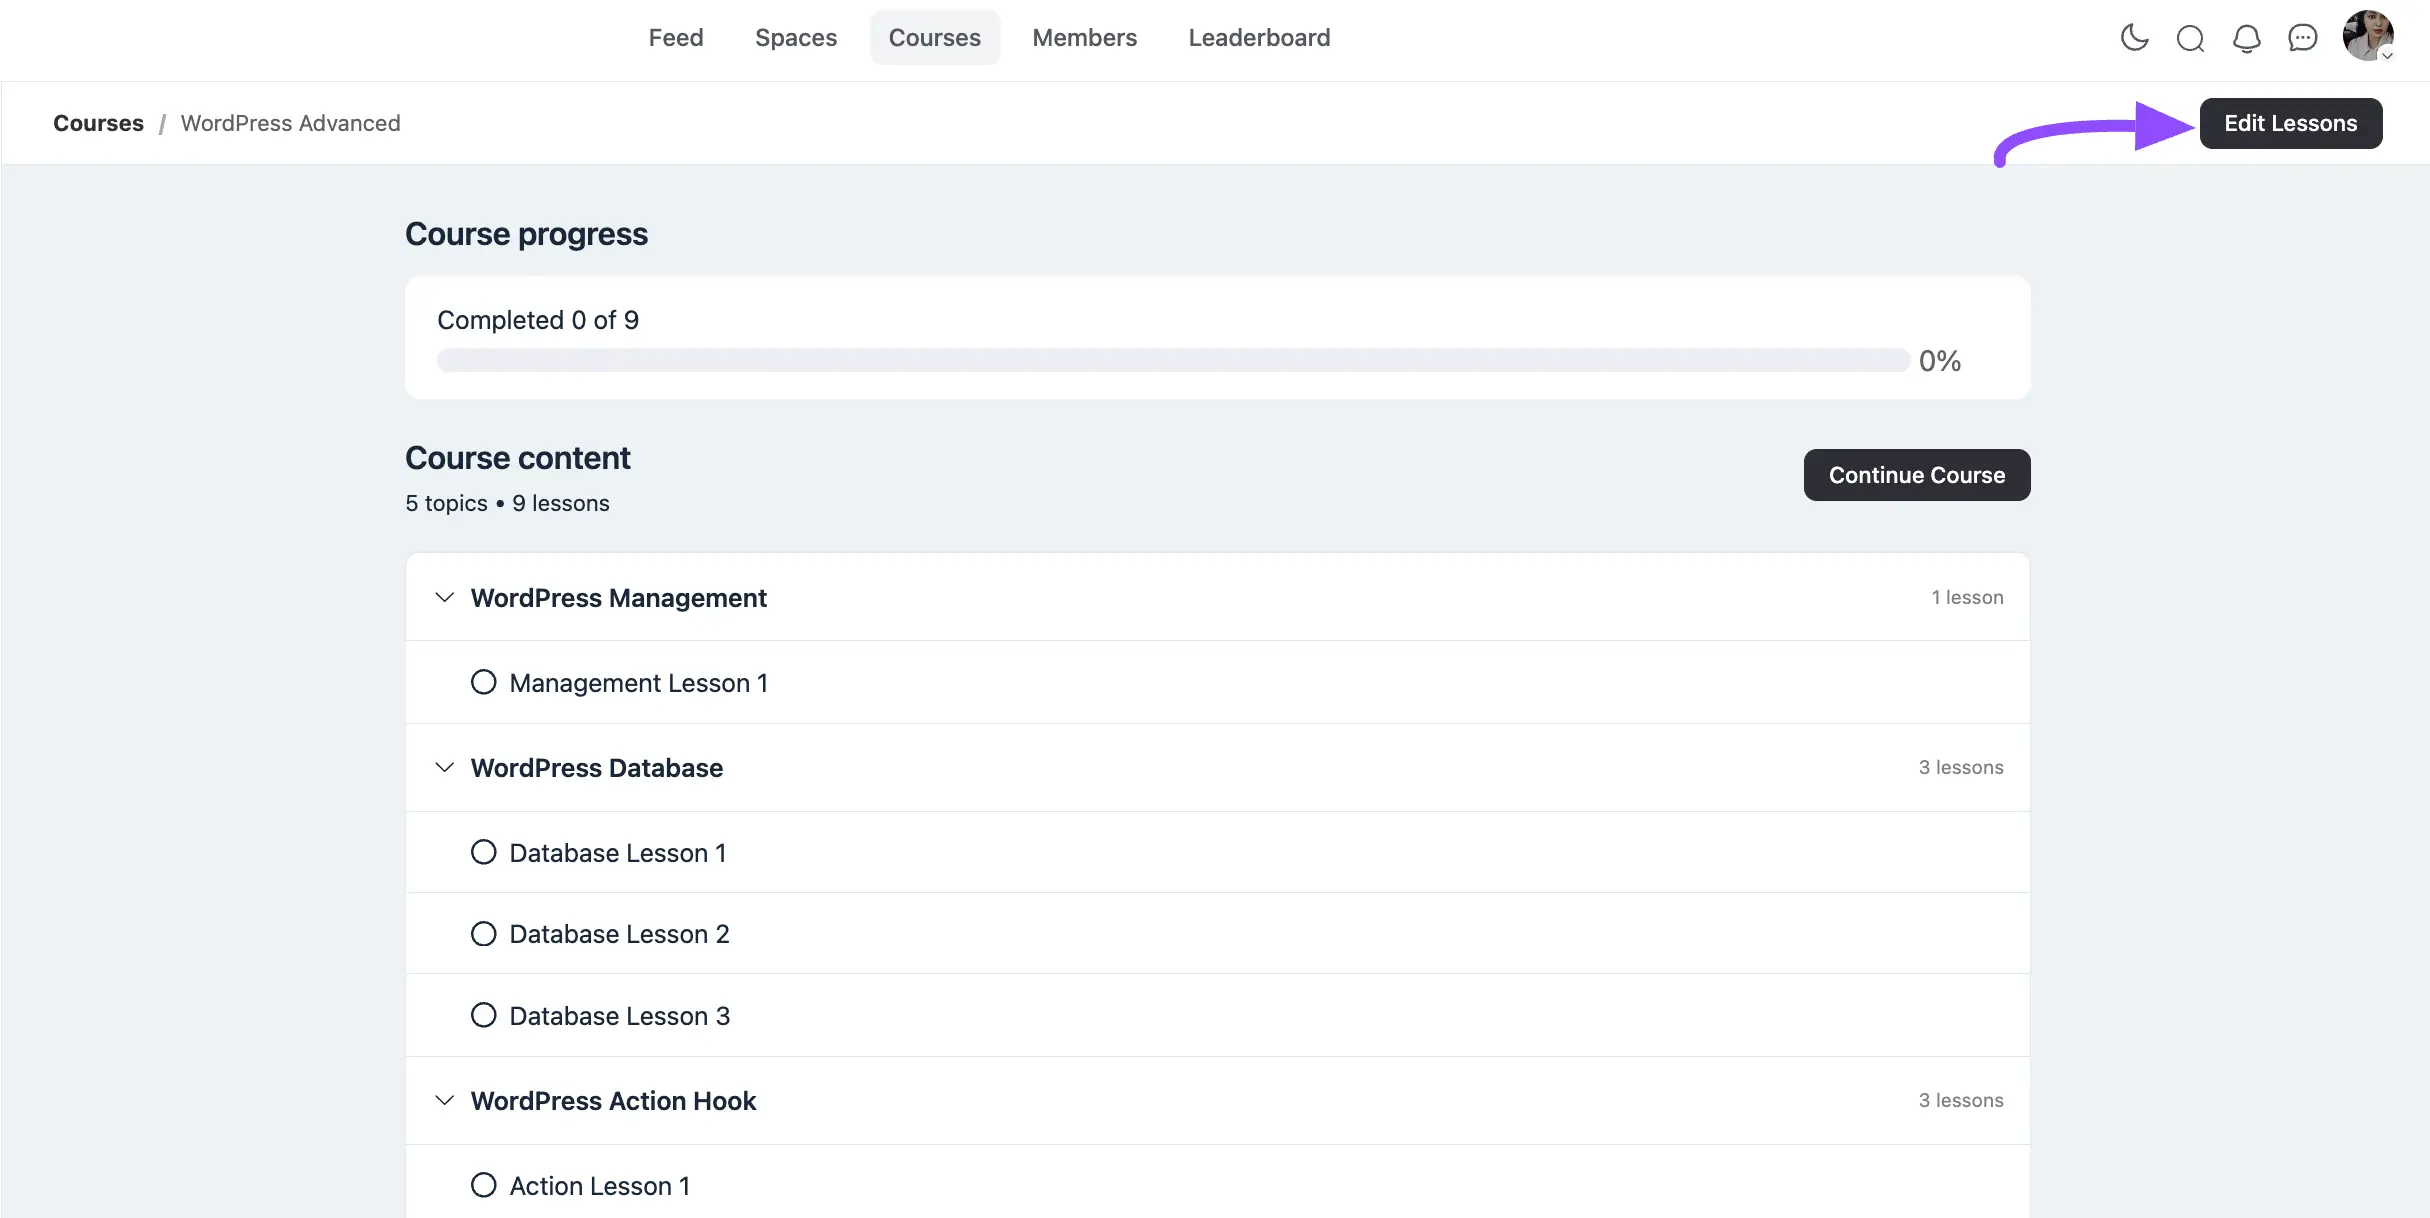
- In the top-right corner, click the Edit Lessons button.
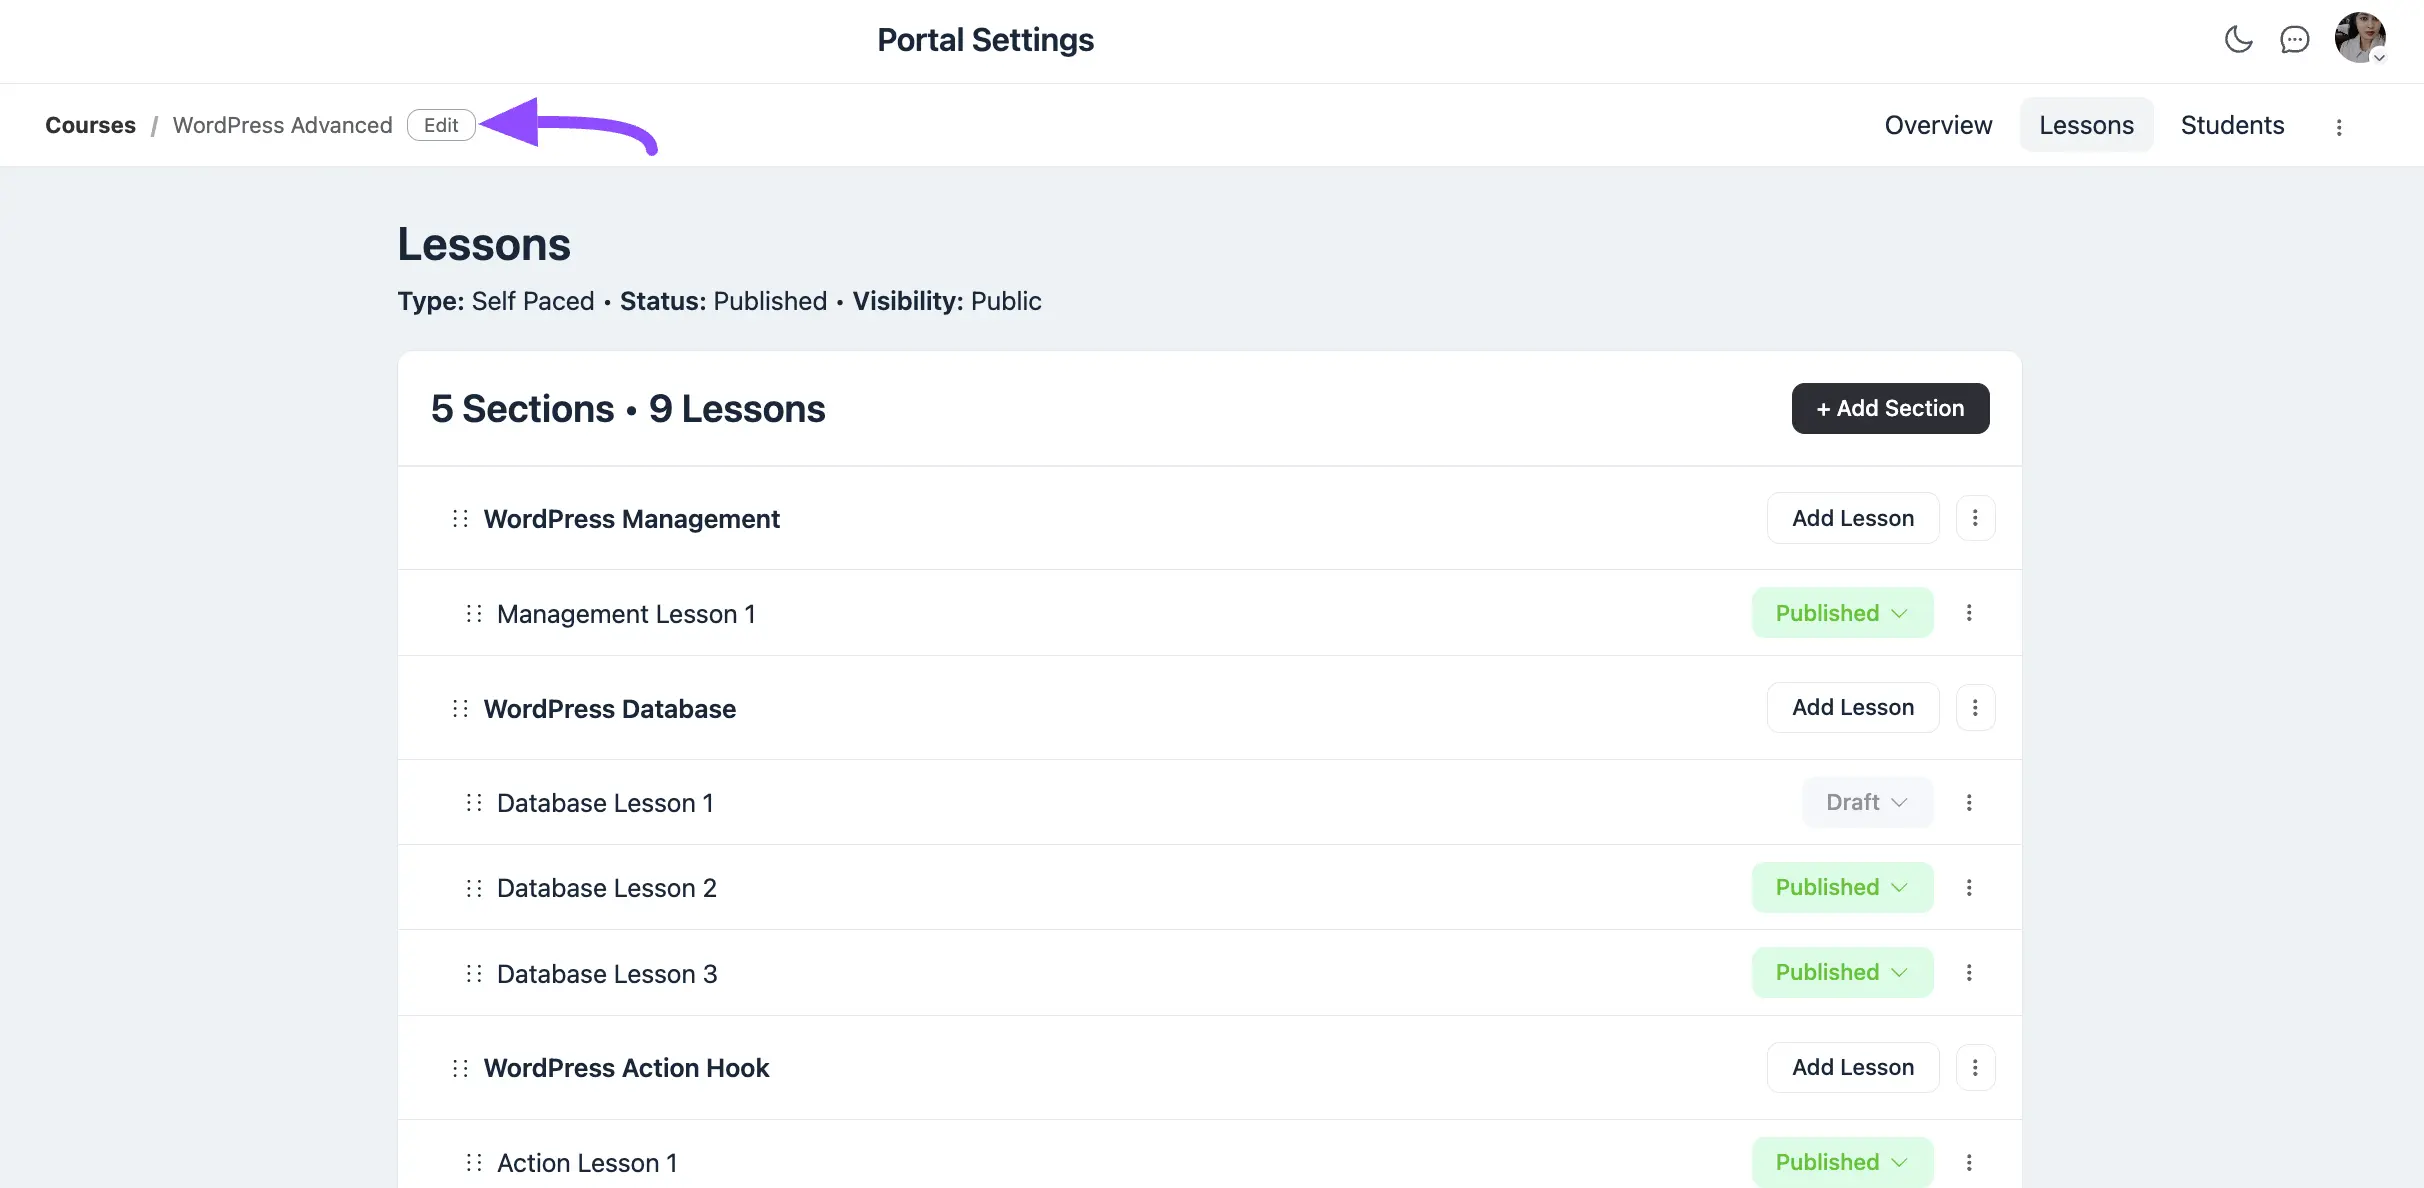
- Next, click the Edit button in the top-left corner to open the course settings.
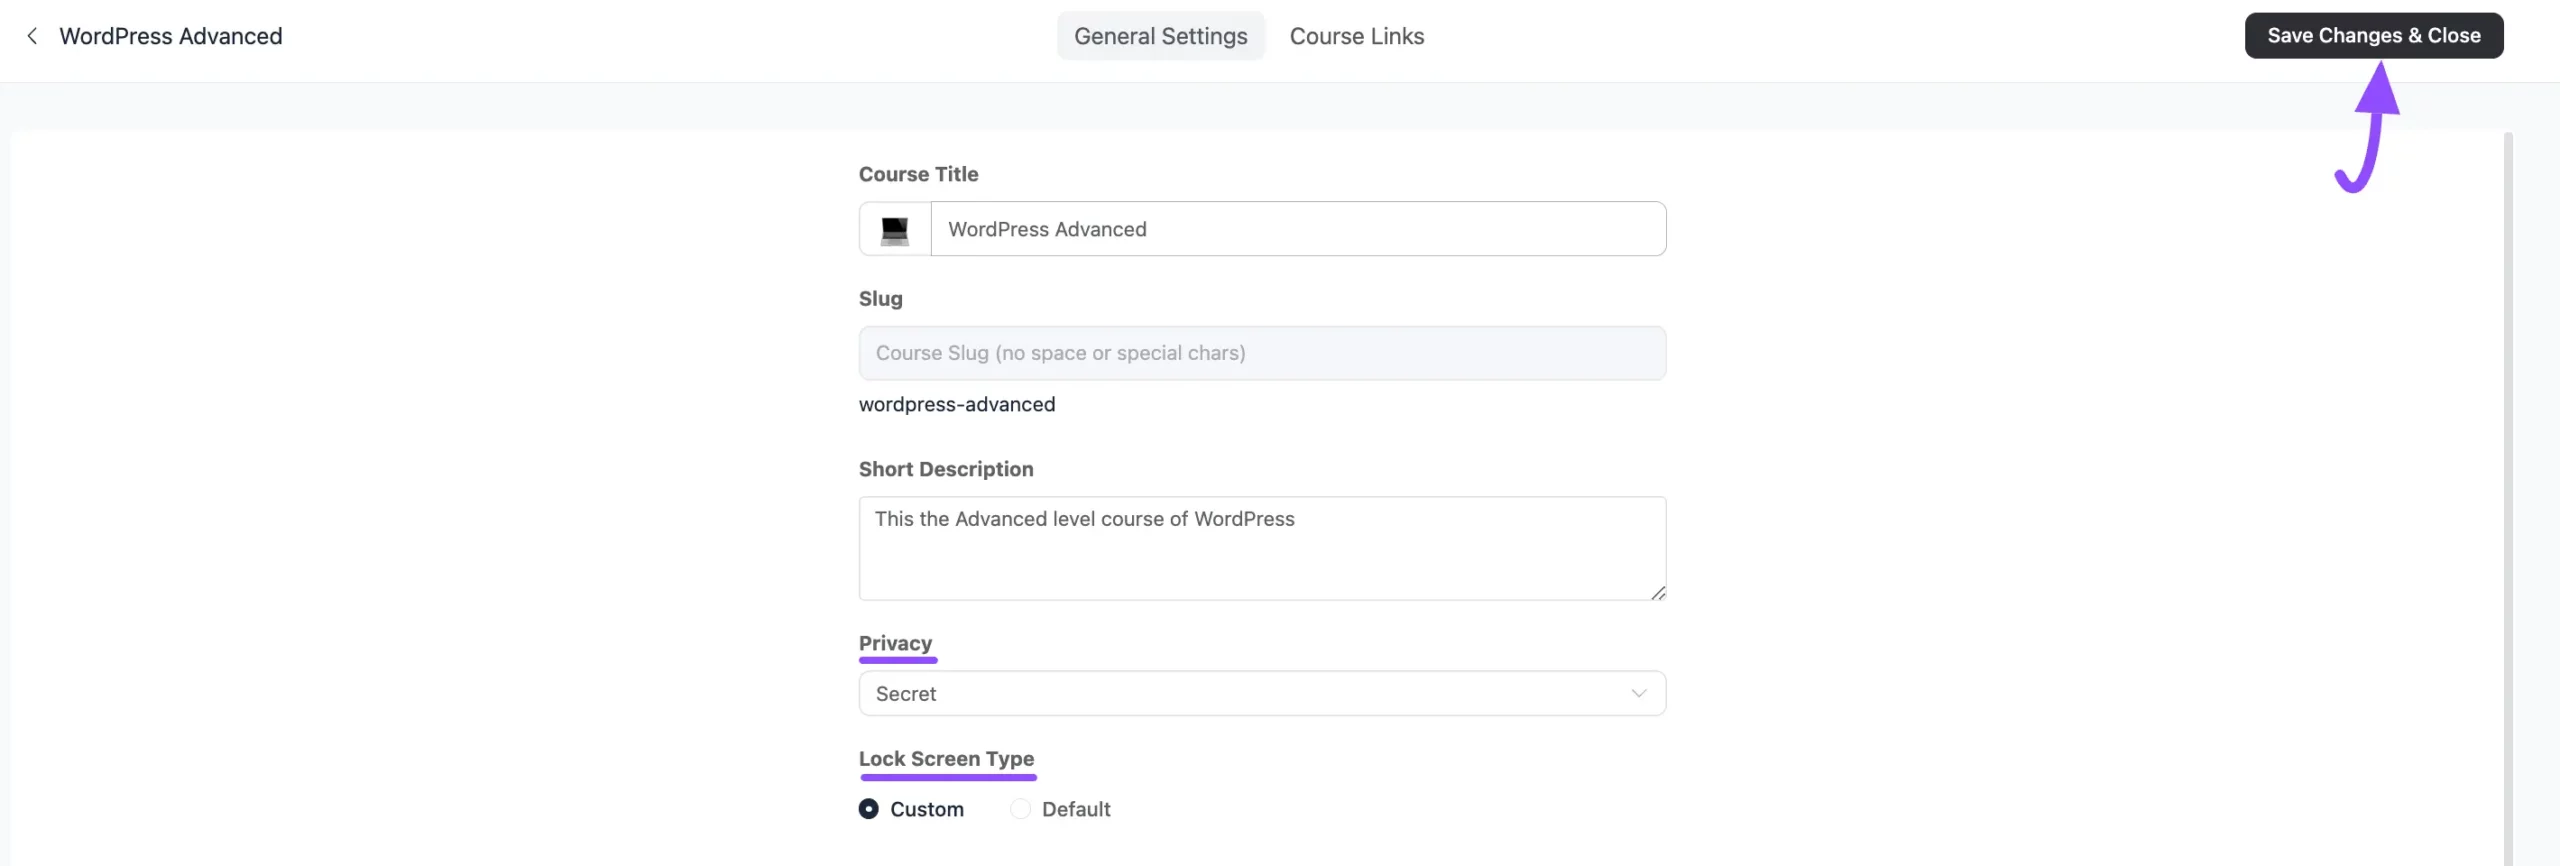
- Under General Settings, open the Privacy dropdown. You'll see three options: Public, Private, and Secret.
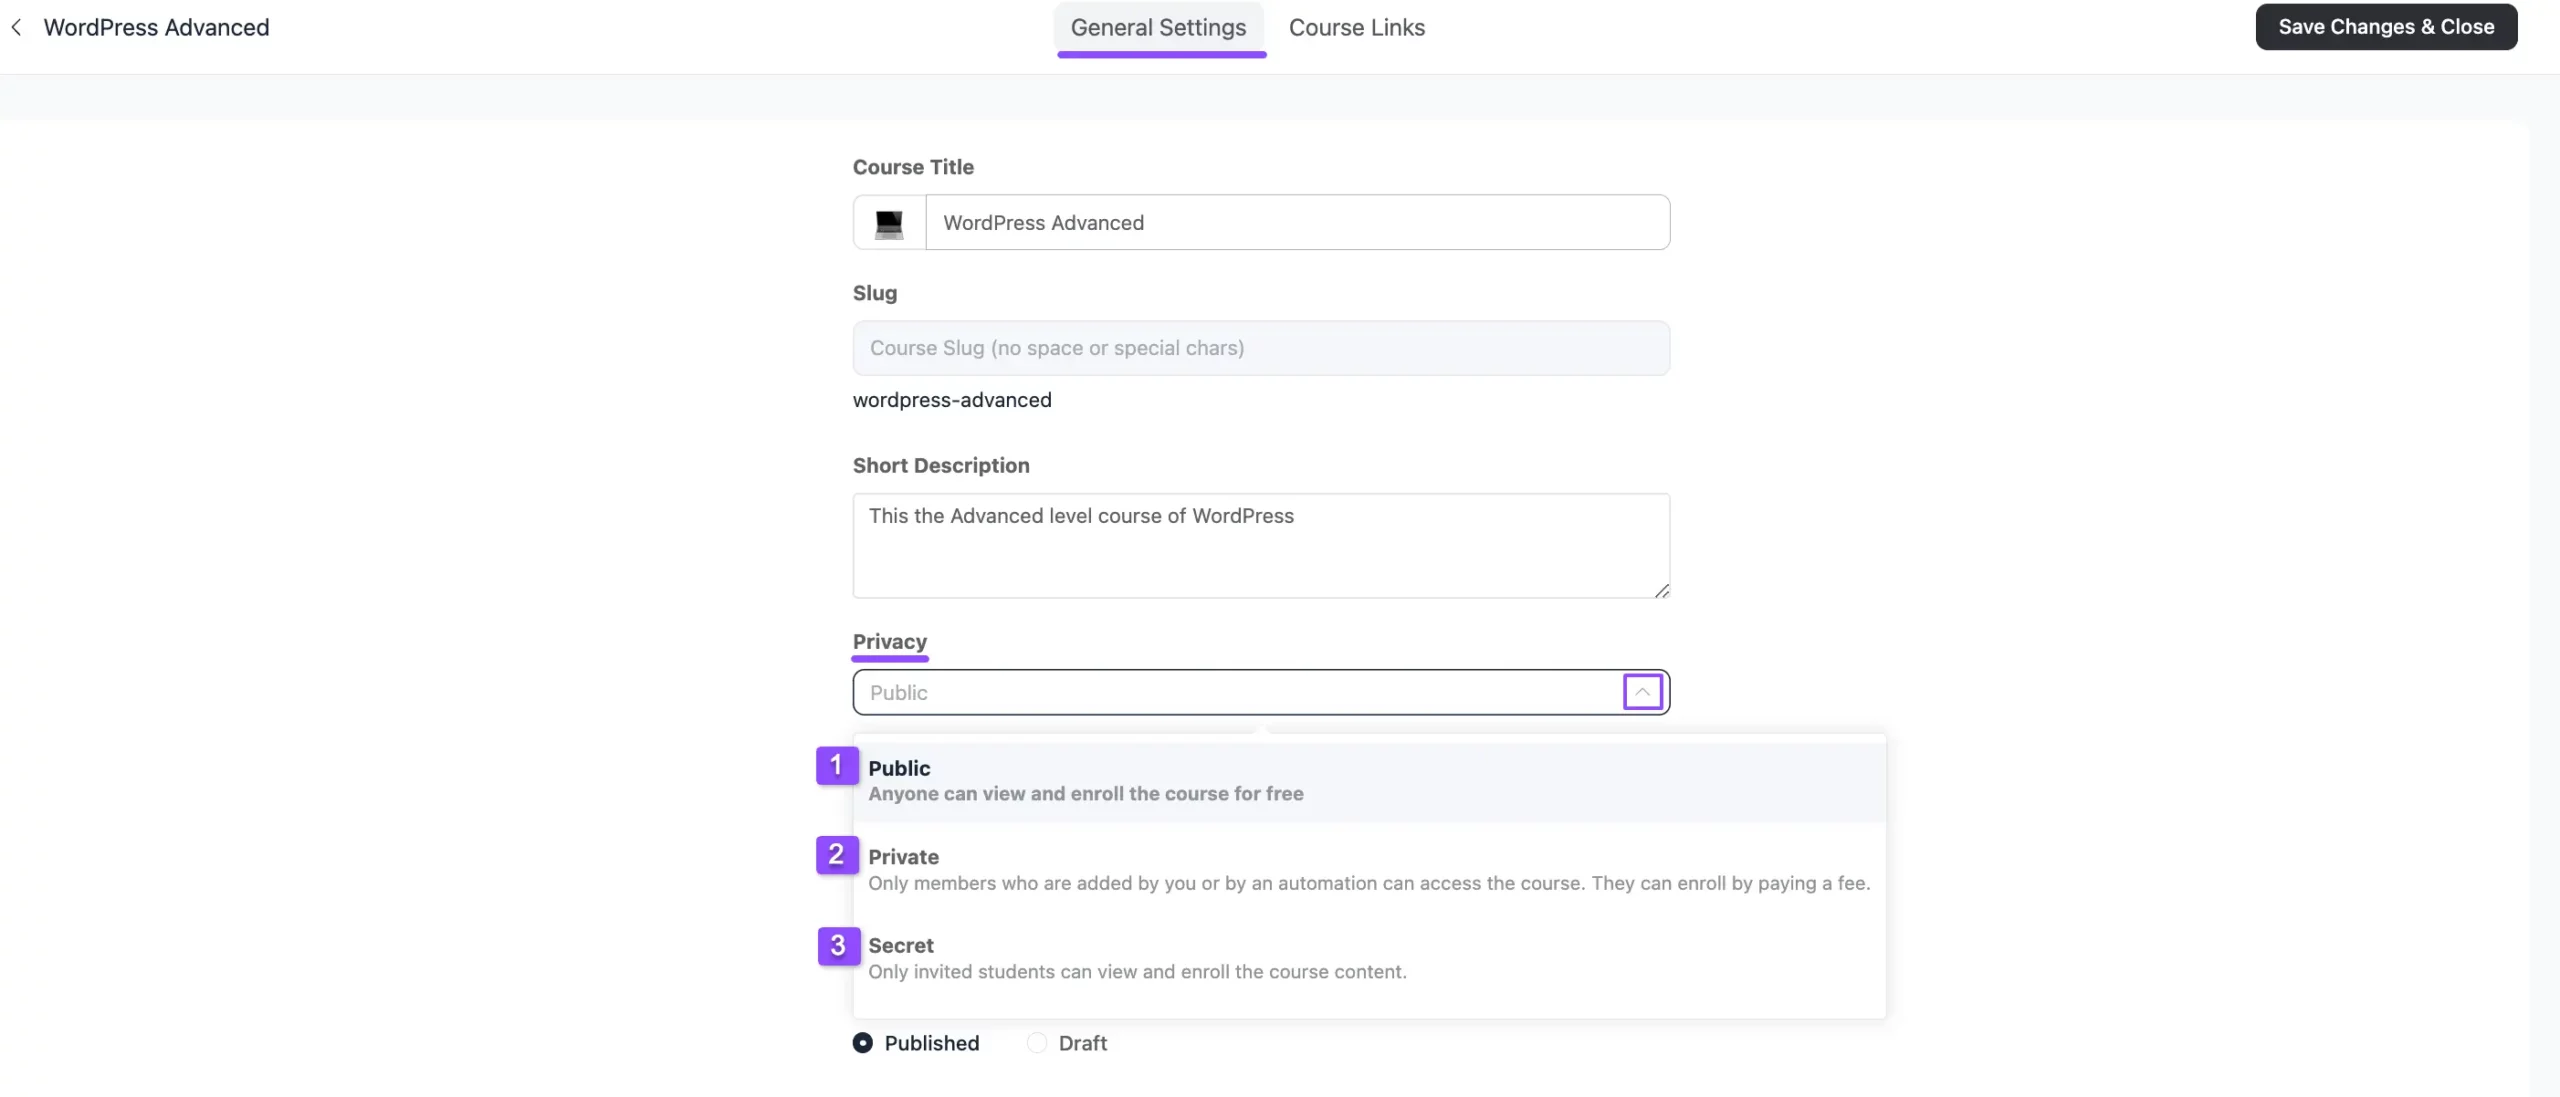
Here's what each privacy level does.
Public
Anyone can view the course and enroll in it for free. This is the best choice for lead-generation courses or free content you want as many people to find as possible.
Private
The course is locked for everyone. Only members you add manually (or through automation) can access it, and users can also enroll by paying a fee.
When you select Private, you get two Lock Screen options for what non-members see:
- Default: Shows FluentCommunity's standard lock screen.
- Custom: Lets you design your own lock screen. Once selected, open the Lock Screen tab from the top menu to access all the customization options.
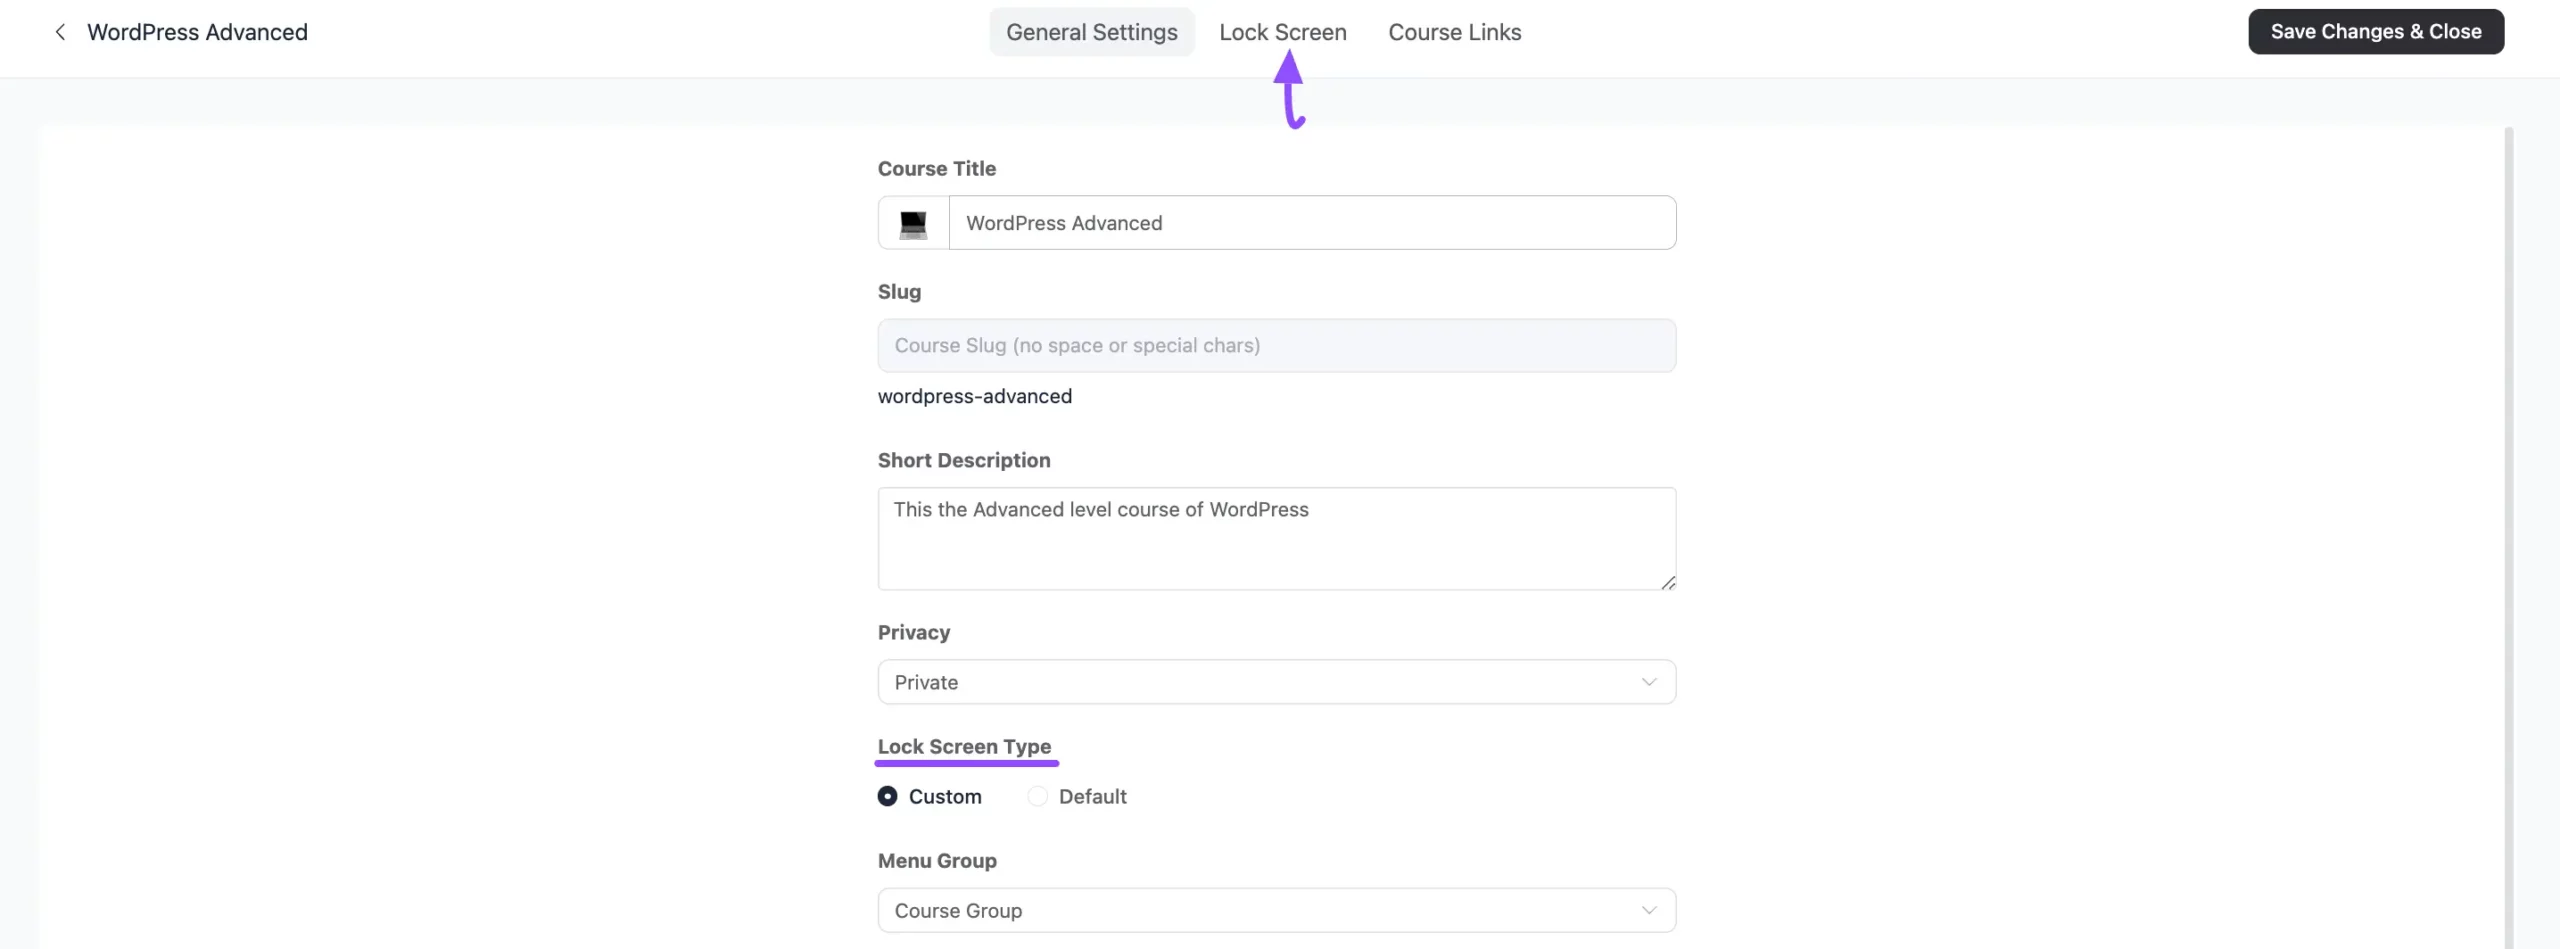
Customizing the Lock Screen
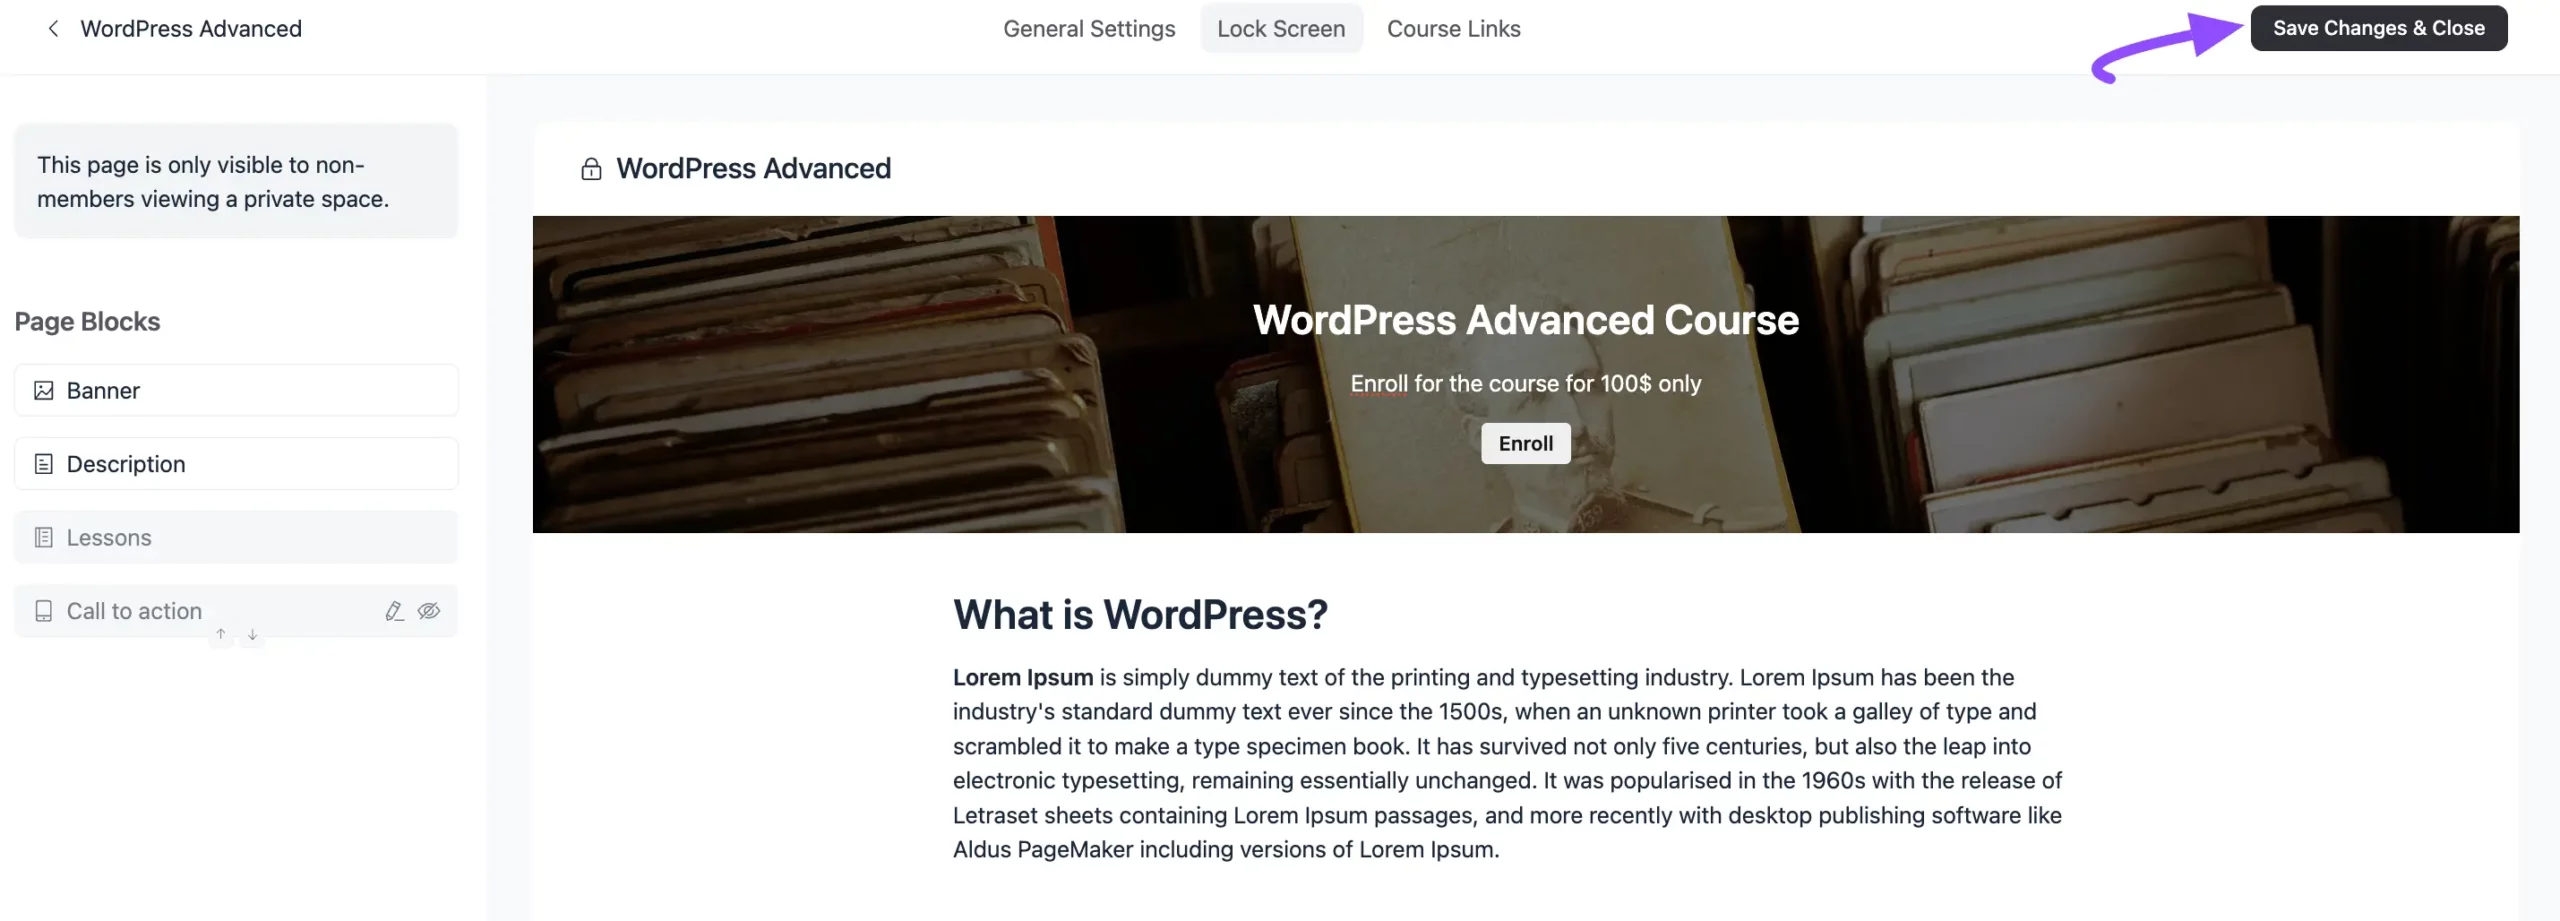
In the left sidebar under Page Blocks, you'll find every block you can customize, including the Banner, Description, Lessons, and Call to Action. Each block gives you three controls:
- Edit: Click the pencil icon on a block to change its content.
- Disable: Click the eye icon to hide a block from the lock screen.
- Move: Click the up/down arrows to reorder a block.
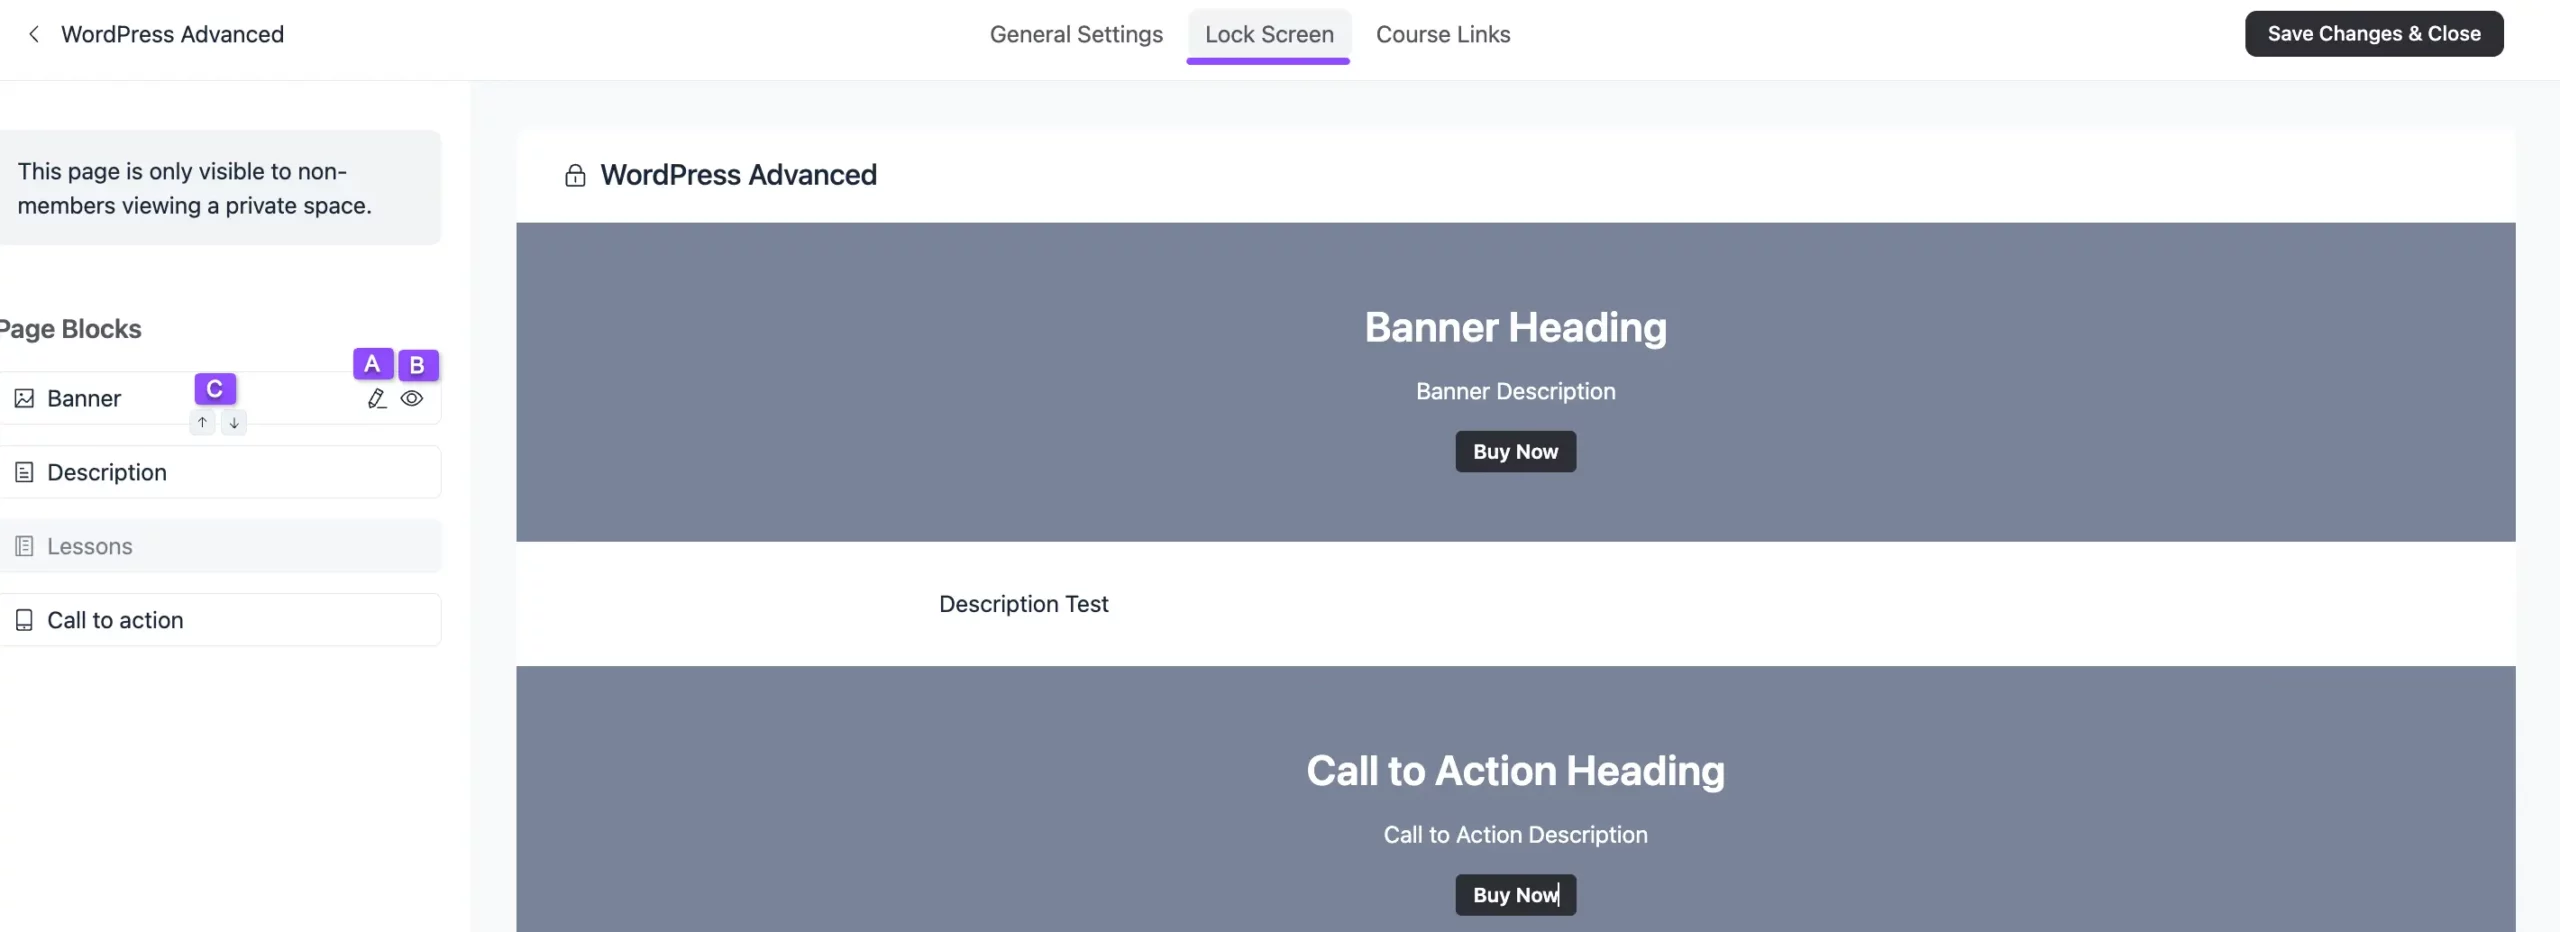
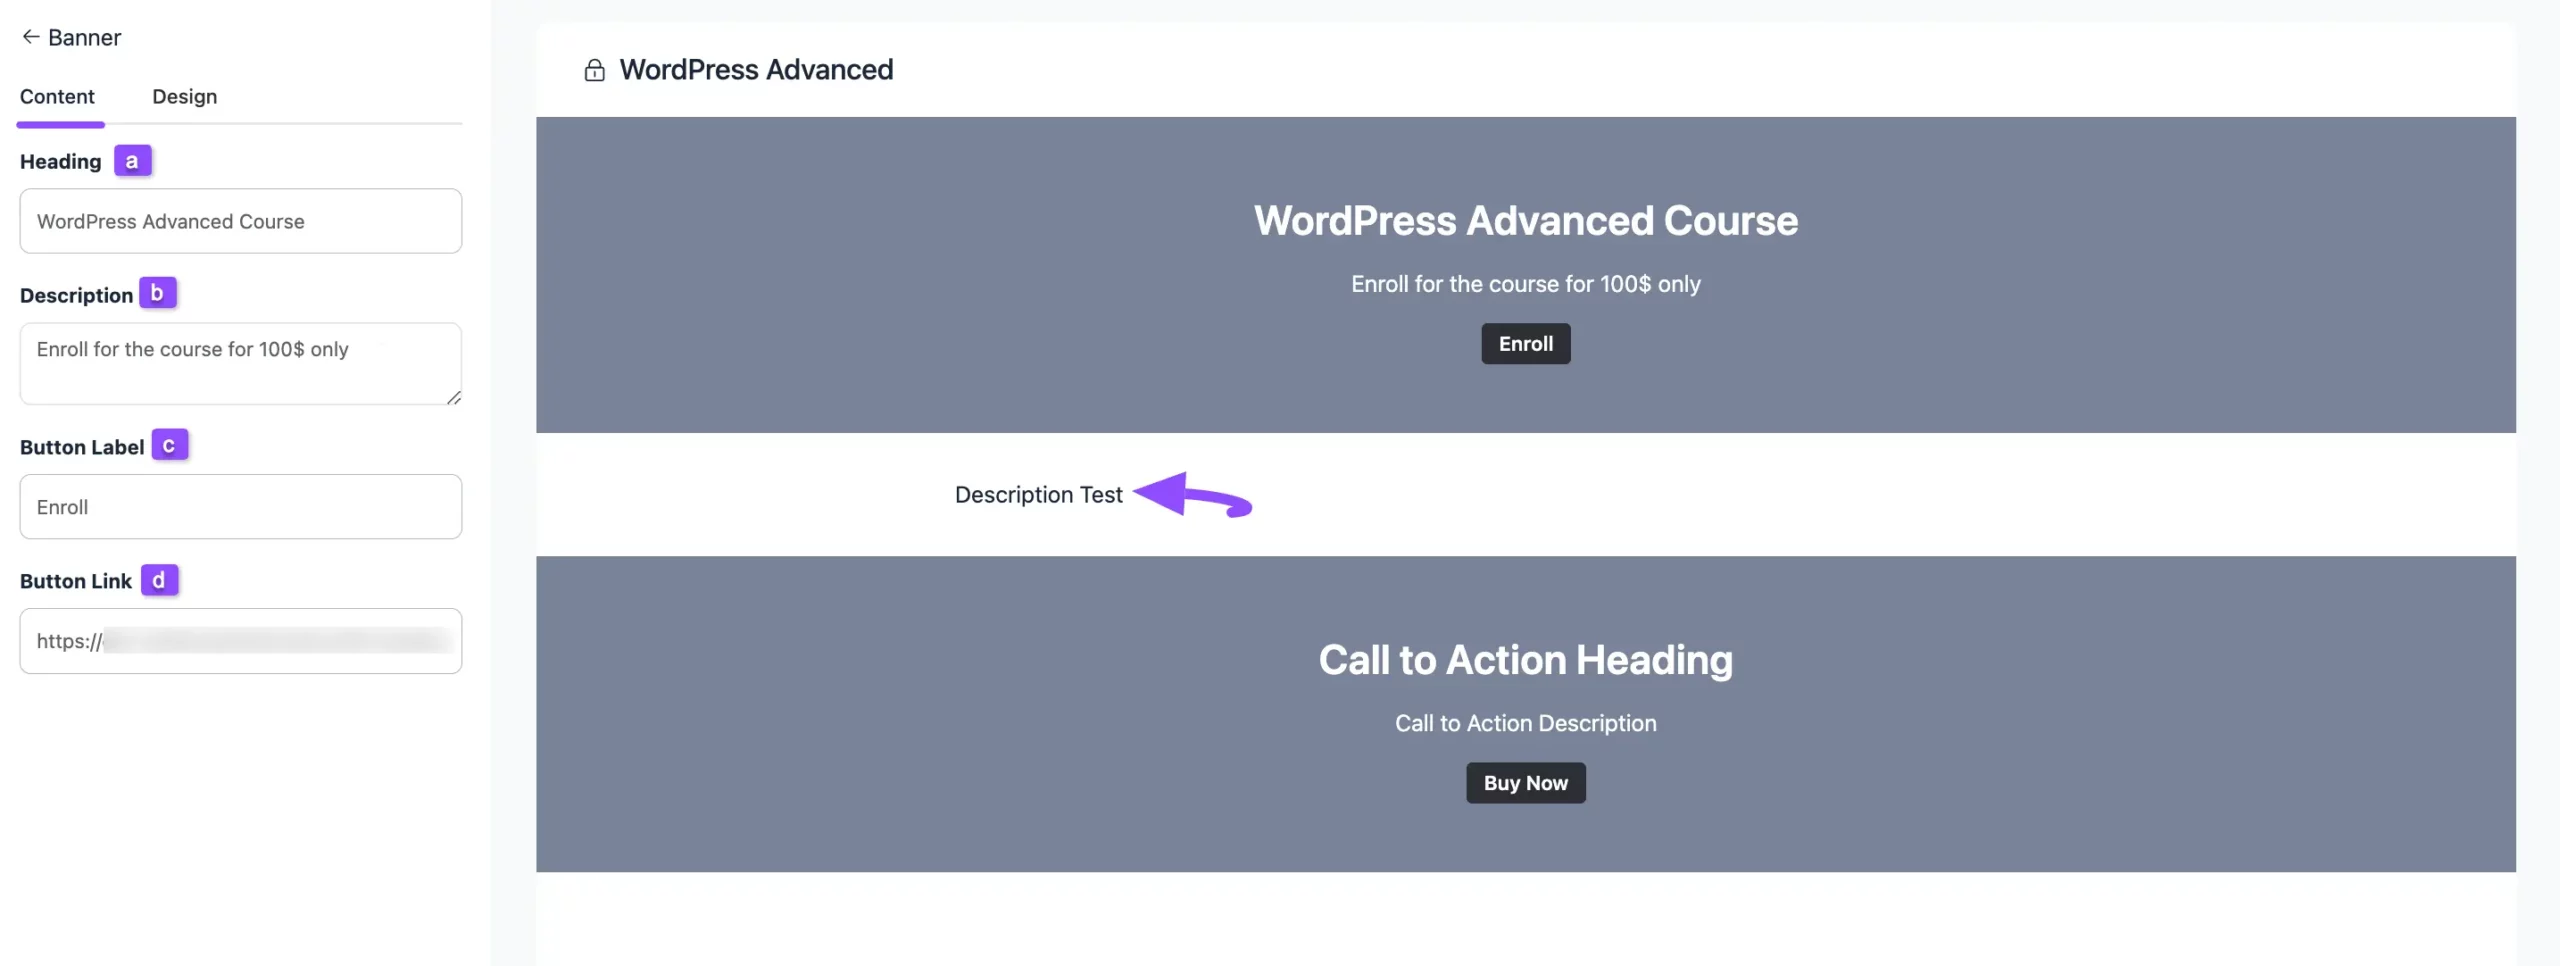
When you click the Edit icon on a block, the Content tab opens so you can adjust the text:
- Heading: Change the heading text.
- Description: Change the description text. You can also add a longer description below the banner using the Description Text button.
- Button Label: Change the wording on your button.
- Button Link: Add the URL you want to send students to after they click the button.
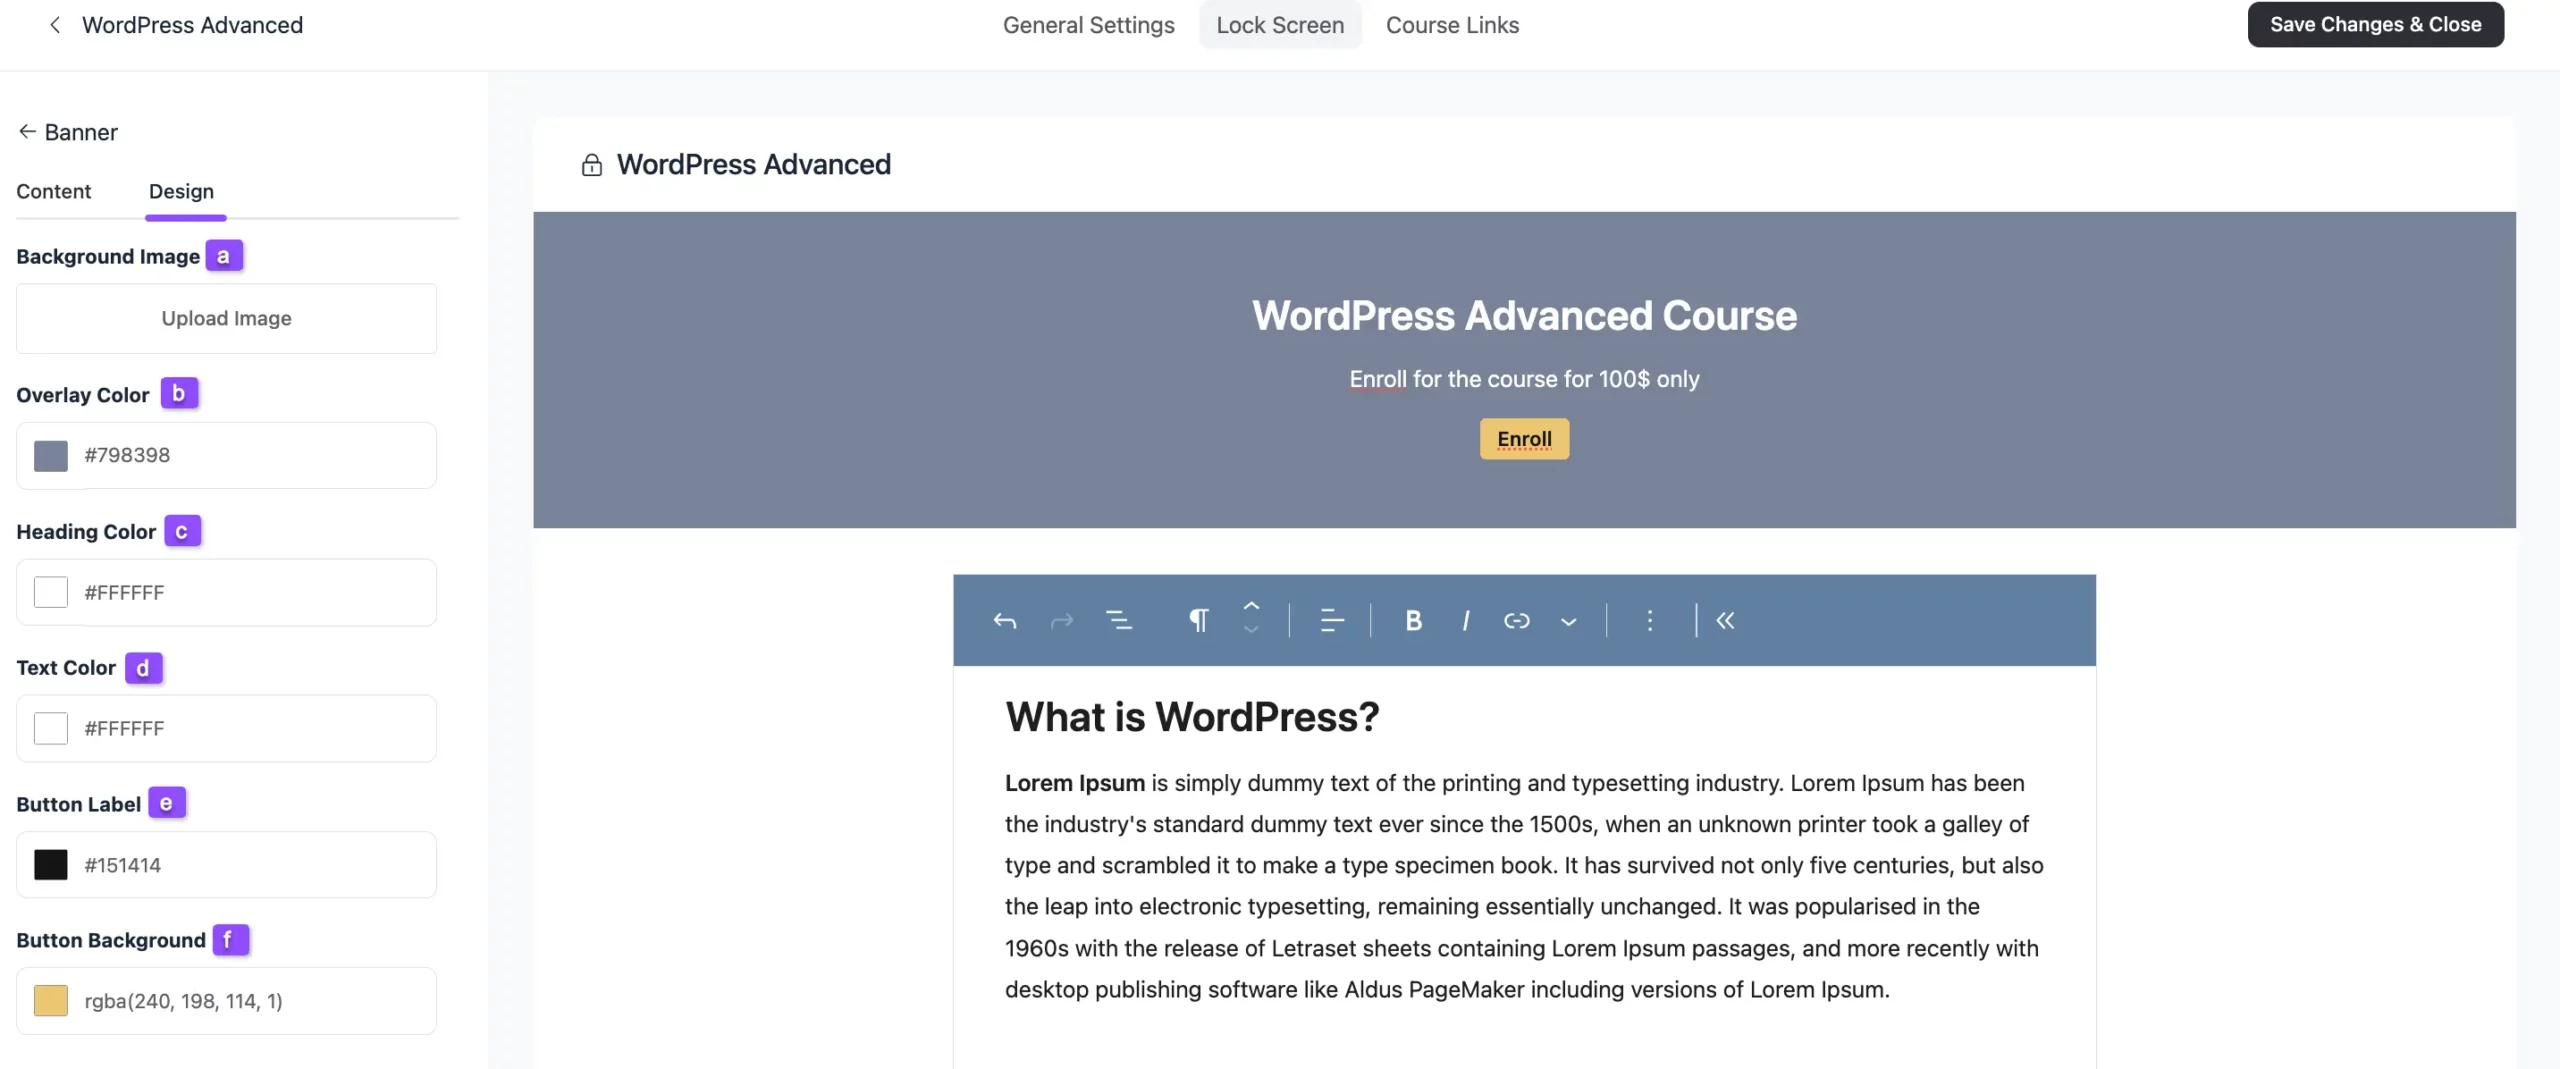
To change the look of the lock screen, open the Design tab:
- Background Image: Upload an image for the banner background using the Upload Image button.
- Overlay Color: Add a color overlay on top of the background image.
- Heading Color: Change the color of the heading text.
- Text Color: Change the color of the description text below the heading.
- Button Label: Change the color of the button text.
- Button Background: Change the background color of the button.
When you're happy with the design, click Save Changes & Close to keep your changes.
Secret
The course is completely hidden from everyone. Only invited students can view and enroll in the content, making this ideal for private cohorts or beta groups.
After choosing your privacy level, always click Save Changes & Close to apply your settings.