Appearance
Adding Members to a Space
FluentCommunity makes it easy to build your audience inside each Space. Whether you're adding a single person who already has an account or bulk-importing hundreds from a spreadsheet, there's a method for it.
Before you start, make sure:
- You are logged into your WordPress dashboard.
- You have Administrator or Moderator privileges for the Space you want to manage.
Looking for roles instead?
This guide covers adding people. To change someone's role or remove them from a Space, see Assigning User Roles.
Step 1: Navigate to Your Member List
To start managing your community, you first need to access the dedicated member area for your specific Space.
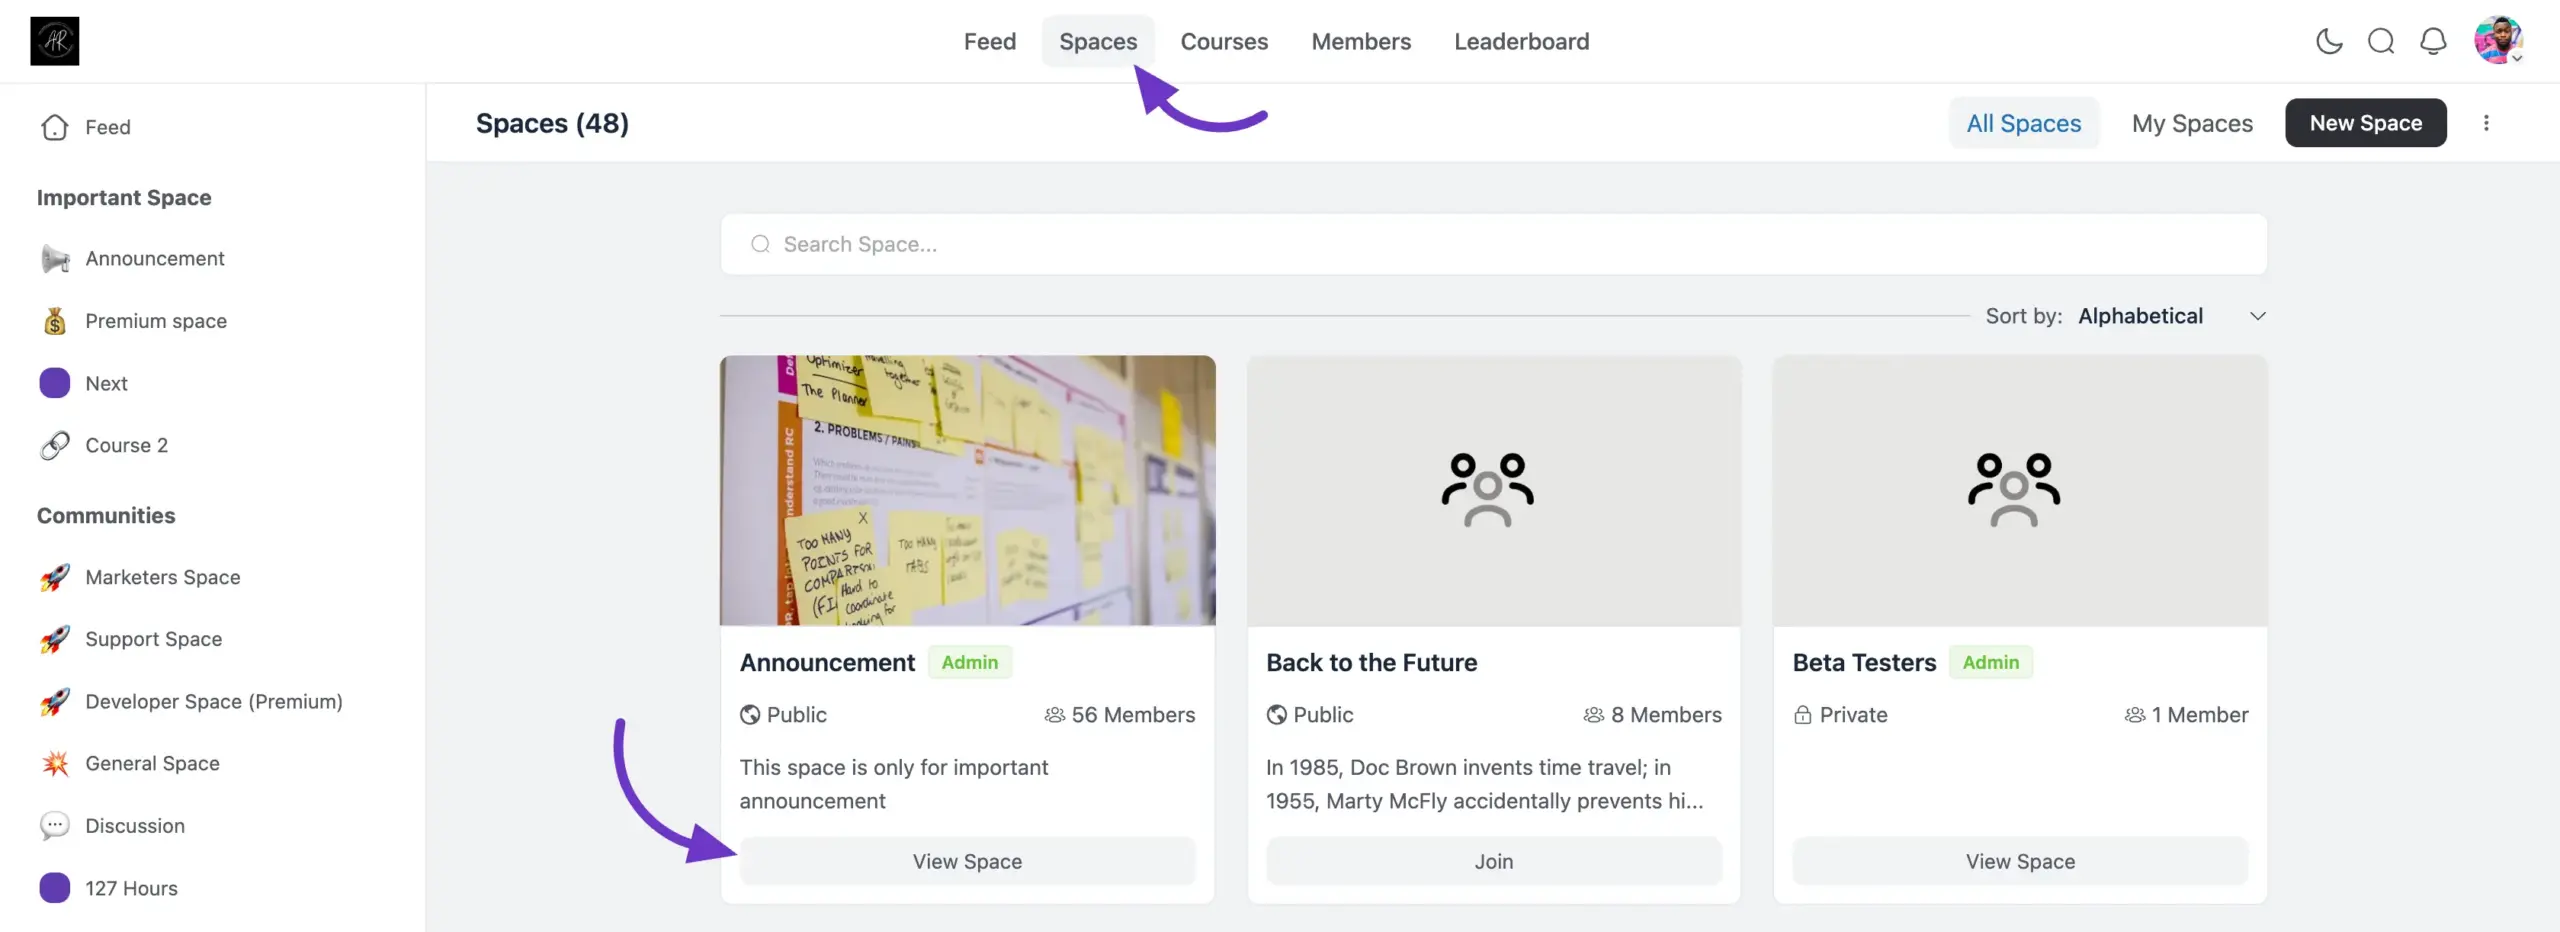
- Go to your community portal and click on Spaces from the main top navigation menu.
- Find the specific Space you want to manage and click the View Space button on its card.
- Once inside the Space, click on the Members tab located in the top-right menu area (next to Posts and Documents).
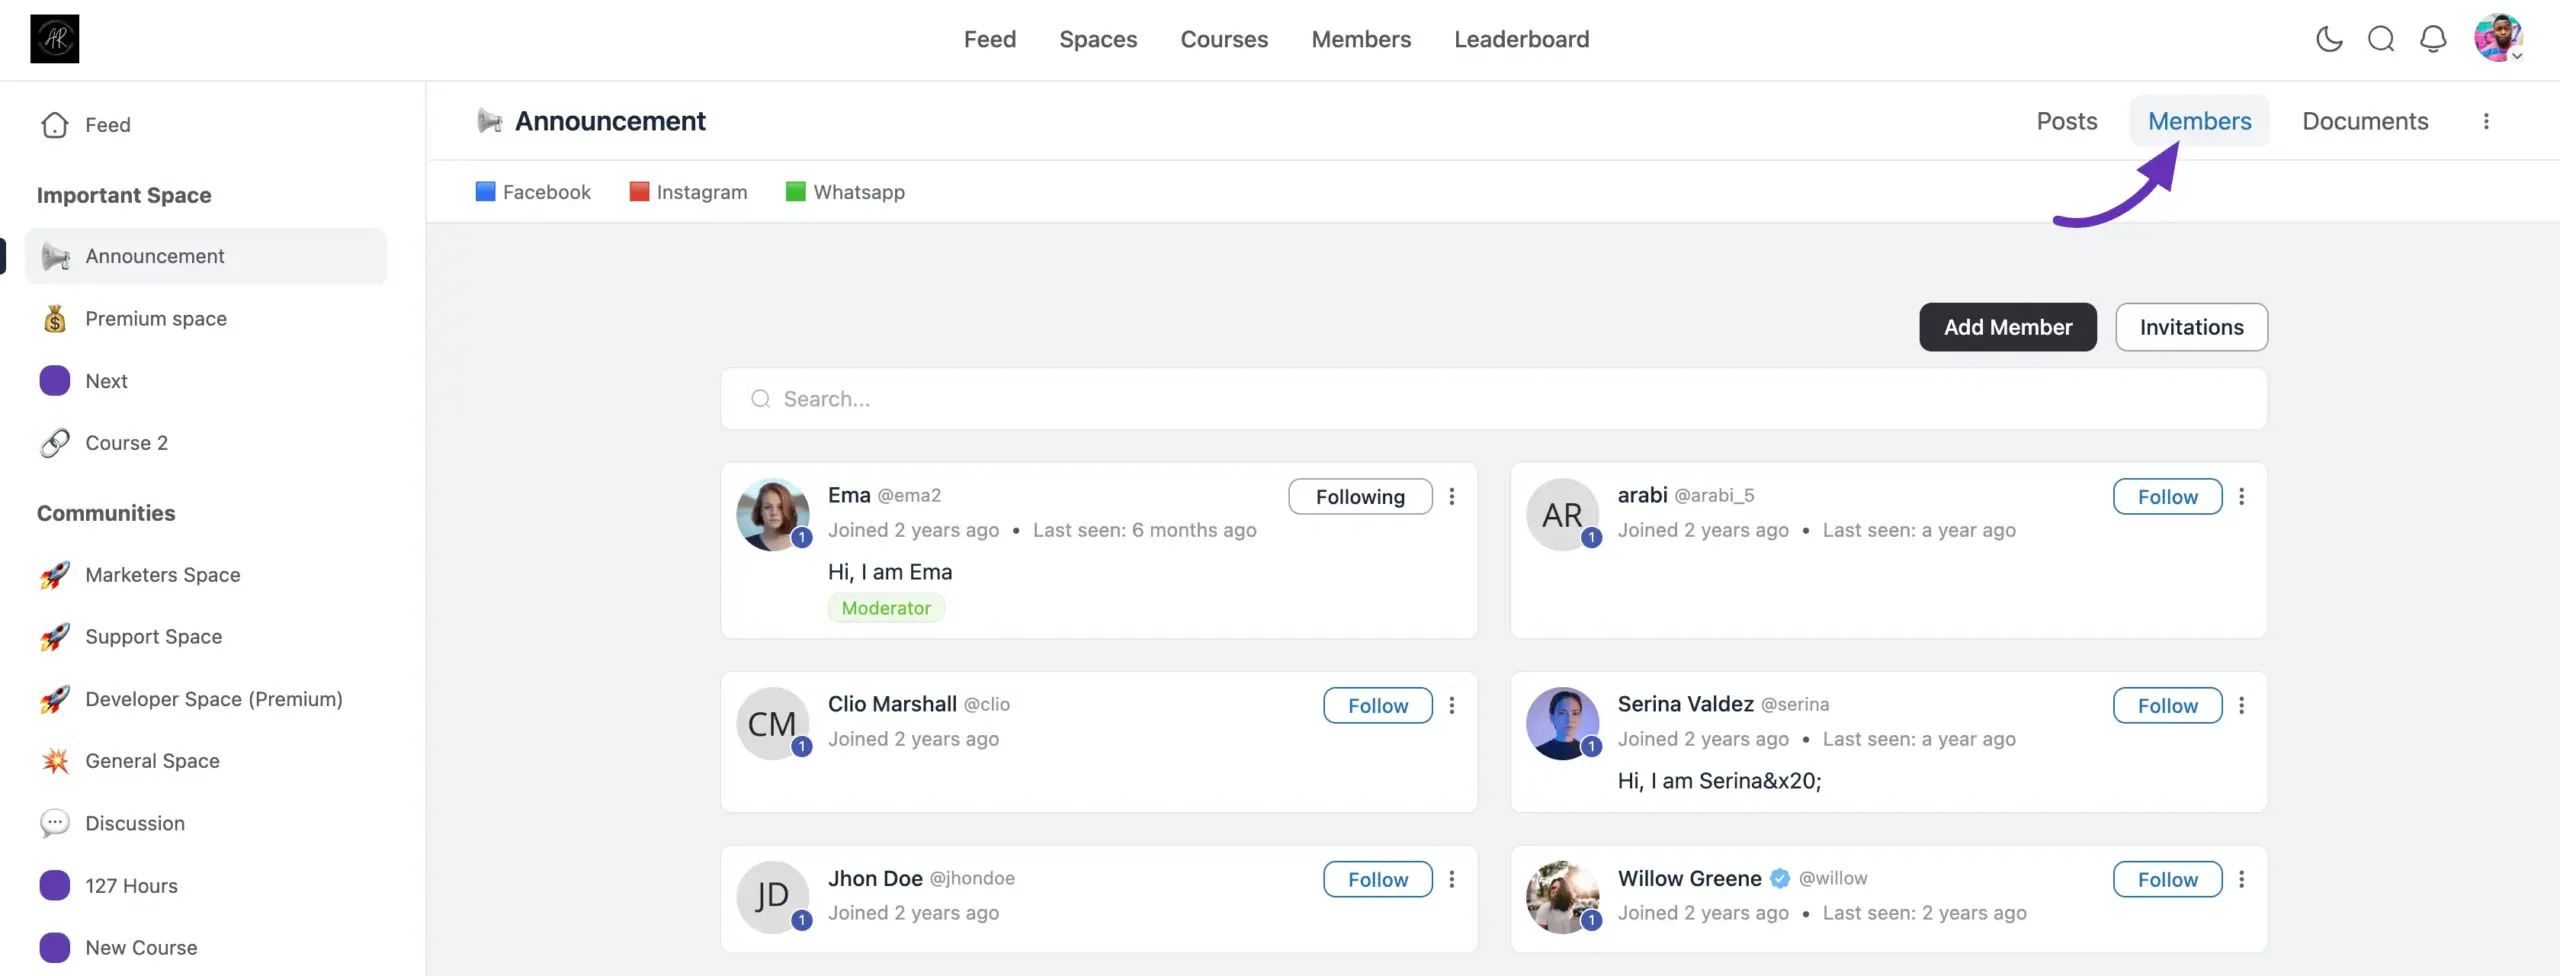
Here, you will see a list of everyone currently in the Space. You can use the search bar to quickly find existing members, and you can easily see each person's role (like Admin or Moderator) displayed directly under their name.
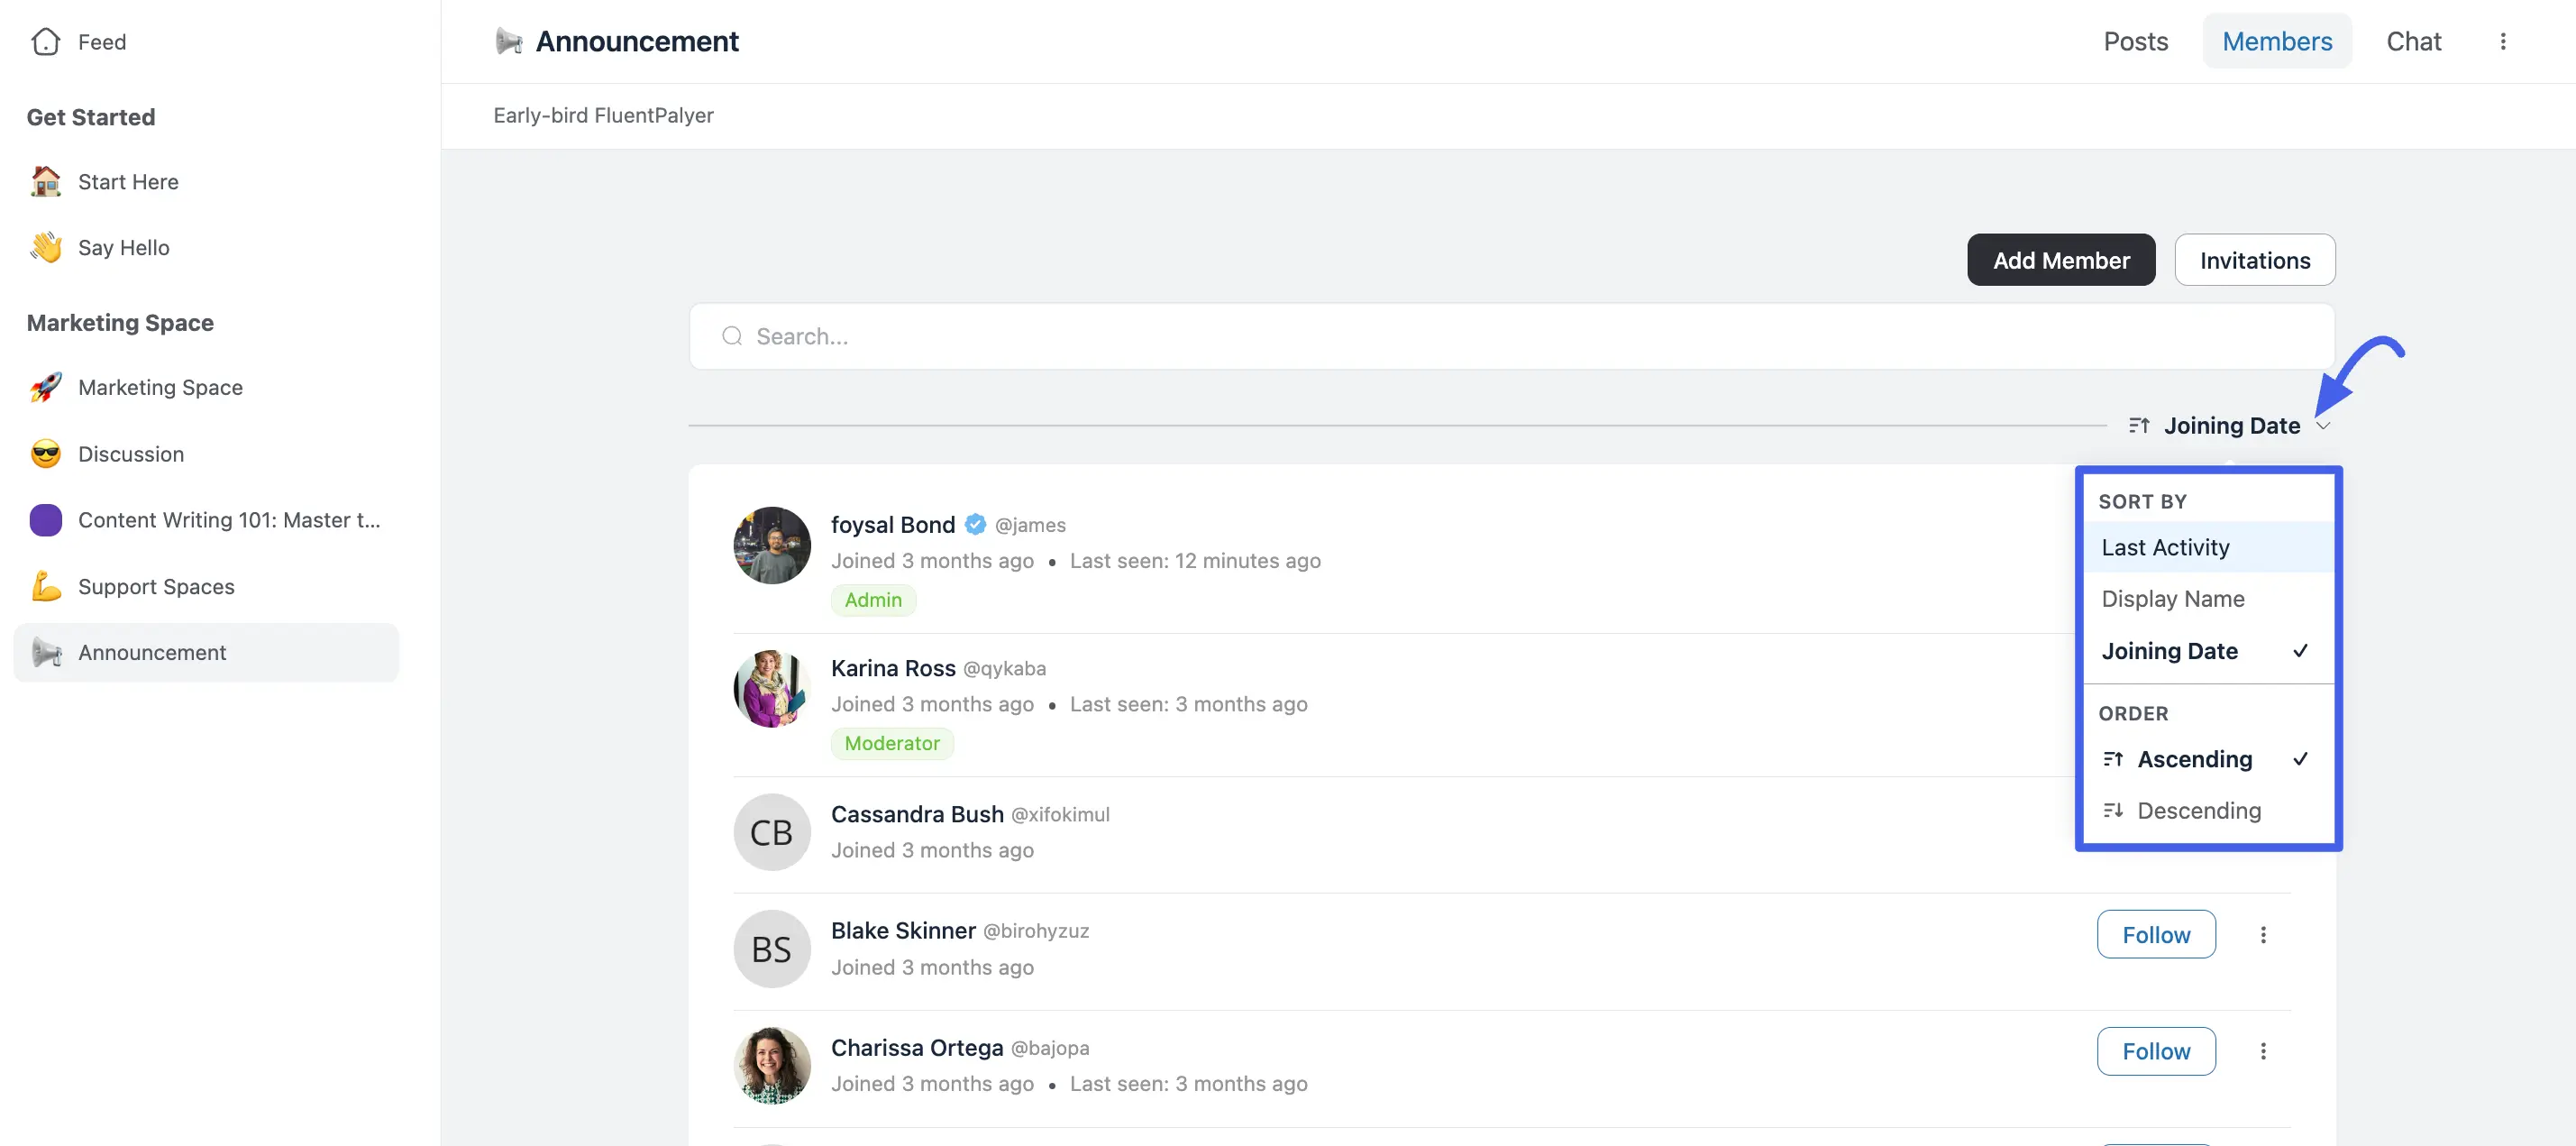
Use the sort dropdown above the list to choose a field Joining Date, Last Activity, or Name. Then click the direction arrow next to it to flip between ascending and descending. For example, switch Joining Date to ascending to surface your longest-standing members first. Your choice is saved and restored the next time you open this list.
NOTE
For a course-type Space, this same tab is labeled Students and offers the identical sort-and-direction control.
Step 2: Add New Members
Click the Add Member button to open the invitation menu. From here, you can choose one of the following four tabs based on your needs.
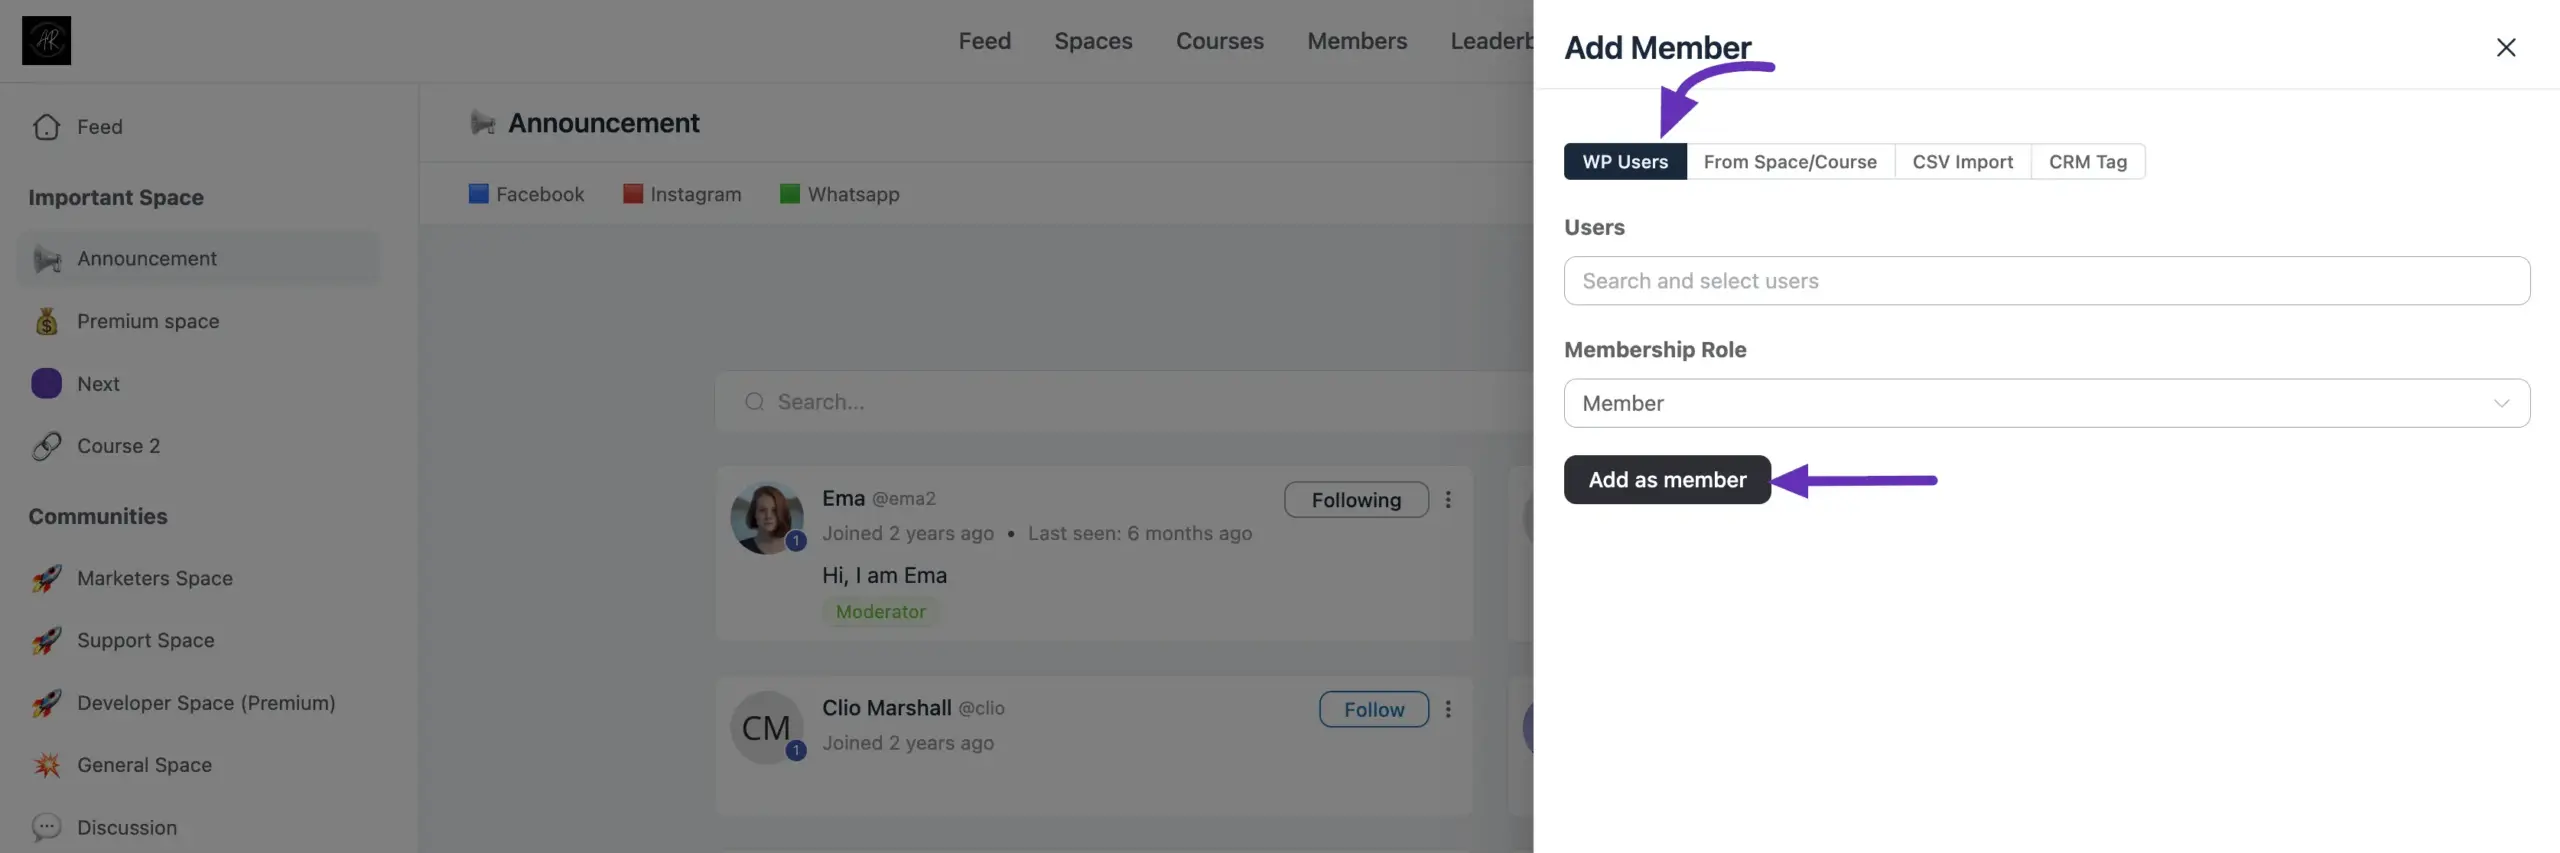
Method A: WP Users (Add Existing Site Users)
This is the perfect method if the person you want to add already has an account on your WordPress website.
- Click the WP Users tab.
- Search for the user's name or email in the Users field.
- Select the Membership Role you want to give them (e.g., Member, Moderator, or Admin).
- Click Add as member.
Method B: From Space/Course (Bulk Import)
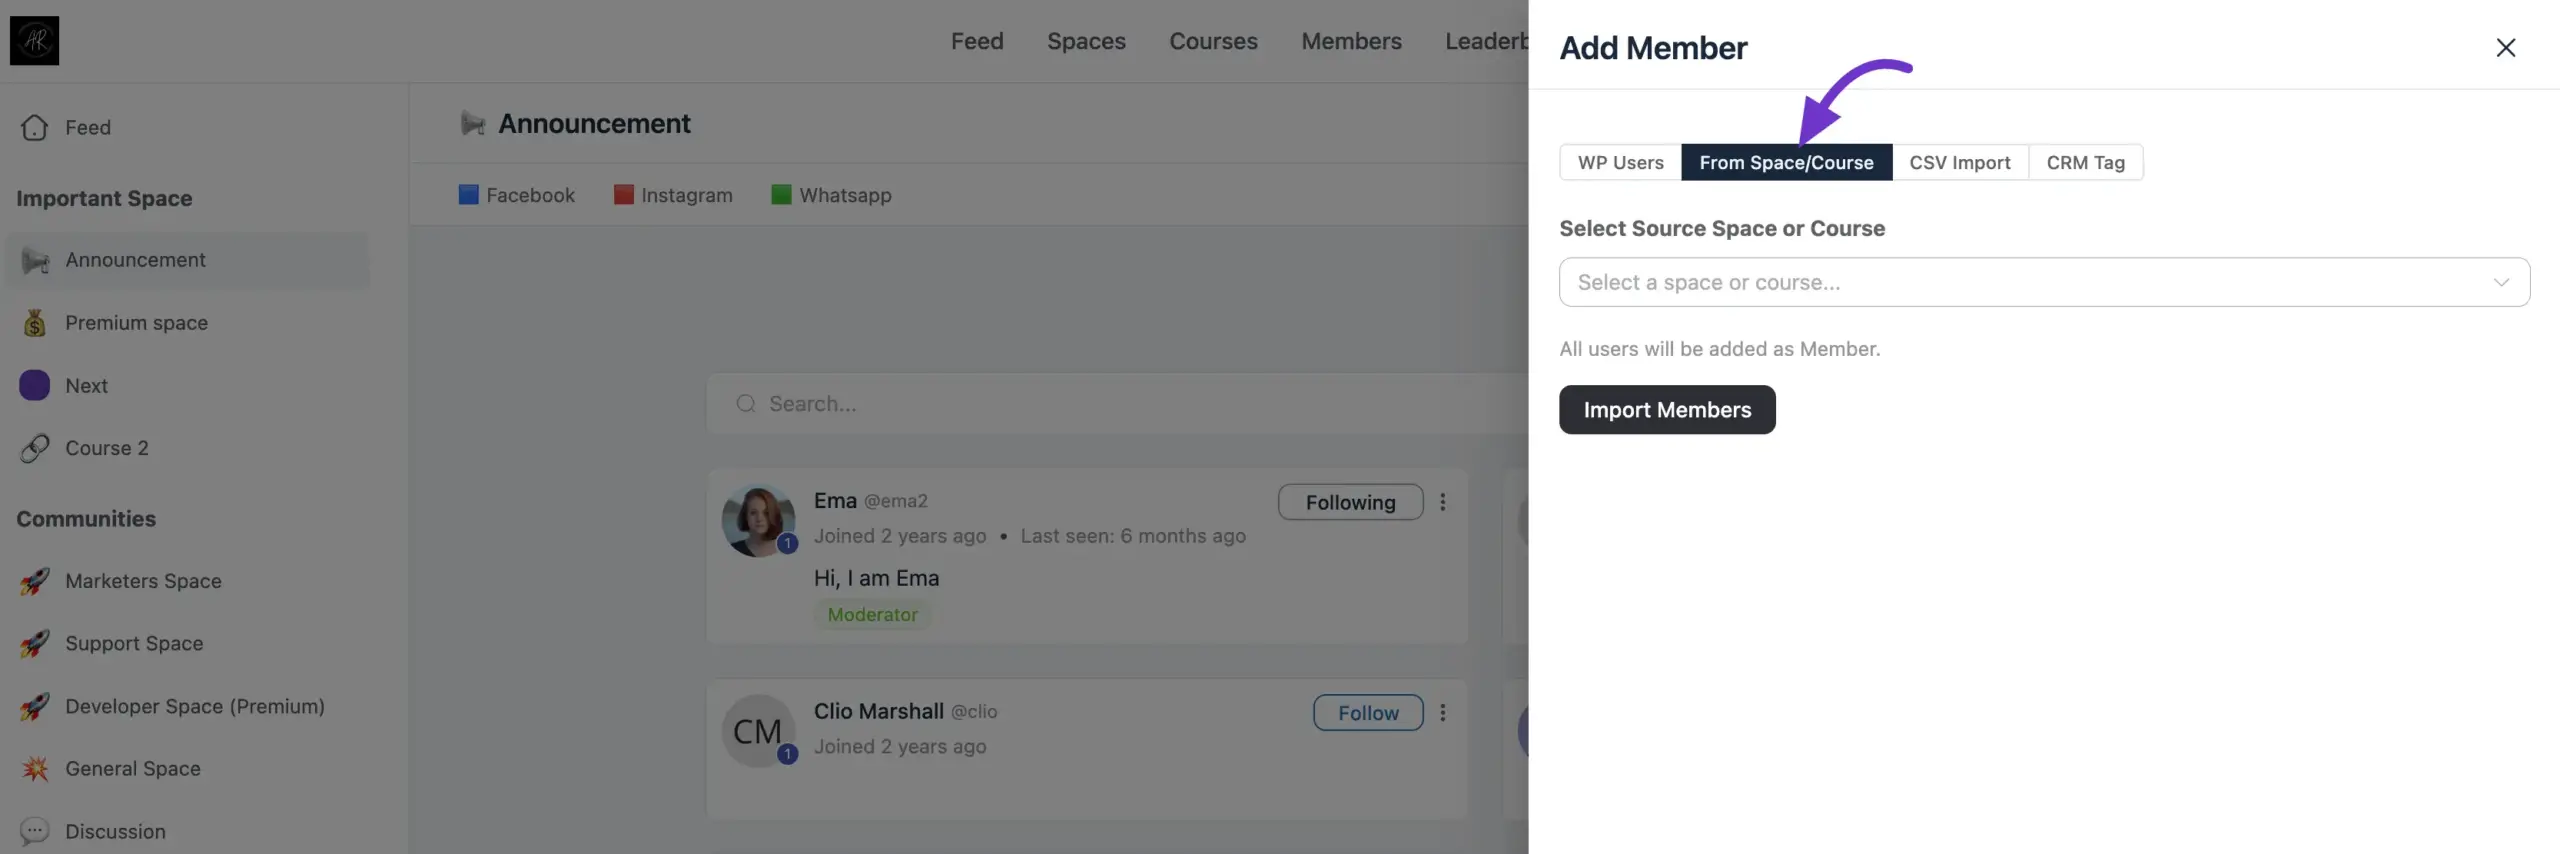
Do you already have a thriving Course or another Space? You can copy all of those members over at once.
- Click the From Space/Course tab.
- Click the dropdown menu and select the source Space or Course.
- Click Import Members.
Note
All users imported using this method will automatically be added with the standard Member role.
Method C: CSV Import (Upload a List)
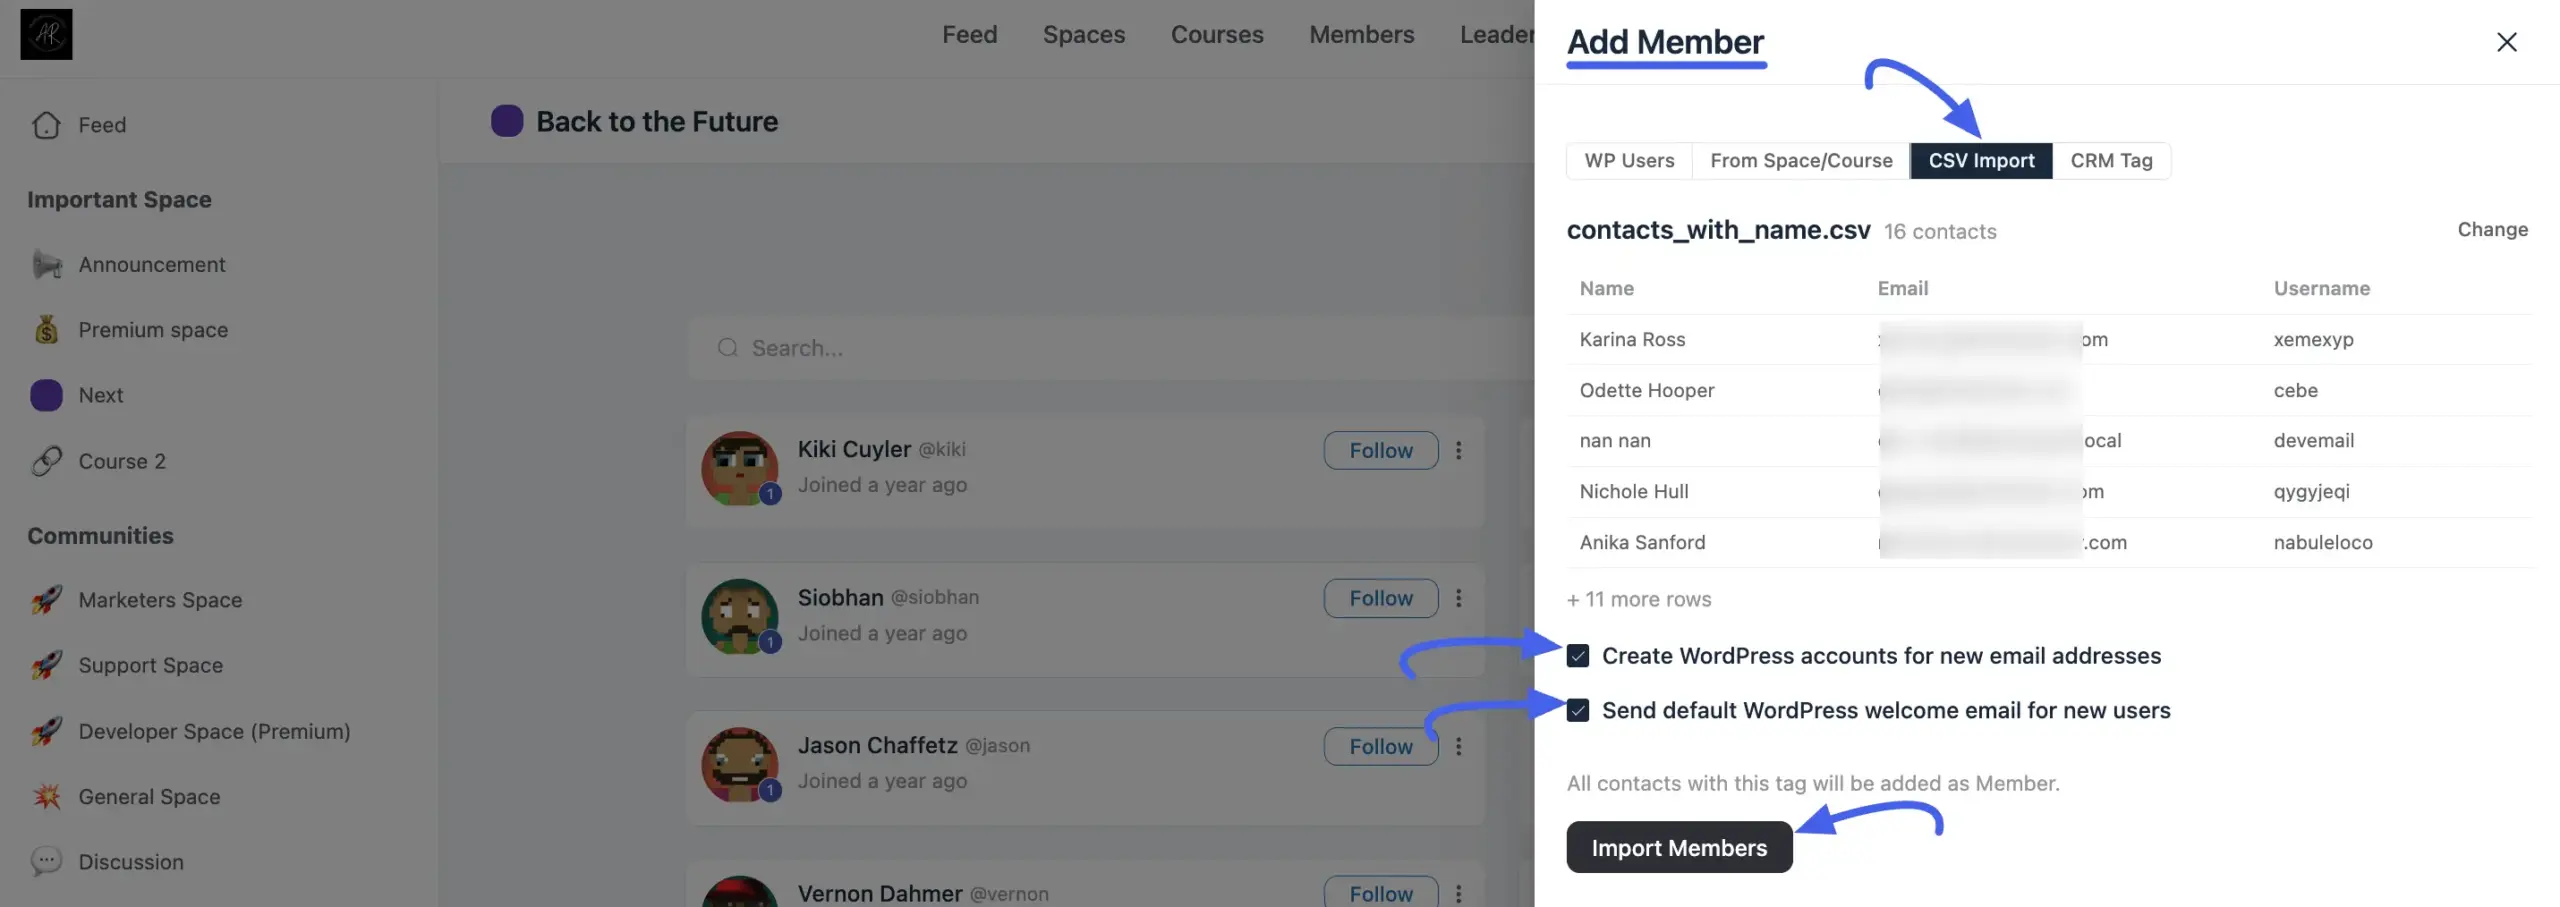
If you have an external directory of users you want to enroll (such as a spreadsheet exported from another platform), you can add them all simultaneously via a CSV upload.
Click the CSV Import tab at the top of the Add Member sliding panel.
Upload your file. Once processed, the panel displays the file name along with the total count of recognized contacts.
Review the data preview columns underneath to ensure they map correctly — Name, Email, and Username.
Configure your user account creation settings using the onboarding options:
- Create WordPress accounts for new email addresses: Check this box if these users do not yet have a profile on your WordPress site. FluentCommunity will securely generate an account for them.
- Send default WordPress welcome email for new users: Check this box to trigger the standard WordPress welcome email automatically, allowing new members to receive their system login credentials immediately.
Click the Import Members button at the bottom to complete the import queue.
Method D: CRM Tag (Integrate with FluentCRM)
If you use FluentCRM, you can automatically pull in contacts based on the tags they have in your CRM.
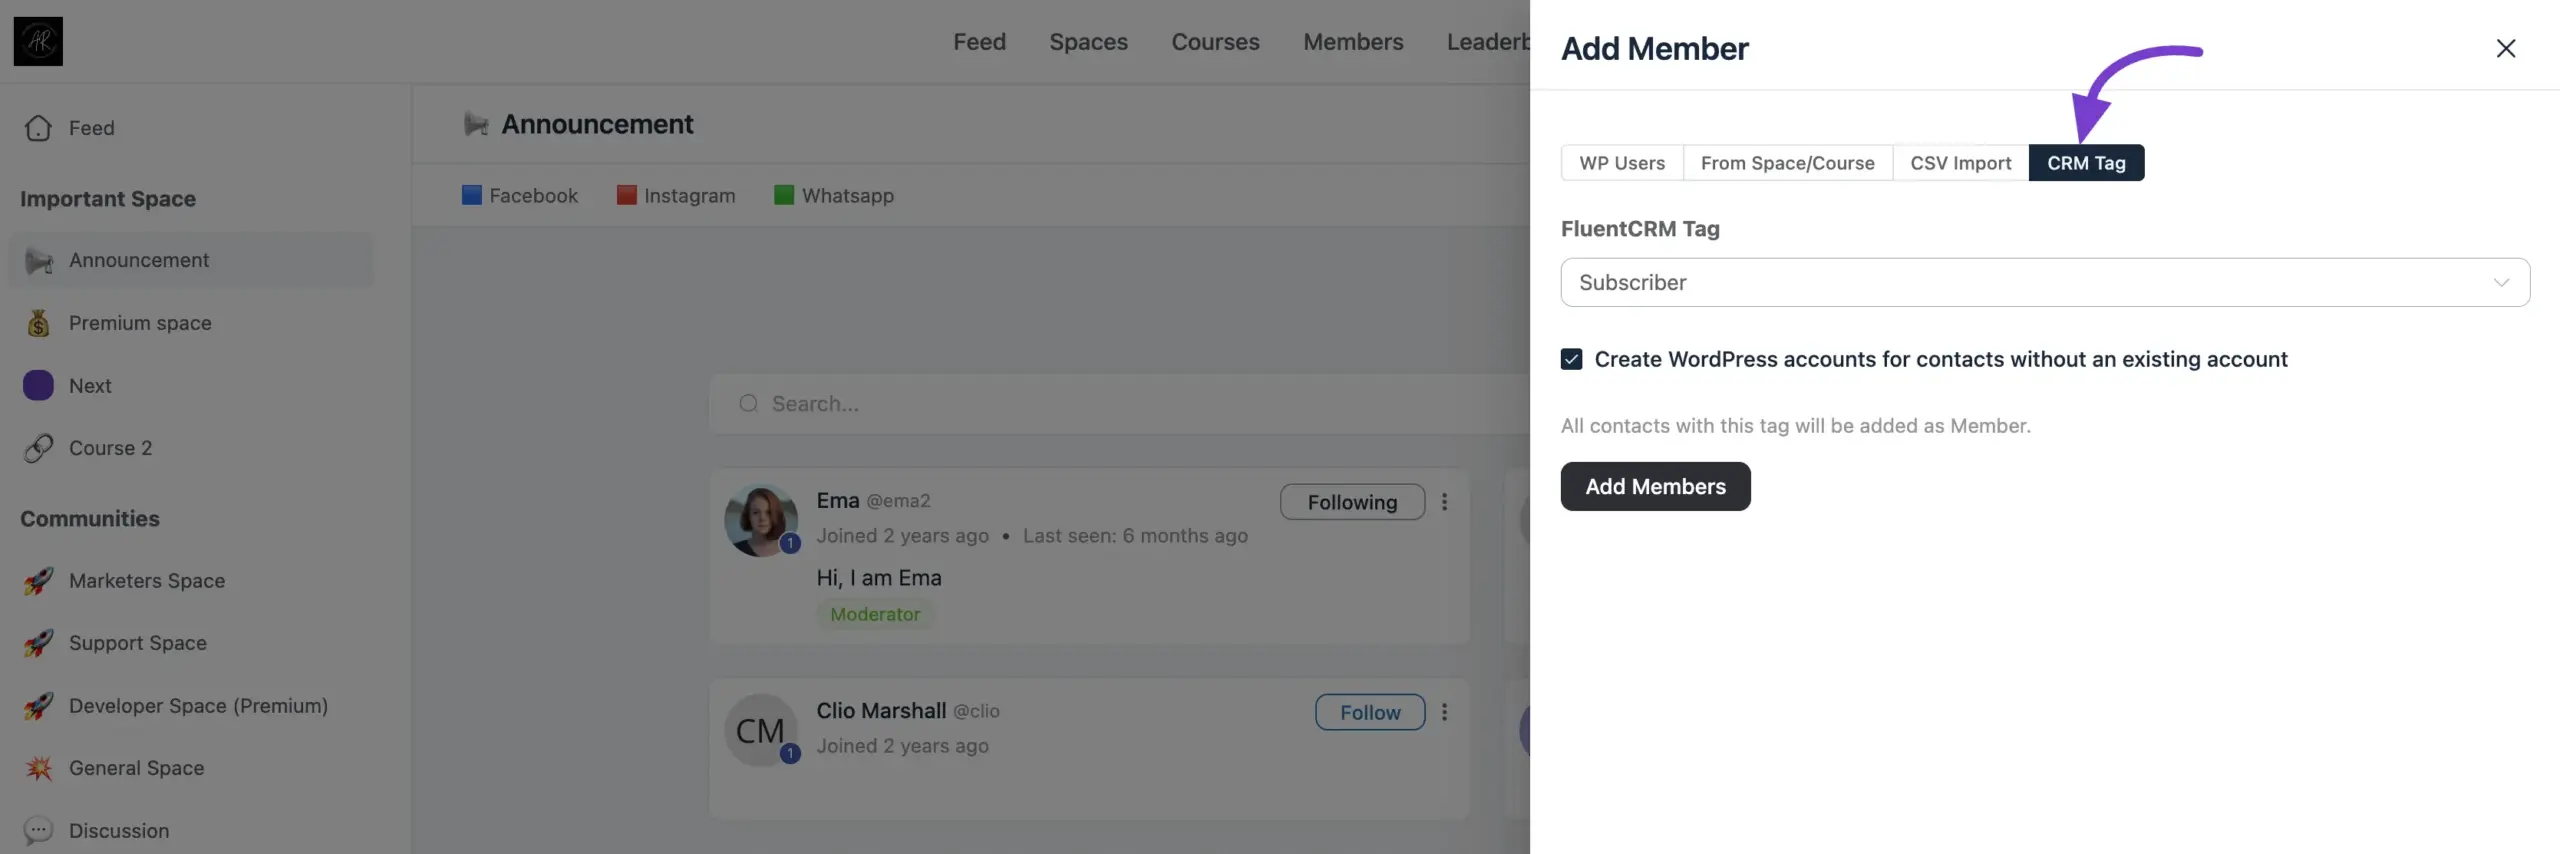
- Click the CRM Tag tab.
- Select the specific FluentCRM Tag from the dropdown menu (e.g., "Subscriber" or "VIP").
- If these contacts do not have user accounts on your website yet, check the box that says Create WordPress accounts for contacts without an existing account.
- Click Add Members.