

Appearance
Monetizing Your Spaces
FluentCommunity lets you turn any Space into a paid, members-only area. The idea is simple: you set a Space to Private, put a custom Lock Screen in front of it with a Call to Action button, and point that button at a payment form. Once someone pays, you grant them access. This guide walks you through the whole flow using Fluent Forms.
Use Case: You run a coaching business and want to charge a one-time fee for access to your private "Inner Circle" Space. Non-members see a branded Lock Screen with a "Join Now" button that sends them to a Fluent Forms payment form, and paying customers are enrolled automatically.
Step 1: Set Up Your Space
Create or Edit a Space
Start with a new Space or an existing one. If you need a hand creating one, see Creating a New Space.
Set the Space to Private
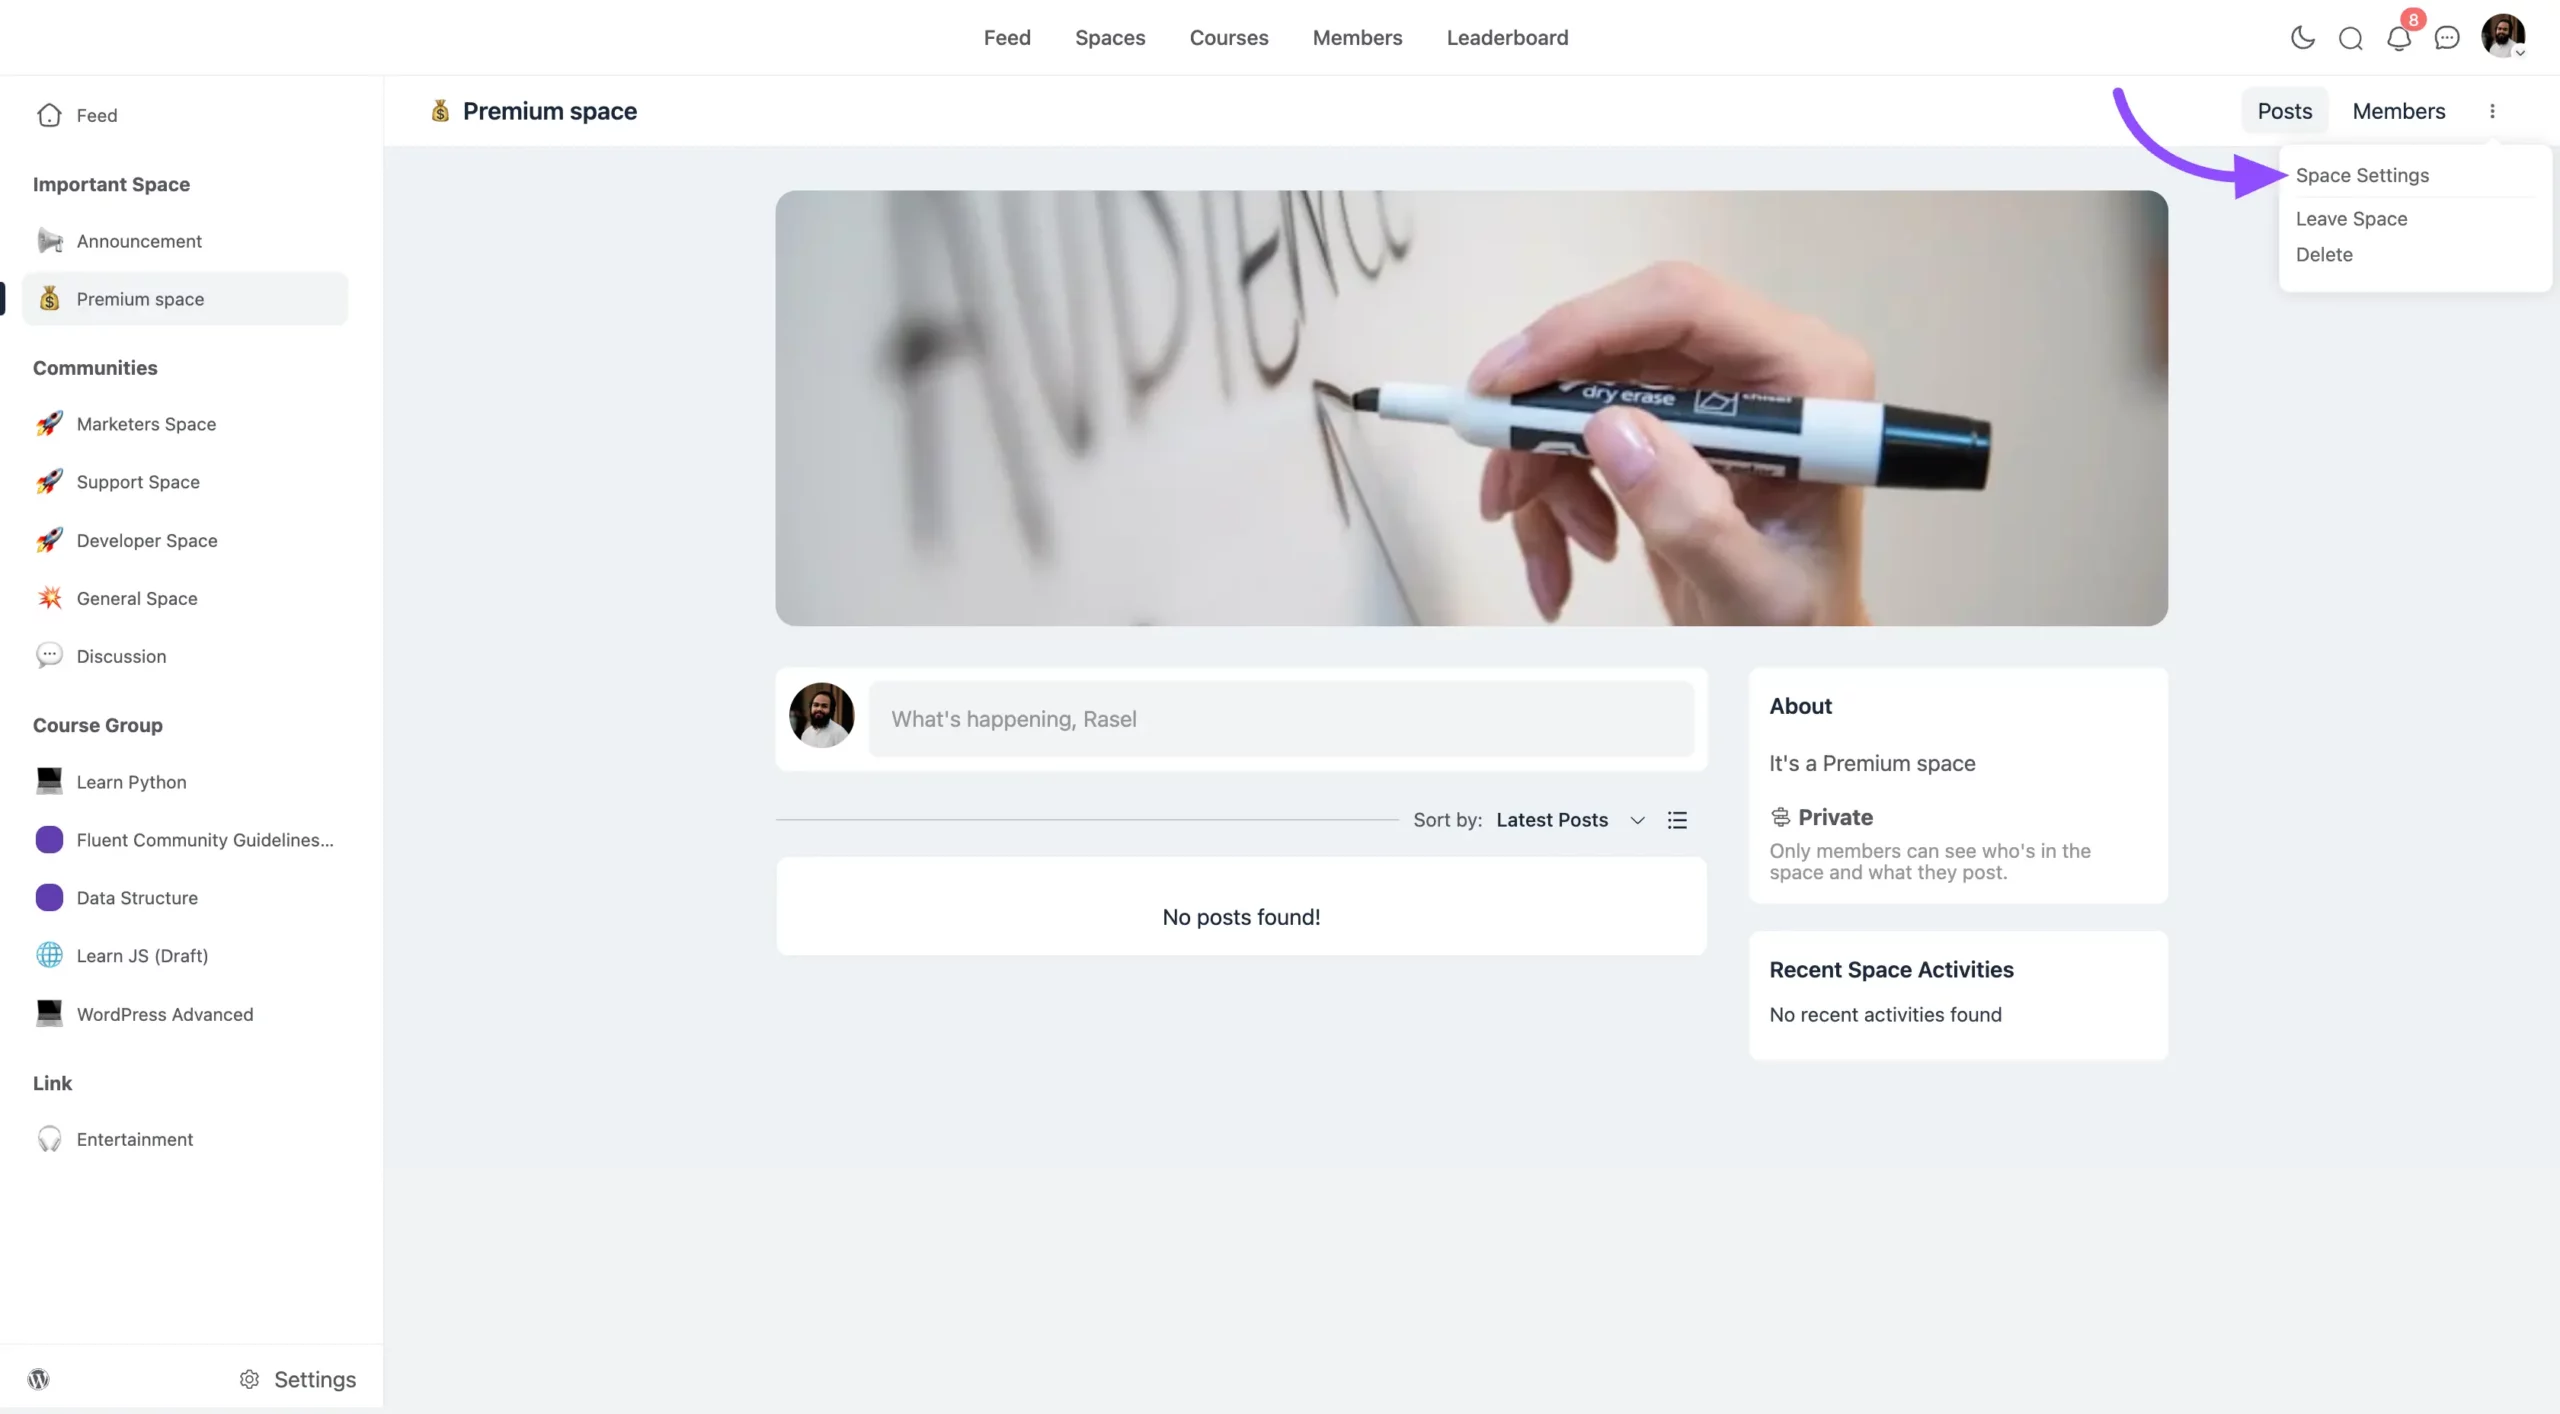
Open the Space you want to monetize, click the three-dot button in the top-right corner, and choose Space Settings.
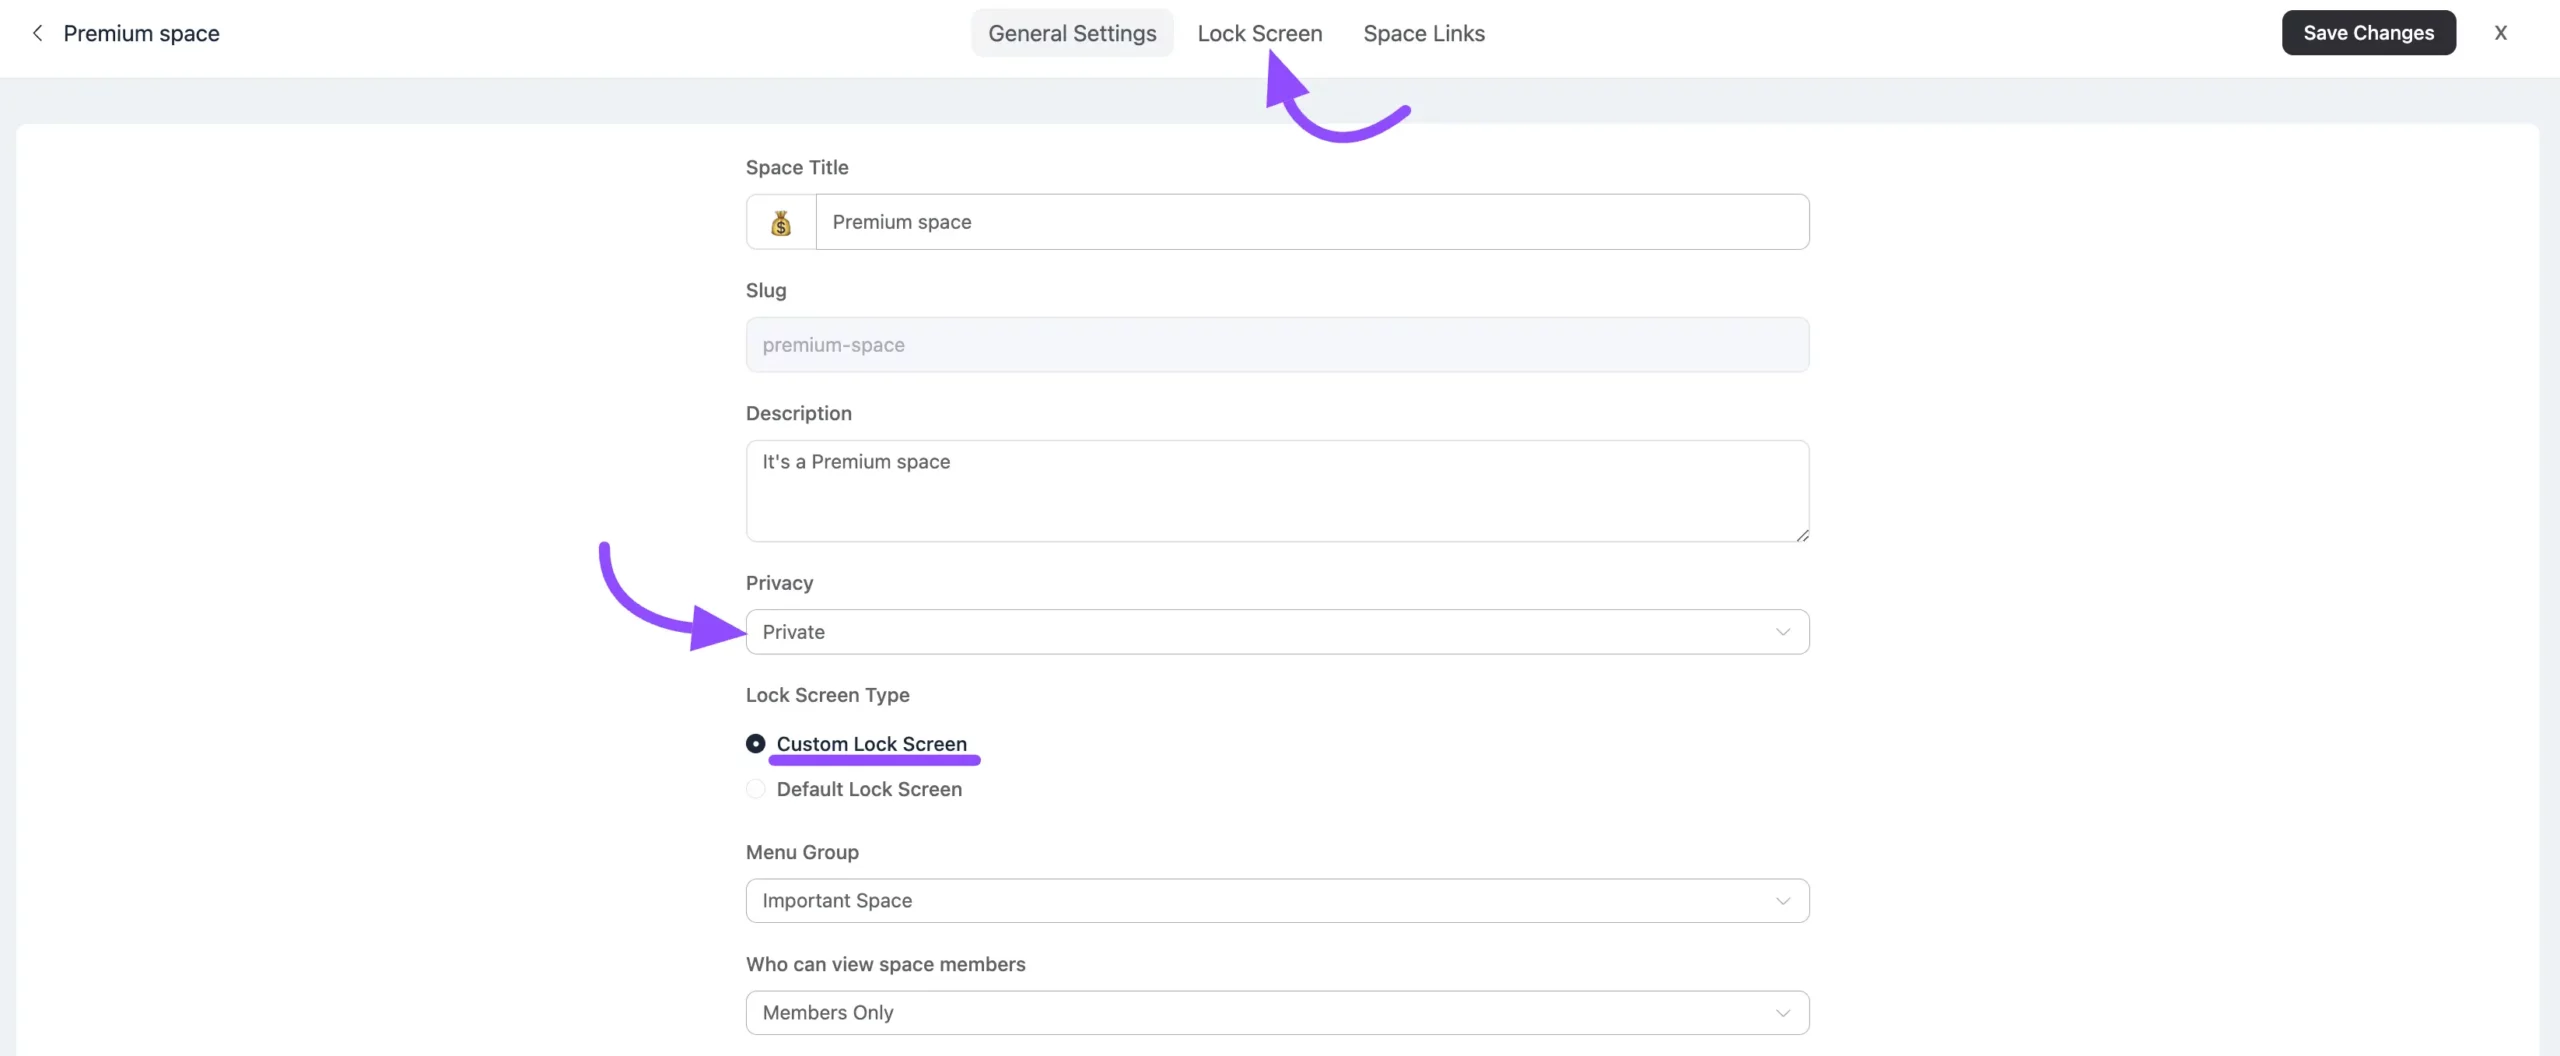
Set Privacy to Private and select Custom Lock Screen. The Custom Lock Screen option only appears once privacy is set to Private. With that in place, click the Lock Screen option in the top menu.
Enable the Lock Screen
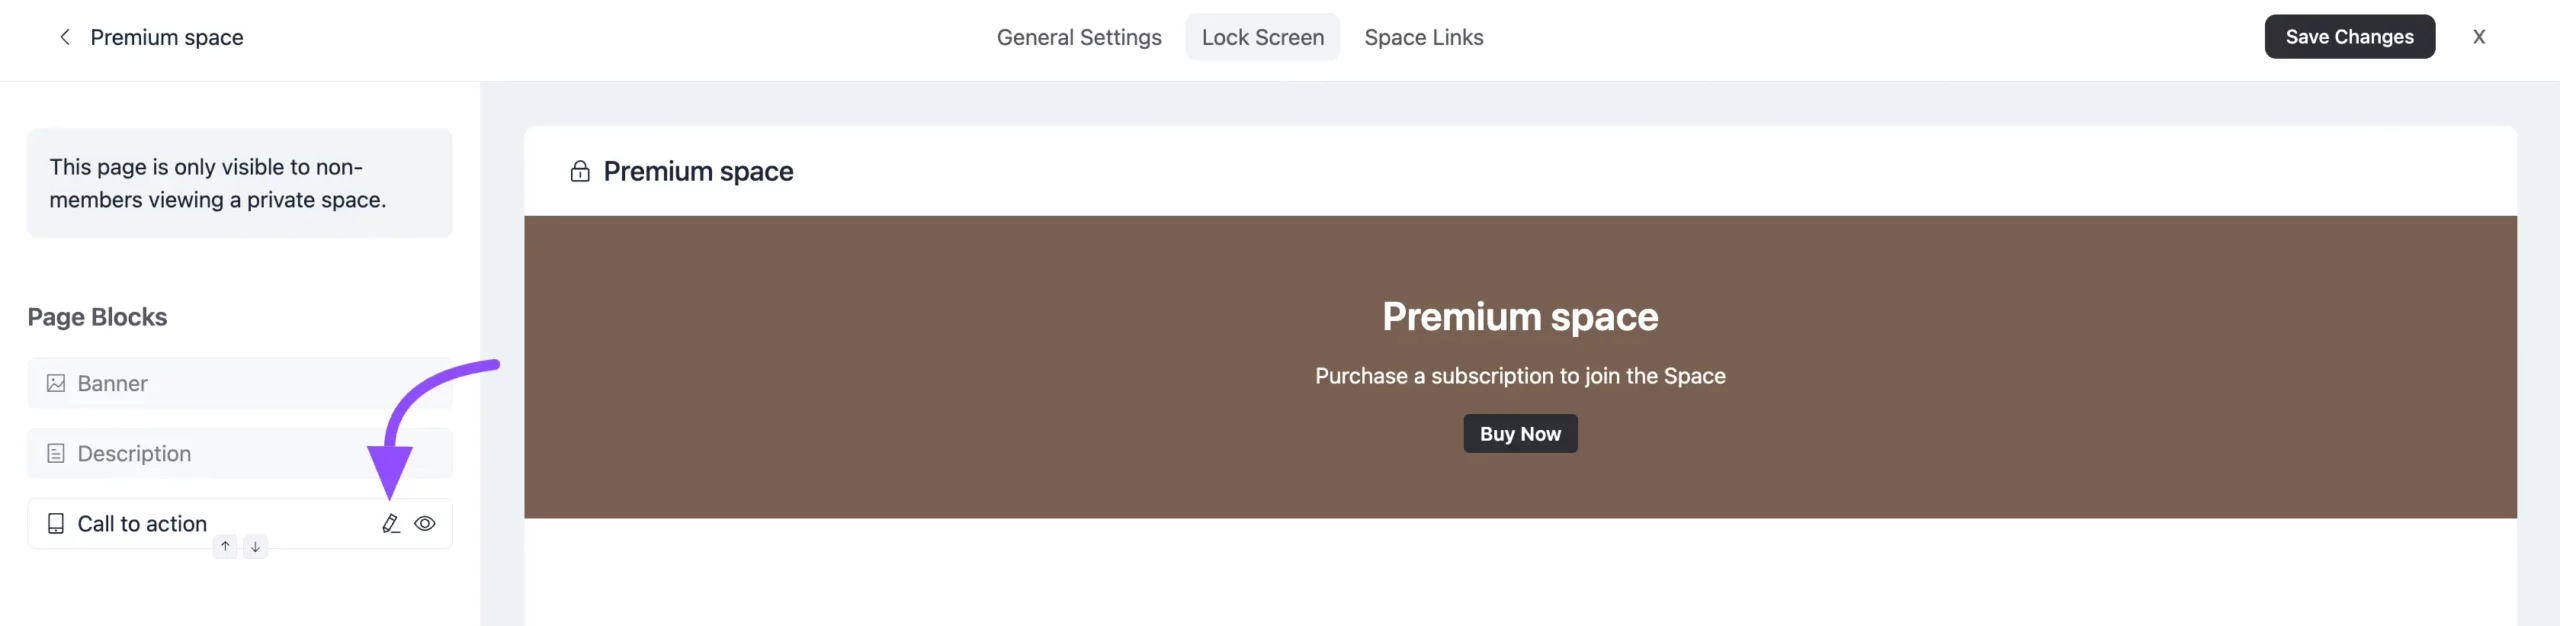
On the Lock Screen editor, design what non-members will see and add a Call to Action (CTA) button. For layout and design tips, see Space Settings & Privacy.
Step 2: Add a Payment Option with Fluent Forms
✨ Note: You'll need Fluent Forms Pro to complete these steps.
Create a Payment Form
In Fluent Forms, create a new payment form with the fields you need plus a Payment Field set to your Space price. Save the form when you're done.
Configure the FluentCommunity Integration Feed
✨ Note: To use the FluentCommunity Integration Feed, first activate the FluentCommunity module in Fluent Forms.
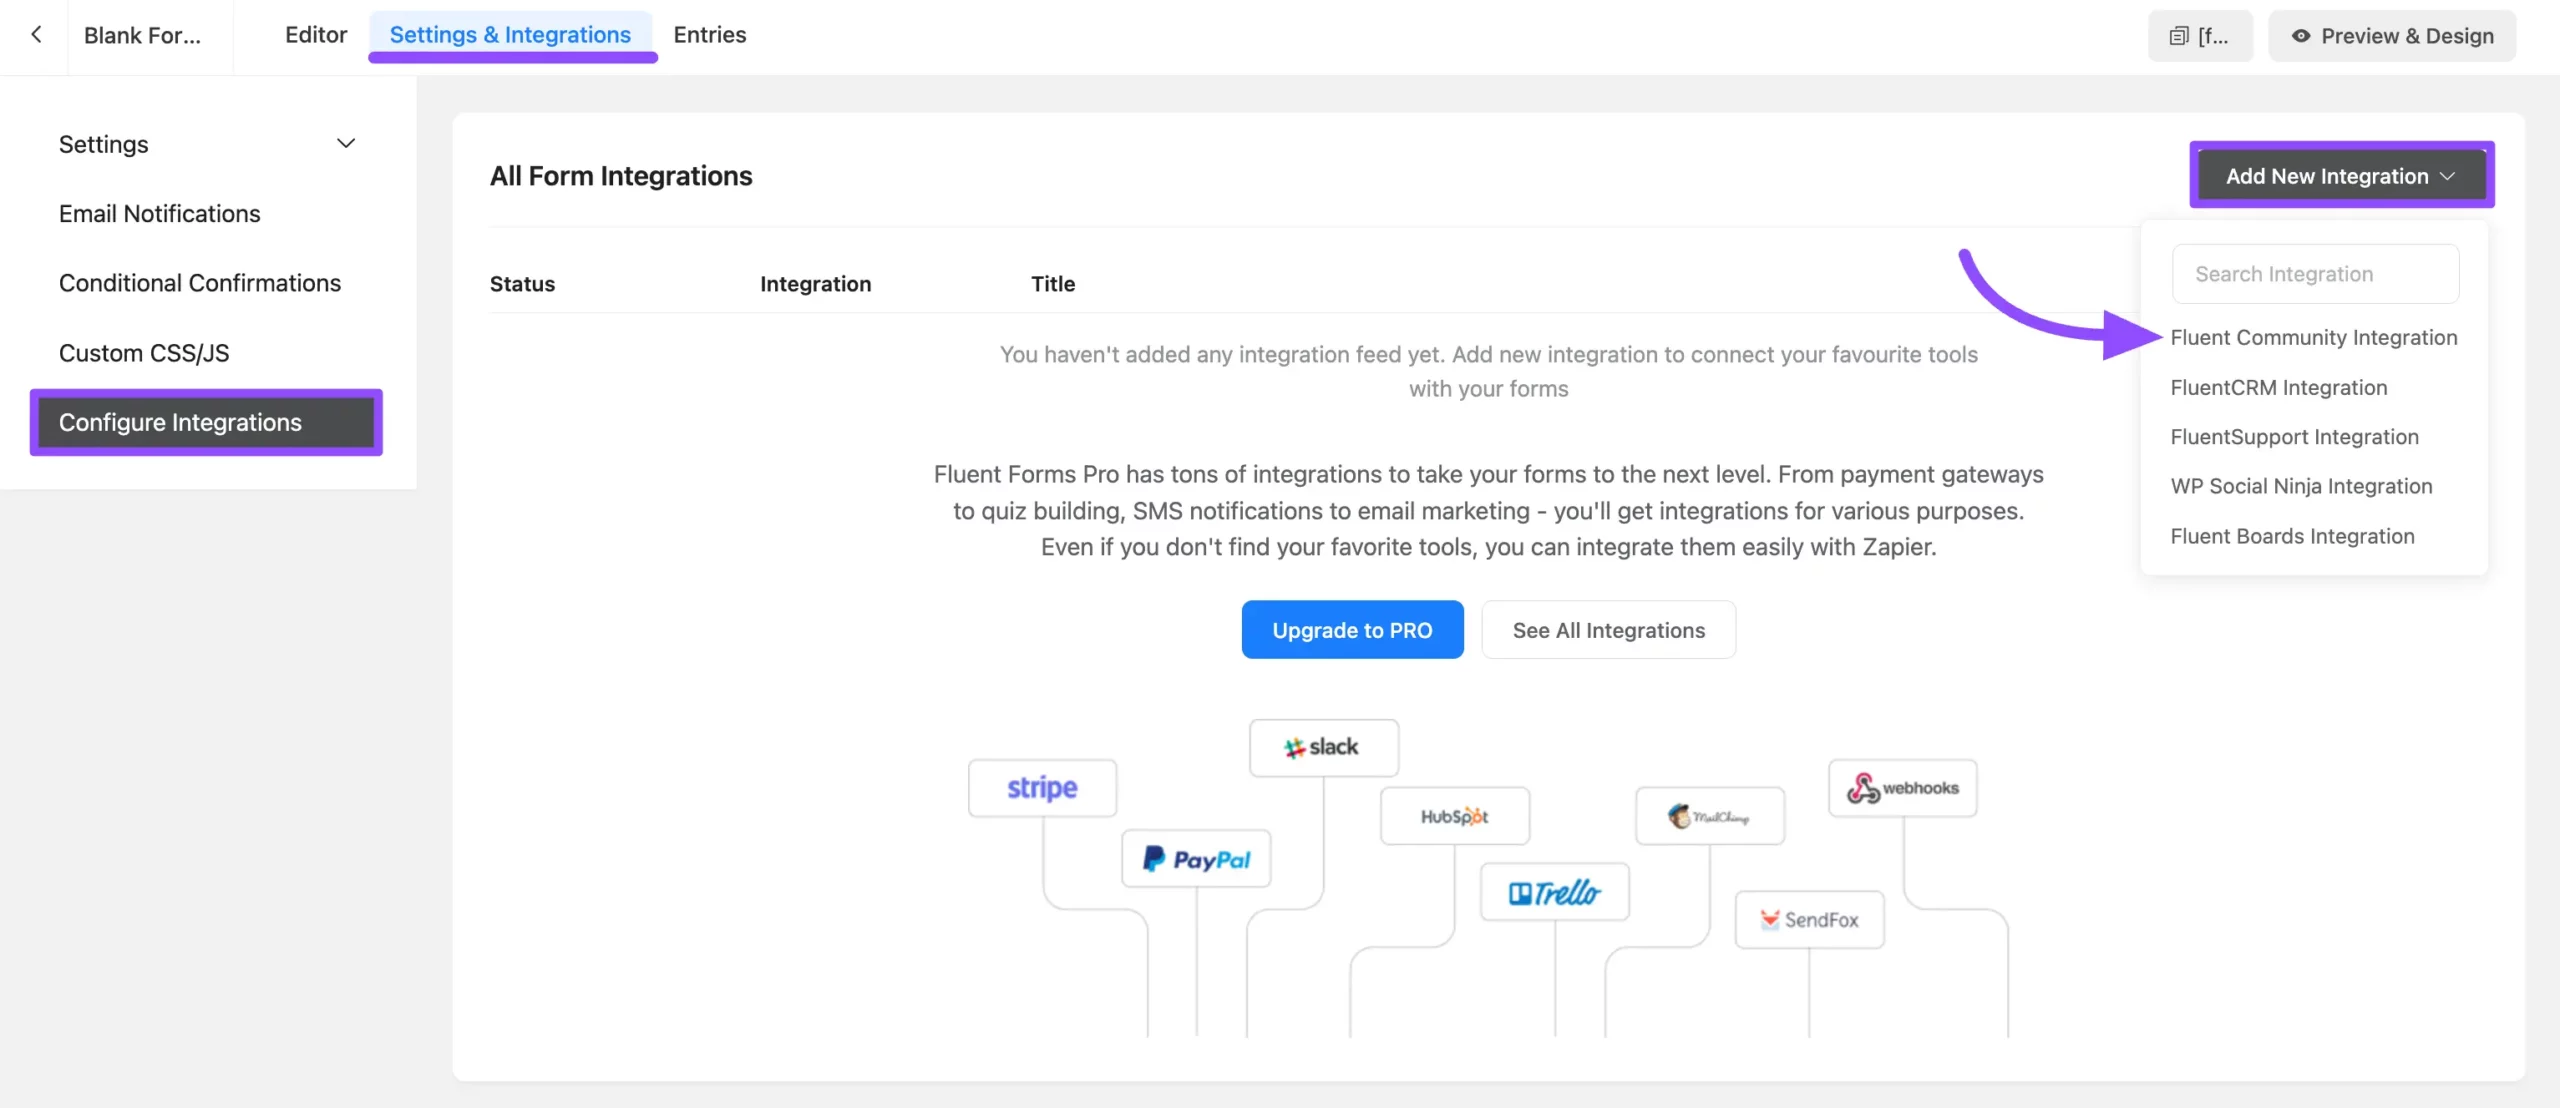
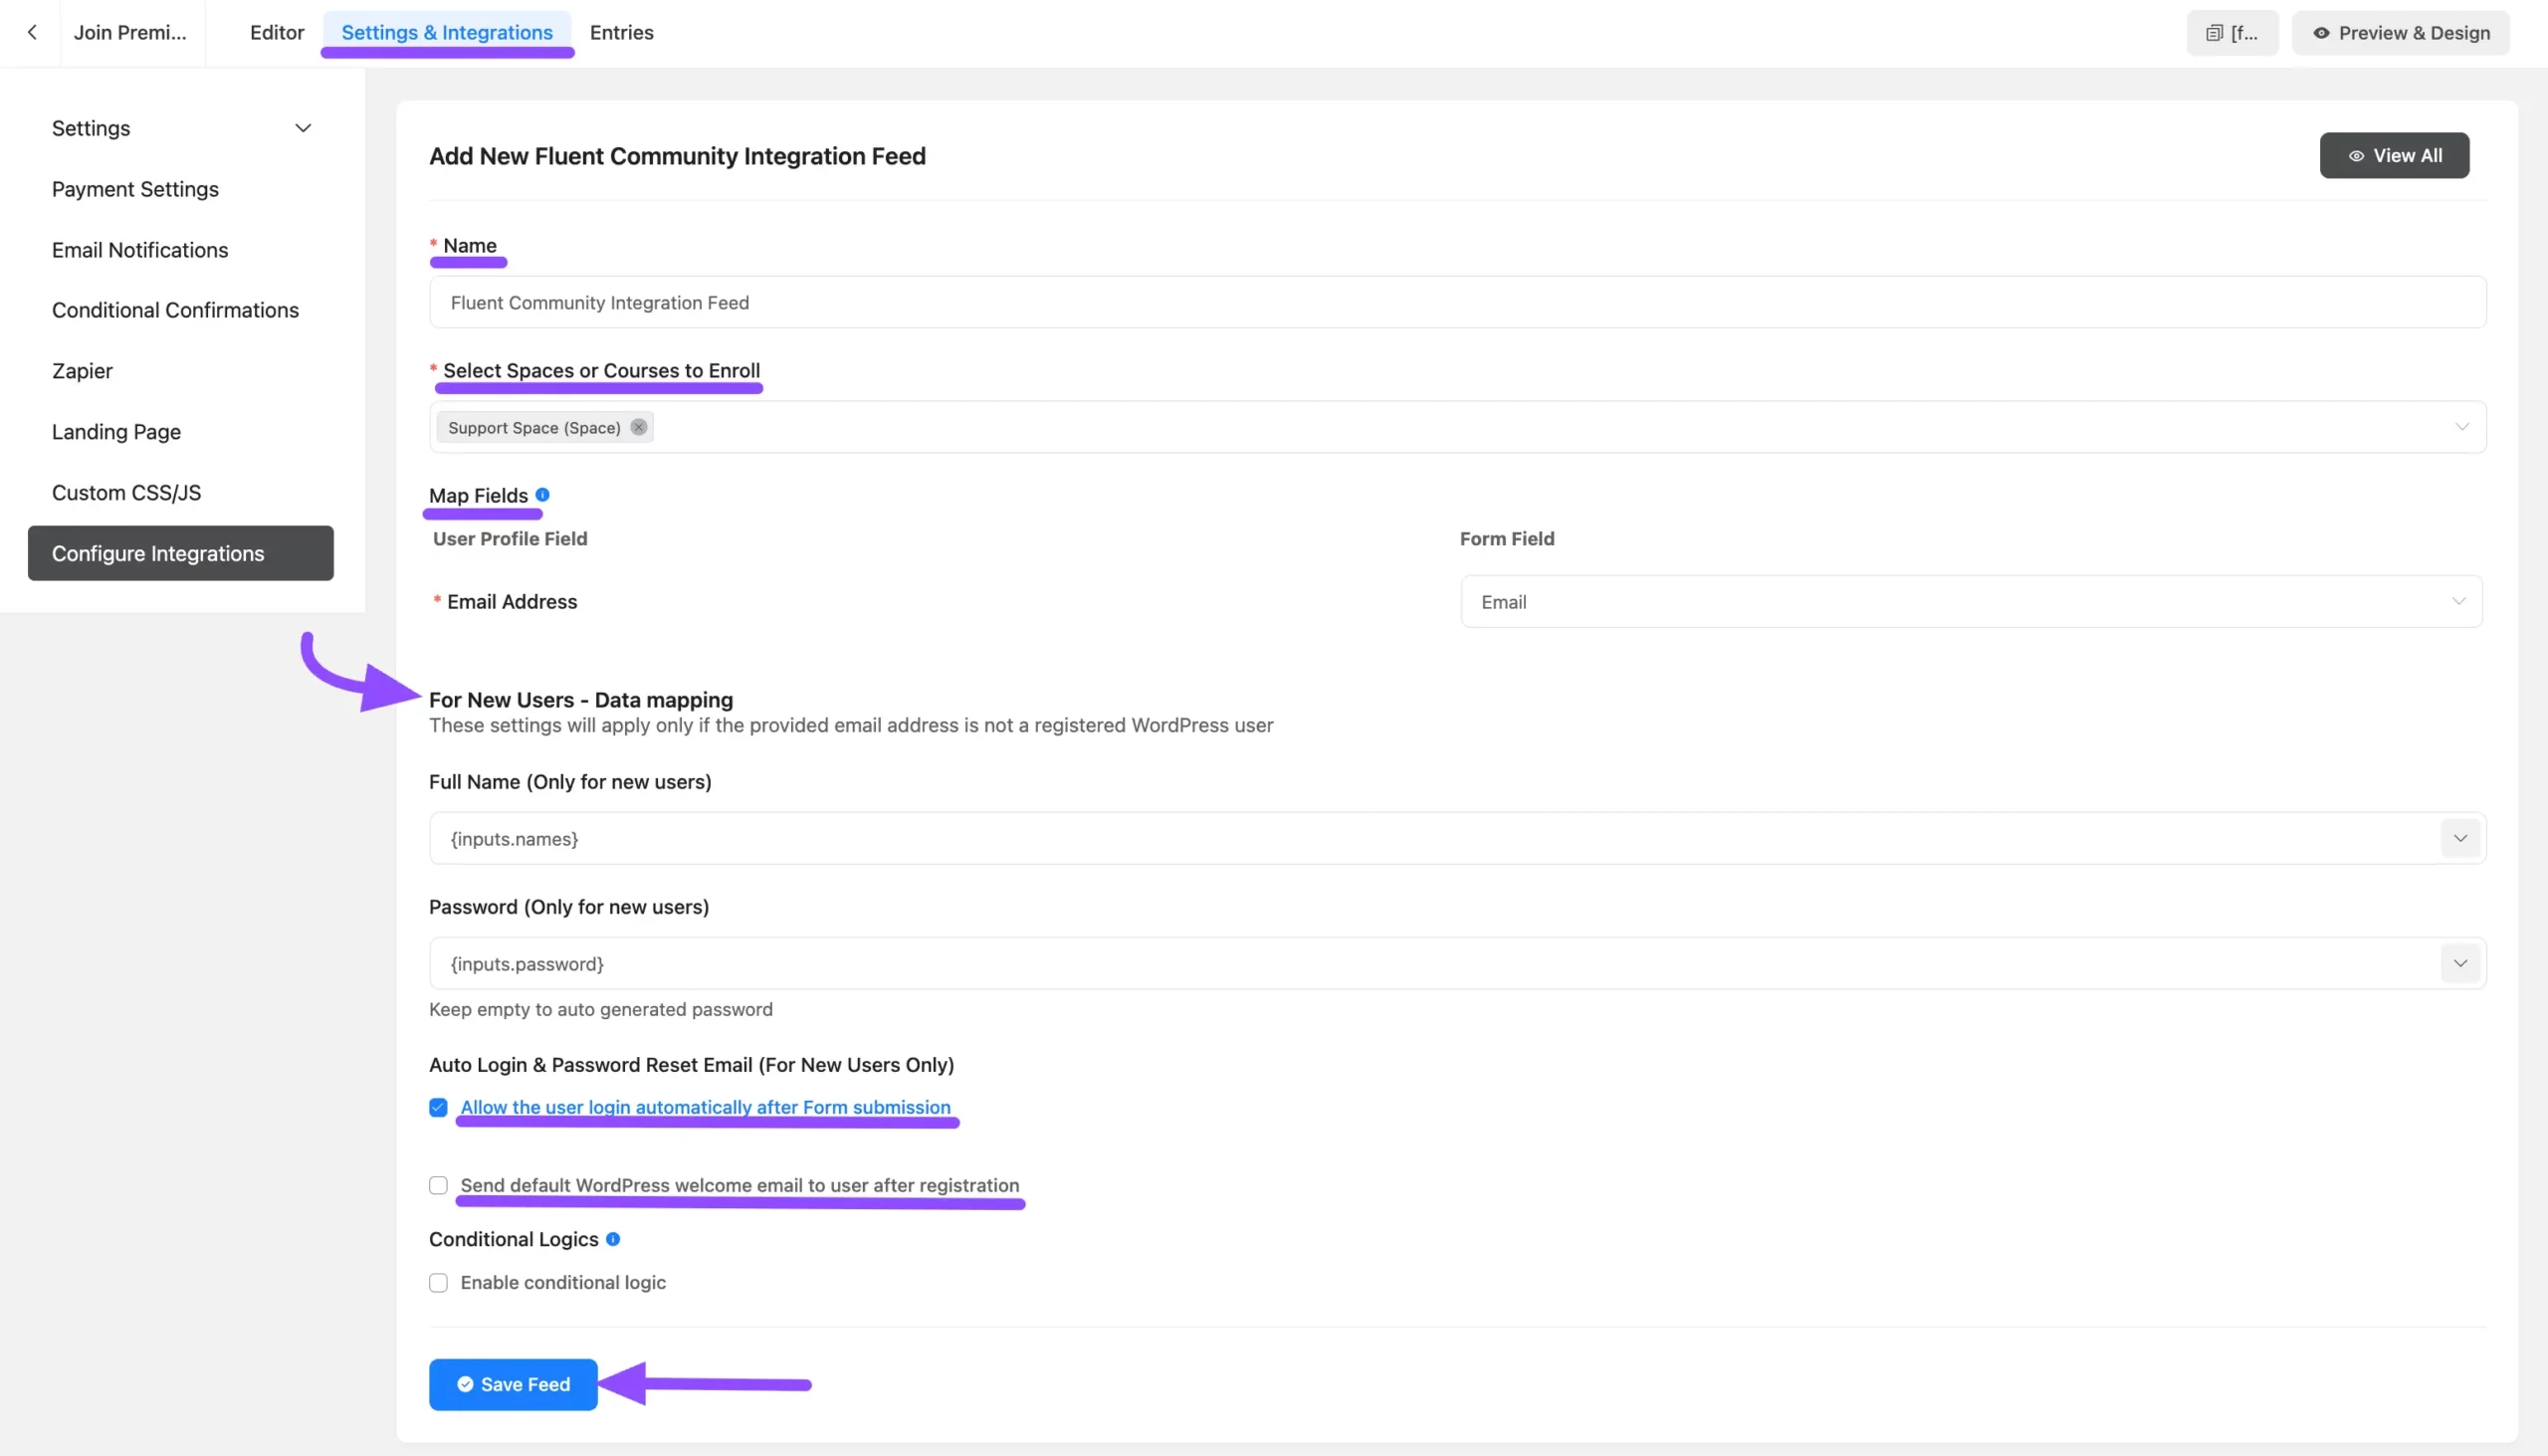
Open the form's Settings & Integration tab, choose Configure Integration from the left sidebar, click Add New Integration, and select FluentCommunity Integration Feed.
Now map the fields for your feed:
- Name: A label for the feed so you can identify it later.
- Select Space or Course to Enroll: Pick the Space members should be added to. Both Secret Spaces and Secret Courses appear in this list as well.
Map Fields
- Email Address: Select the email field to map users' email addresses.
For New Users Outside WordPress
- Full Name: Map the name field for new users. Shortcodes are supported here.
- Password: Map a password field so users can set a login password for your community. Shortcodes work here too.
Additional Options
- Allow the user to login automatically after form submission: Logs users in immediately after they submit the form.
- Send Welcome Emails: Sends WordPress's default welcome email to new users after registration.
- Conditional Logic: Apply conditions to control when this feed runs, for more targeted enrollment.
Click Save Feed to store your configuration.
Step 3: Publish Your Payment Form
You can share the form using either its shortcode or a dedicated landing page URL. This guide uses the landing page option.
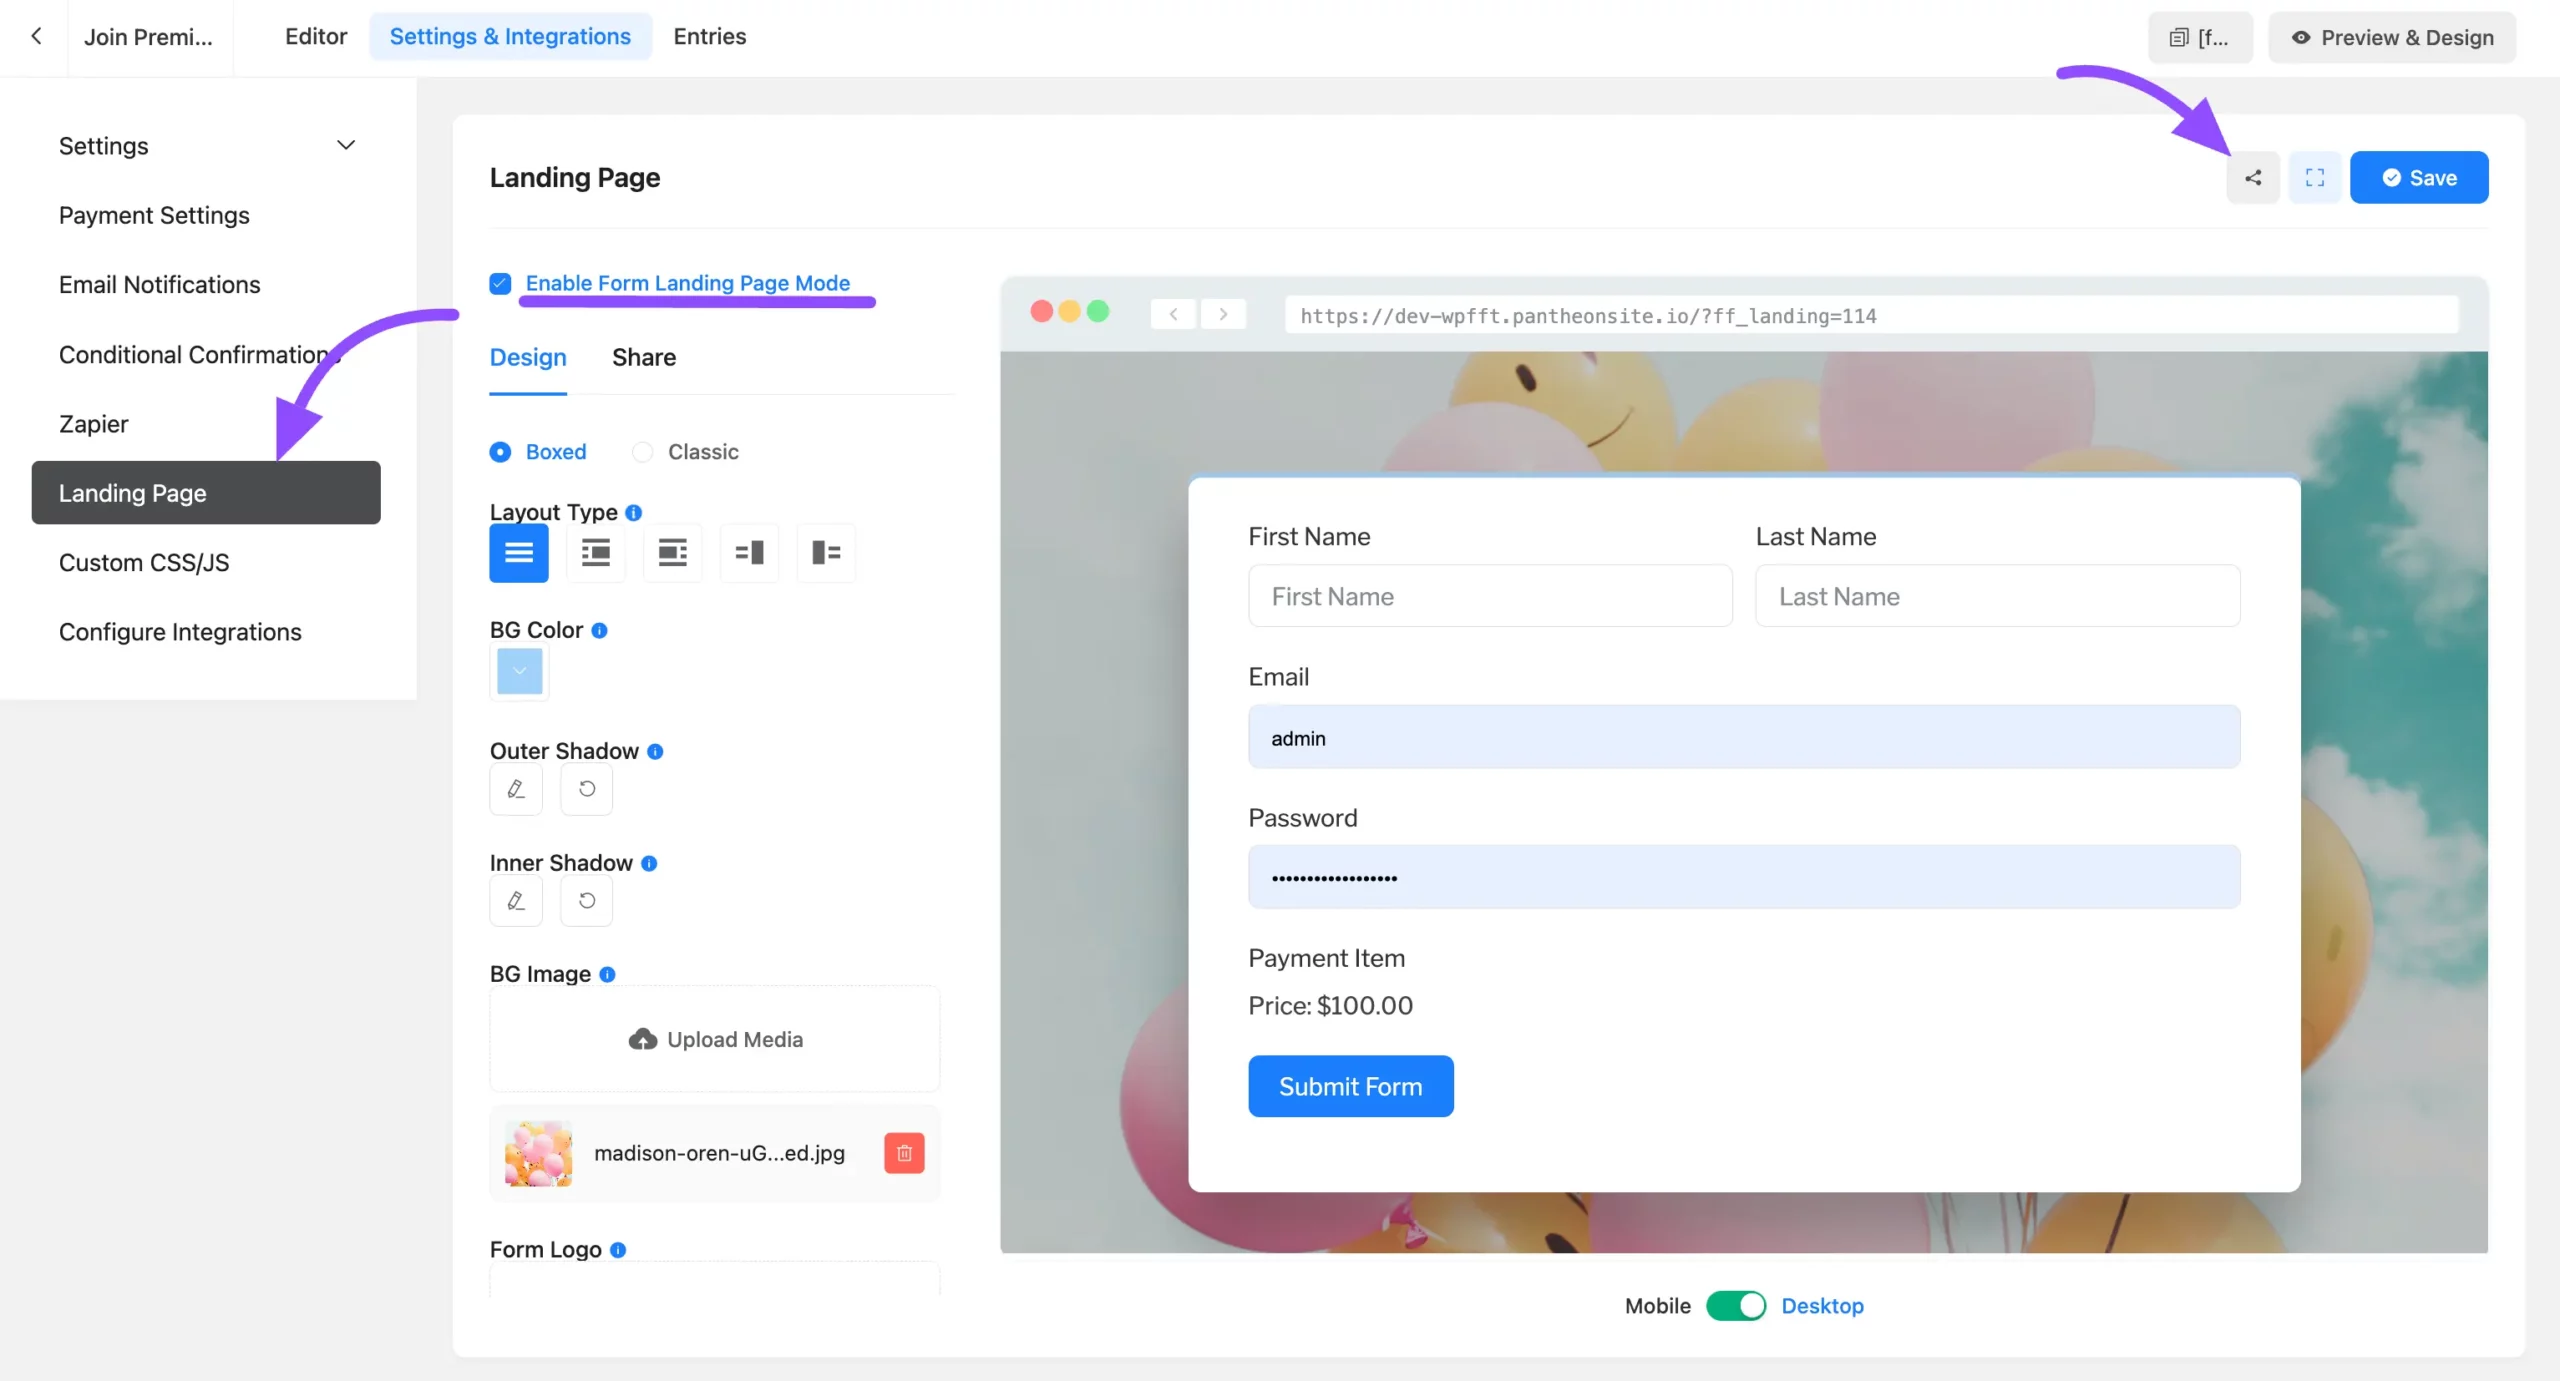
In the form's Settings & Integration section, select Landing Page from the left sidebar and check Enable Form Landing Page Mode. Click Save, then Share to reveal the landing page URL, and copy it. For deeper customization, see the Fluent Forms landing page documentation.
✨ Note: You can also monetize a Space with a WooCommerce product and use a FluentCRM automation funnel to add members automatically after payment.
Step 4: Link the Form to the Lock Screen
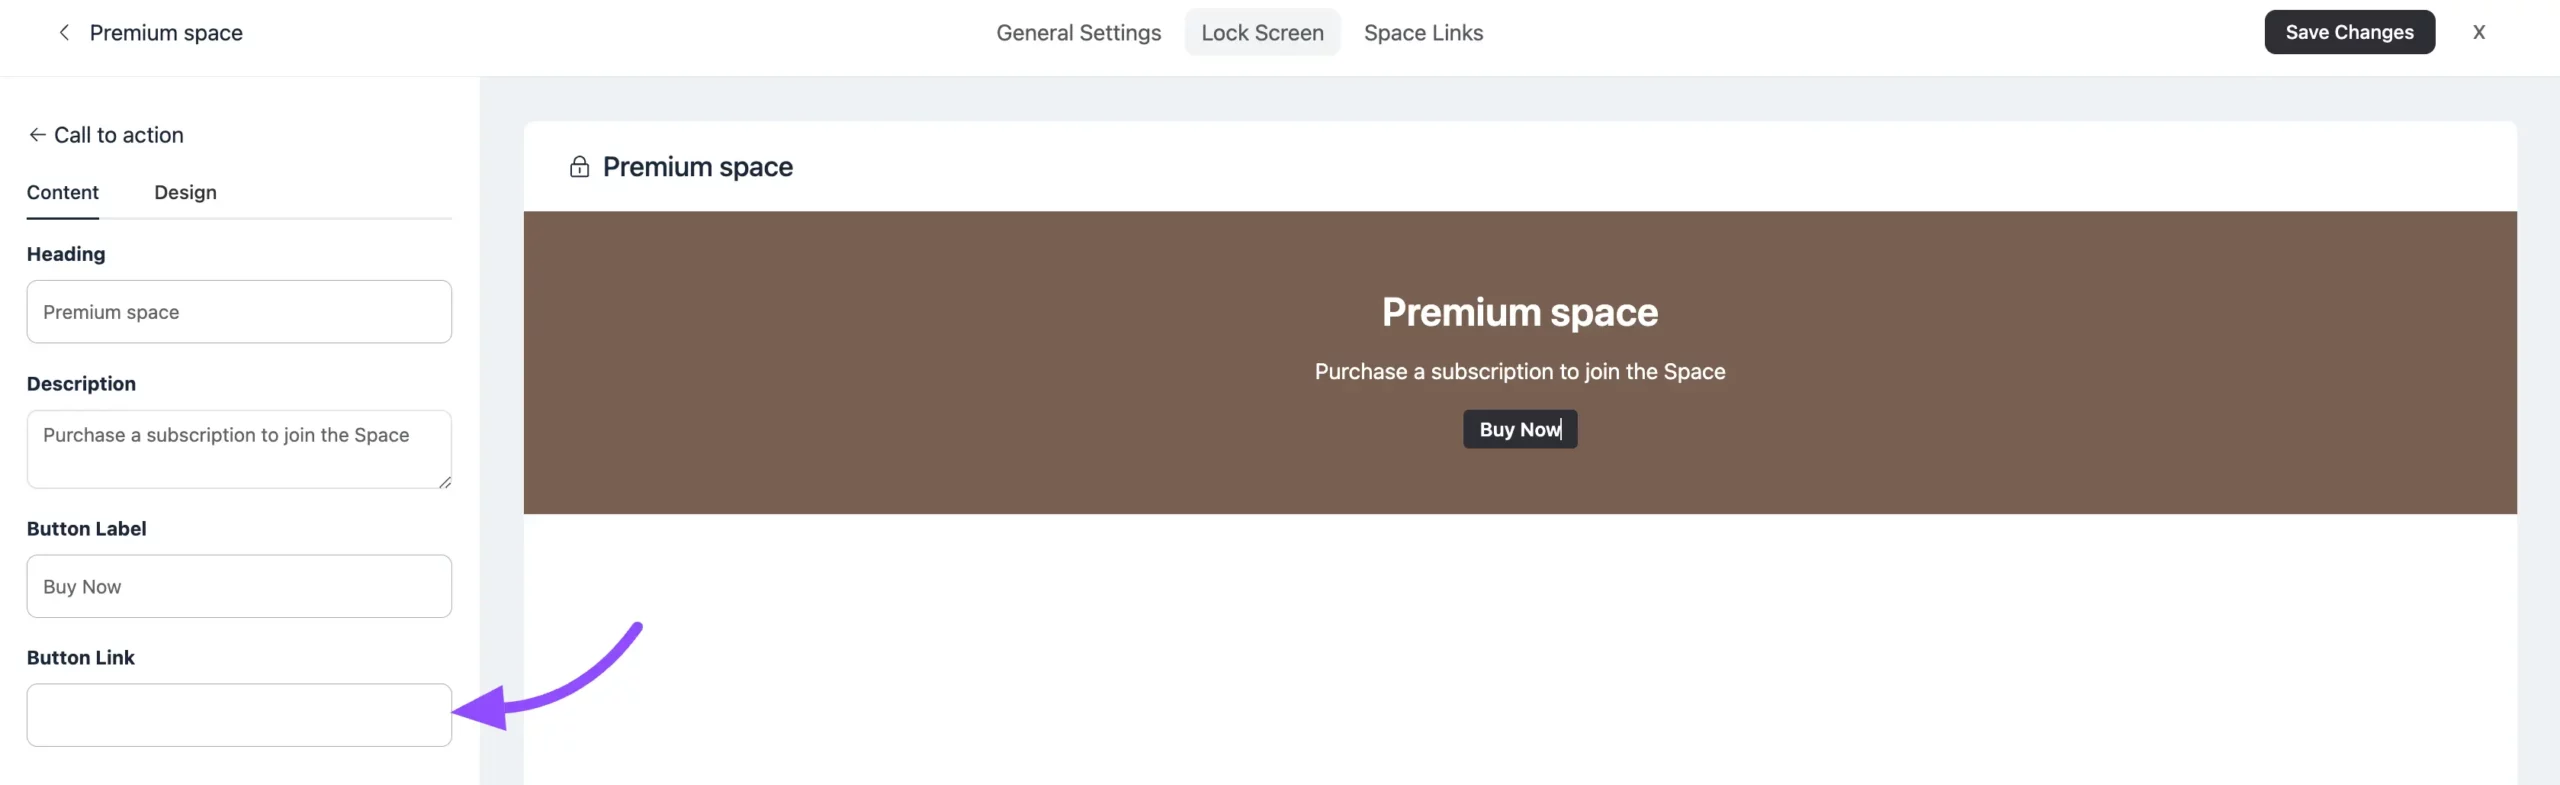
Return to your Lock Screen's CTA button and paste the landing page URL into the Button Link field.
Start Selling Your Space
That's it — your Space is ready to sell. When visitors land on it, they'll see the Lock Screen with your CTA button pointing to the payment form. Once they complete payment, you can grant them access, and your Fluent Forms feed handles enrollment for you.