Appearance
Incoming Webhook
FluentCommunity's Incoming Webhook feature lets you connect external systems or applications to send real-time data into the platform. You can automate workflows, trigger actions, and sync data from third-party services like CRMs, email tools, and more.
Use Case: When a customer completes a purchase in an external tool, you can send their details to FluentCommunity via an incoming webhook to automatically add them to a specific Space or Course.
This guide walks you through setting up and using Incoming Webhooks in FluentCommunity.
Accessing the Webhook Settings
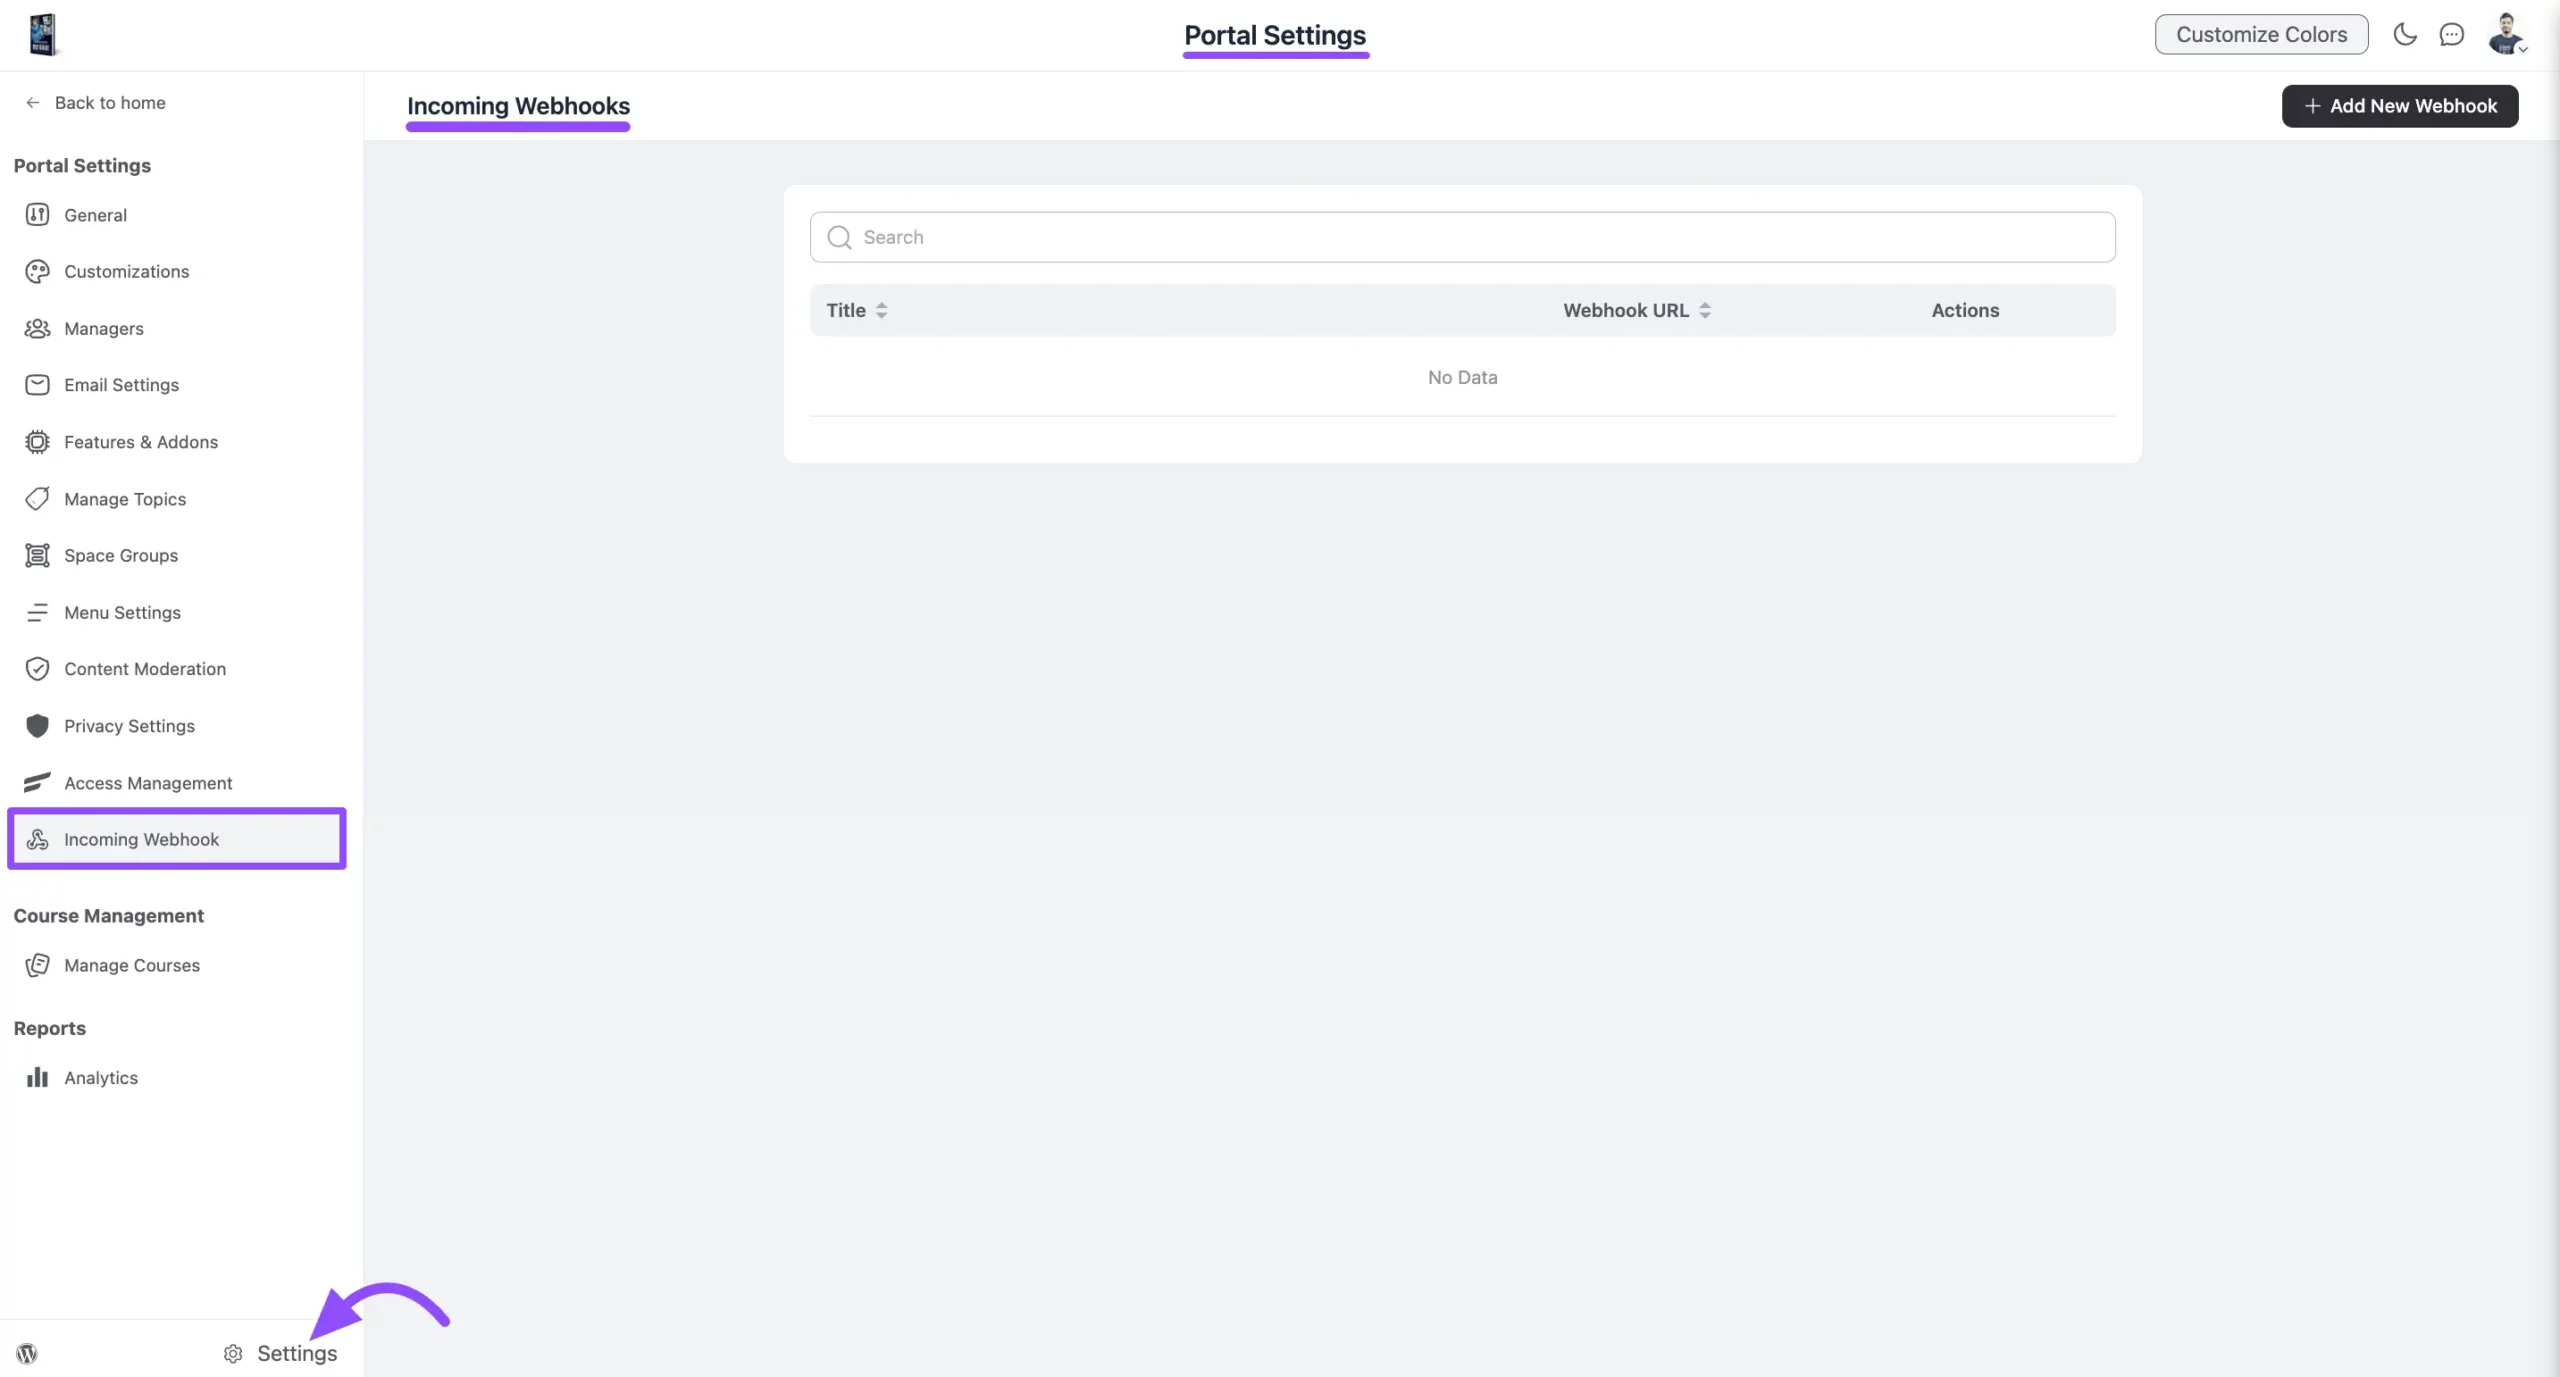
To access the webhook settings, log in to your WordPress Dashboard and navigate to the FluentCommunity portal from the sidebar.
Then, click the Settings button on the bottom left. Next, under Portal Settings, select Incoming Webhook.
Once you're there, you'll be ready to create and manage your webhooks.
Creating a New Webhook
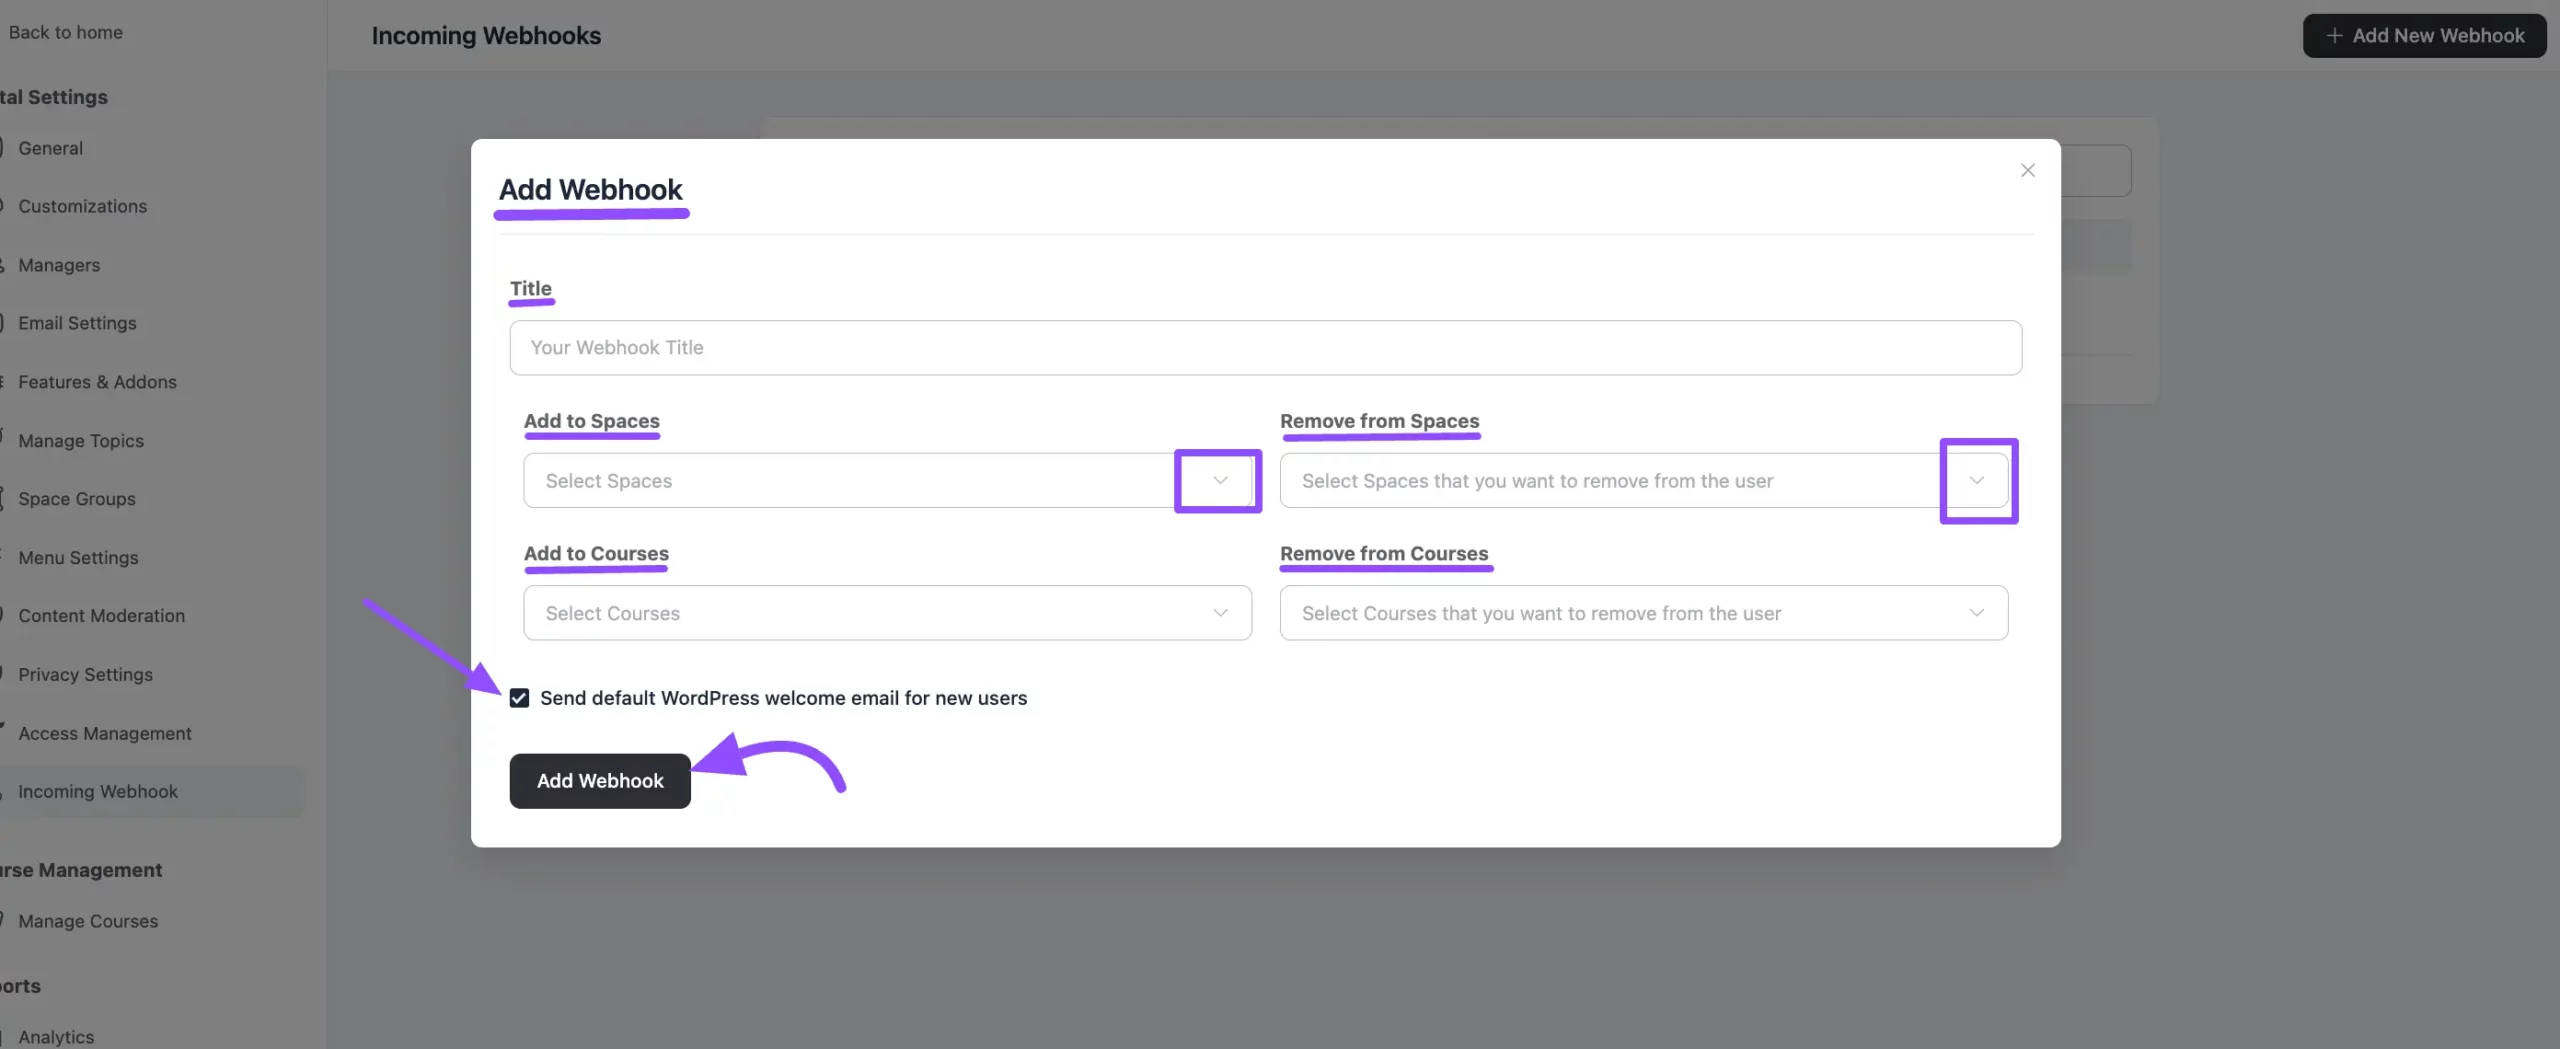
To create a new webhook, click the Add New Webhook button. A pop-up will appear where you need to enter the details.
- Title: Give your webhook a unique title.
- Add to Space: Choose one or multiple Spaces from the dropdown menu to which new users will be added.
- Remove from Space: Select the Spaces you want to remove the user from when the webhook is received.
- Add to Courses: Select Courses that will be added to the user's list upon receiving the webhook.
- Remove from Courses: From the dropdown menu, select the Courses you want to remove from the user's list when the webhook is received.
- Send default WordPress welcome email for new users: Check this box to send the default WordPress welcome email to newly created users.
Once you have added the essential details, click the Add Webhook button to activate it.
Using the Webhook URL
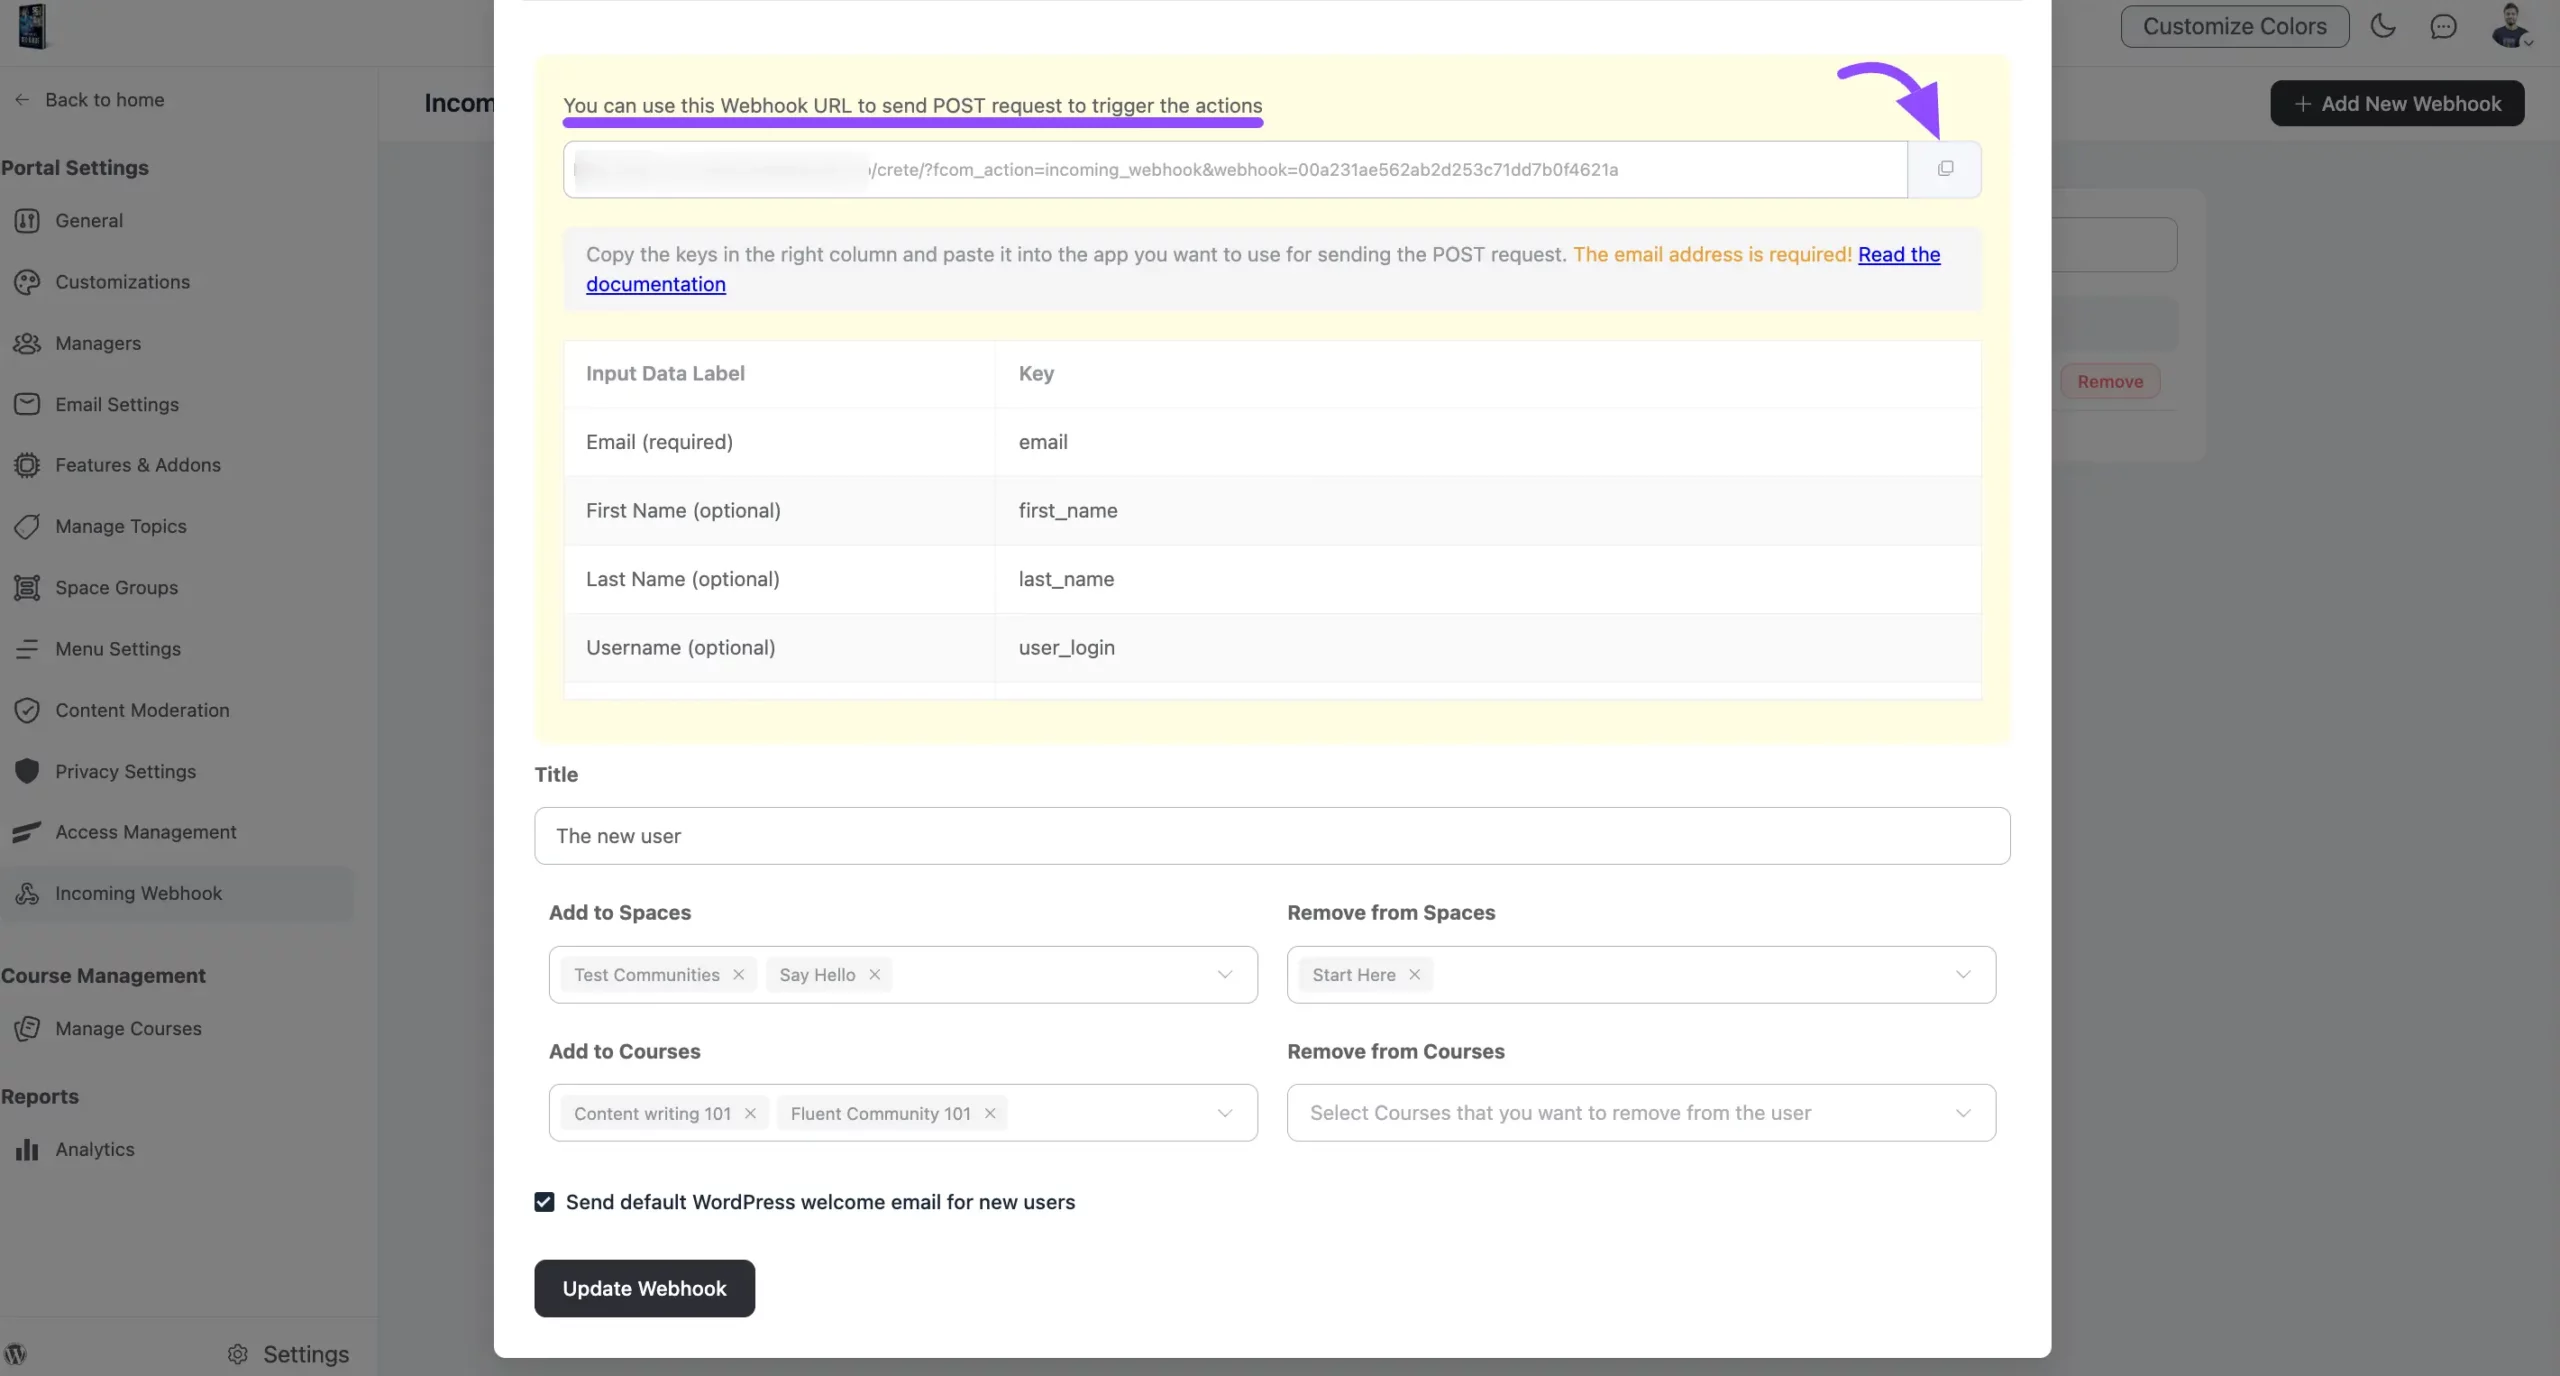
Once your webhook is created, a Webhook URL will be generated. Use this URL to send payload data from external applications to your FluentCommunity system.
This allows seamless data transfer when:
- A new user signs up
- An existing user logs in
- Any automated action is triggered
Developer Reference
For details on sending payload data via POST requests or as form data, see the Incoming Webhook API documentation.
Managing Your Webhook
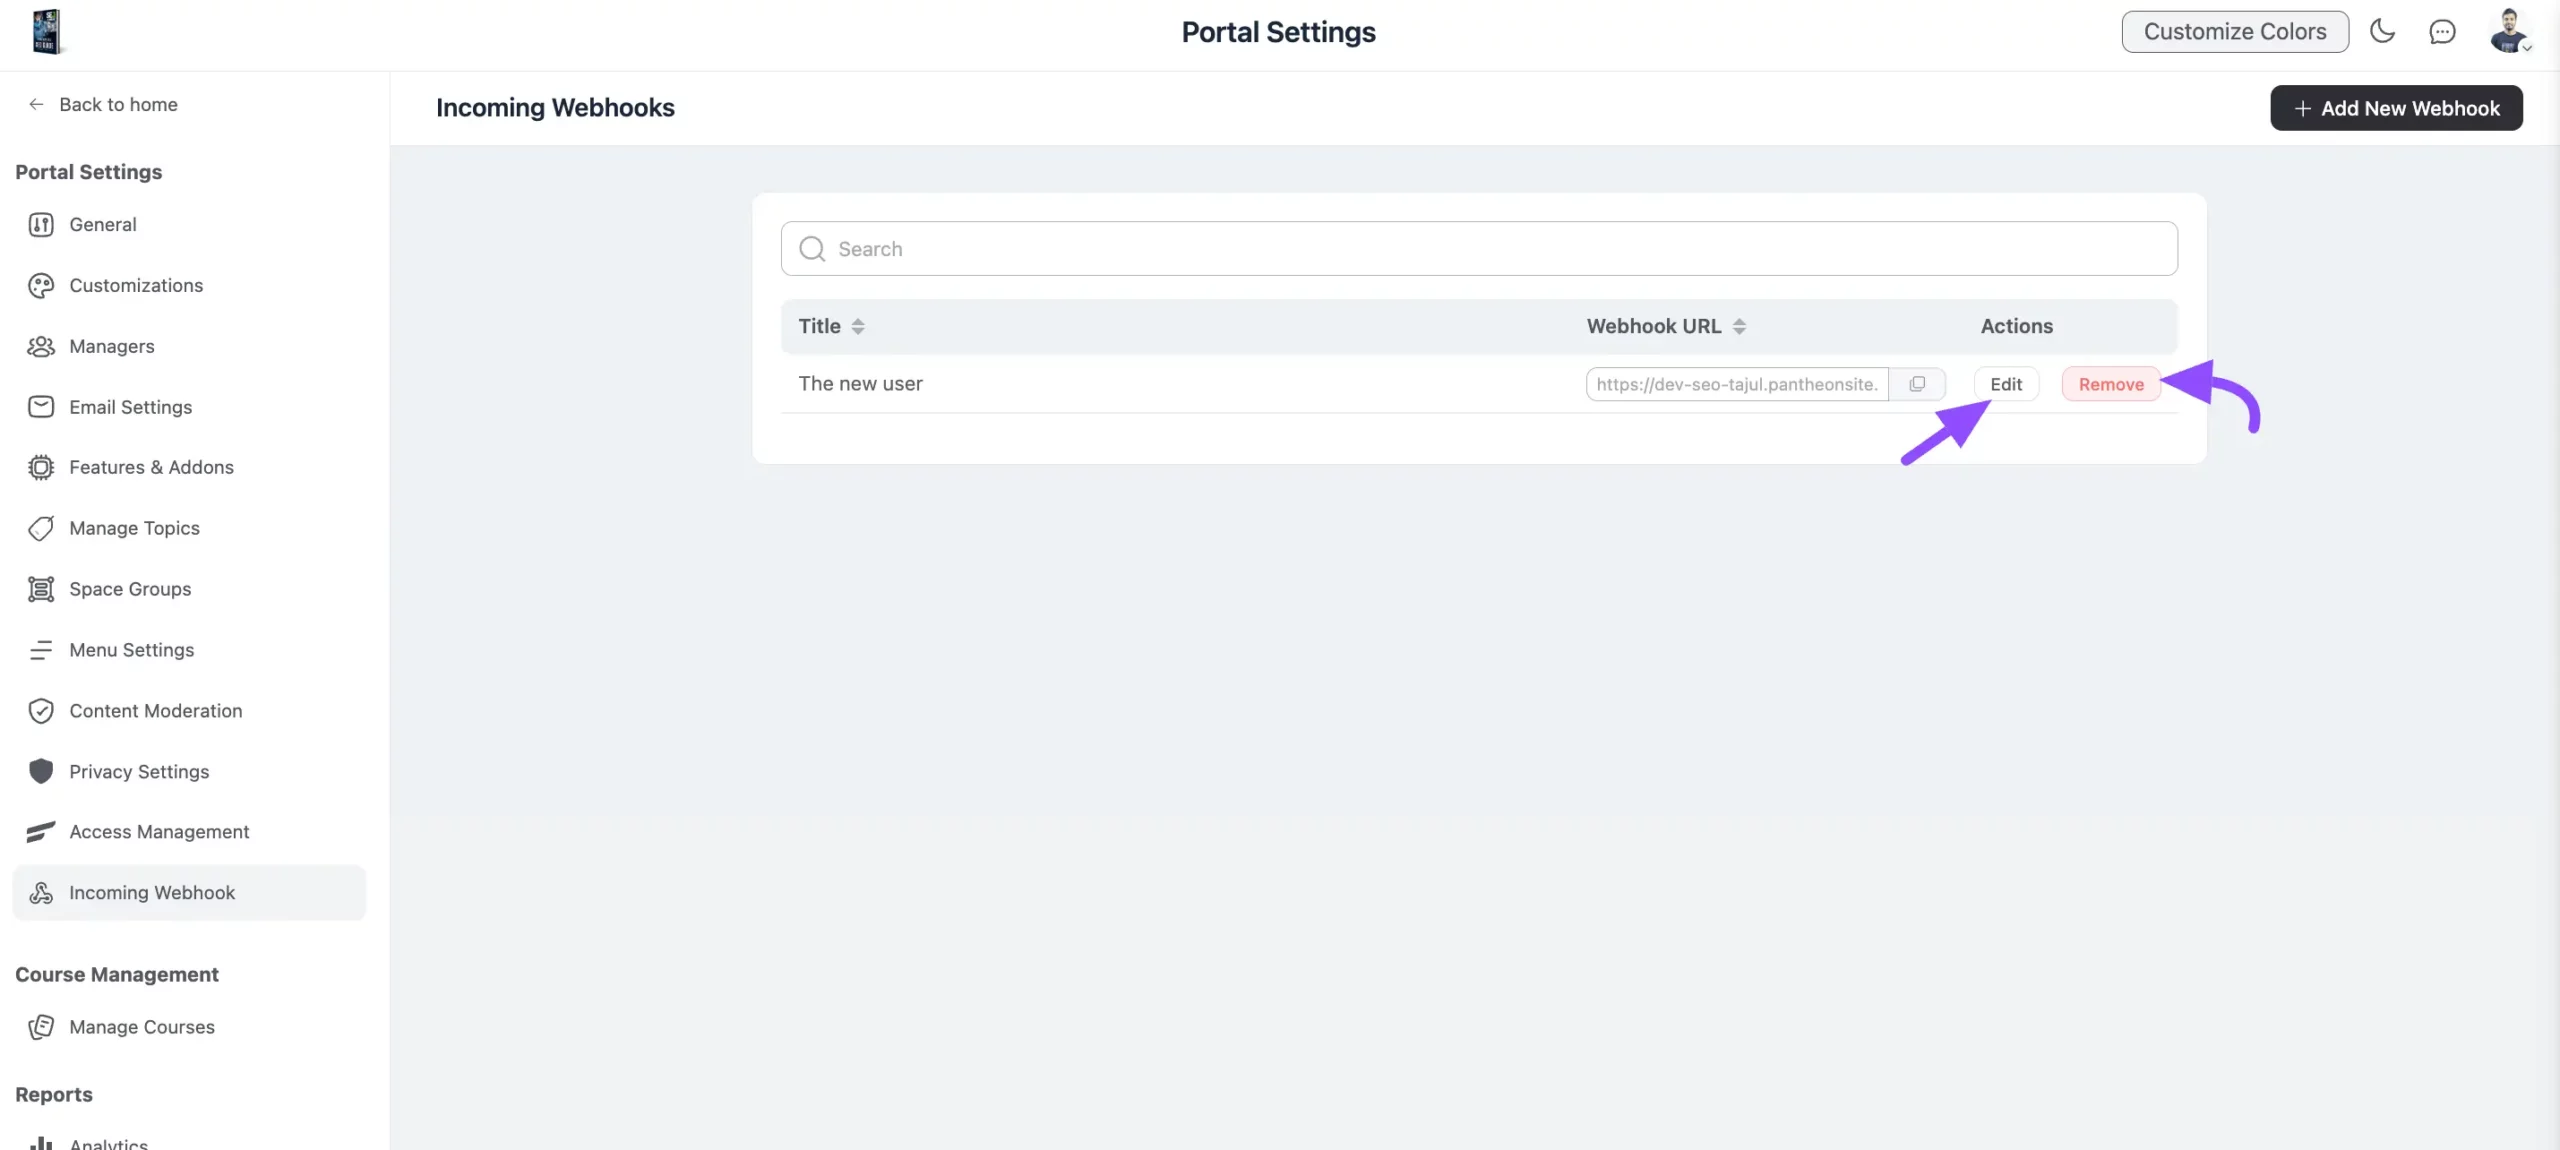
Once your webhook is created, you can modify, update, and delete it.
- Edit Webhook: Modify webhook settings by clicking the Edit button.
- Remove Webhook: Delete the webhook using the Remove button.