

Appearance
CDN & Image Proxy Setup (Pro)
FluentCommunity now integrates with BunnyCDN, allowing you to store data online and reduce site storage usage.
This guide covers two ways to configure BunnyCDN with FluentCommunity: through the plugin's UI or by using the WordPress wp-config.php file.
NOTE
Large BunnyCDN uploads are streamed from disk instead of being held whole in memory, so big files put far less load on your server.
Bunny Settings in FluentCommunity
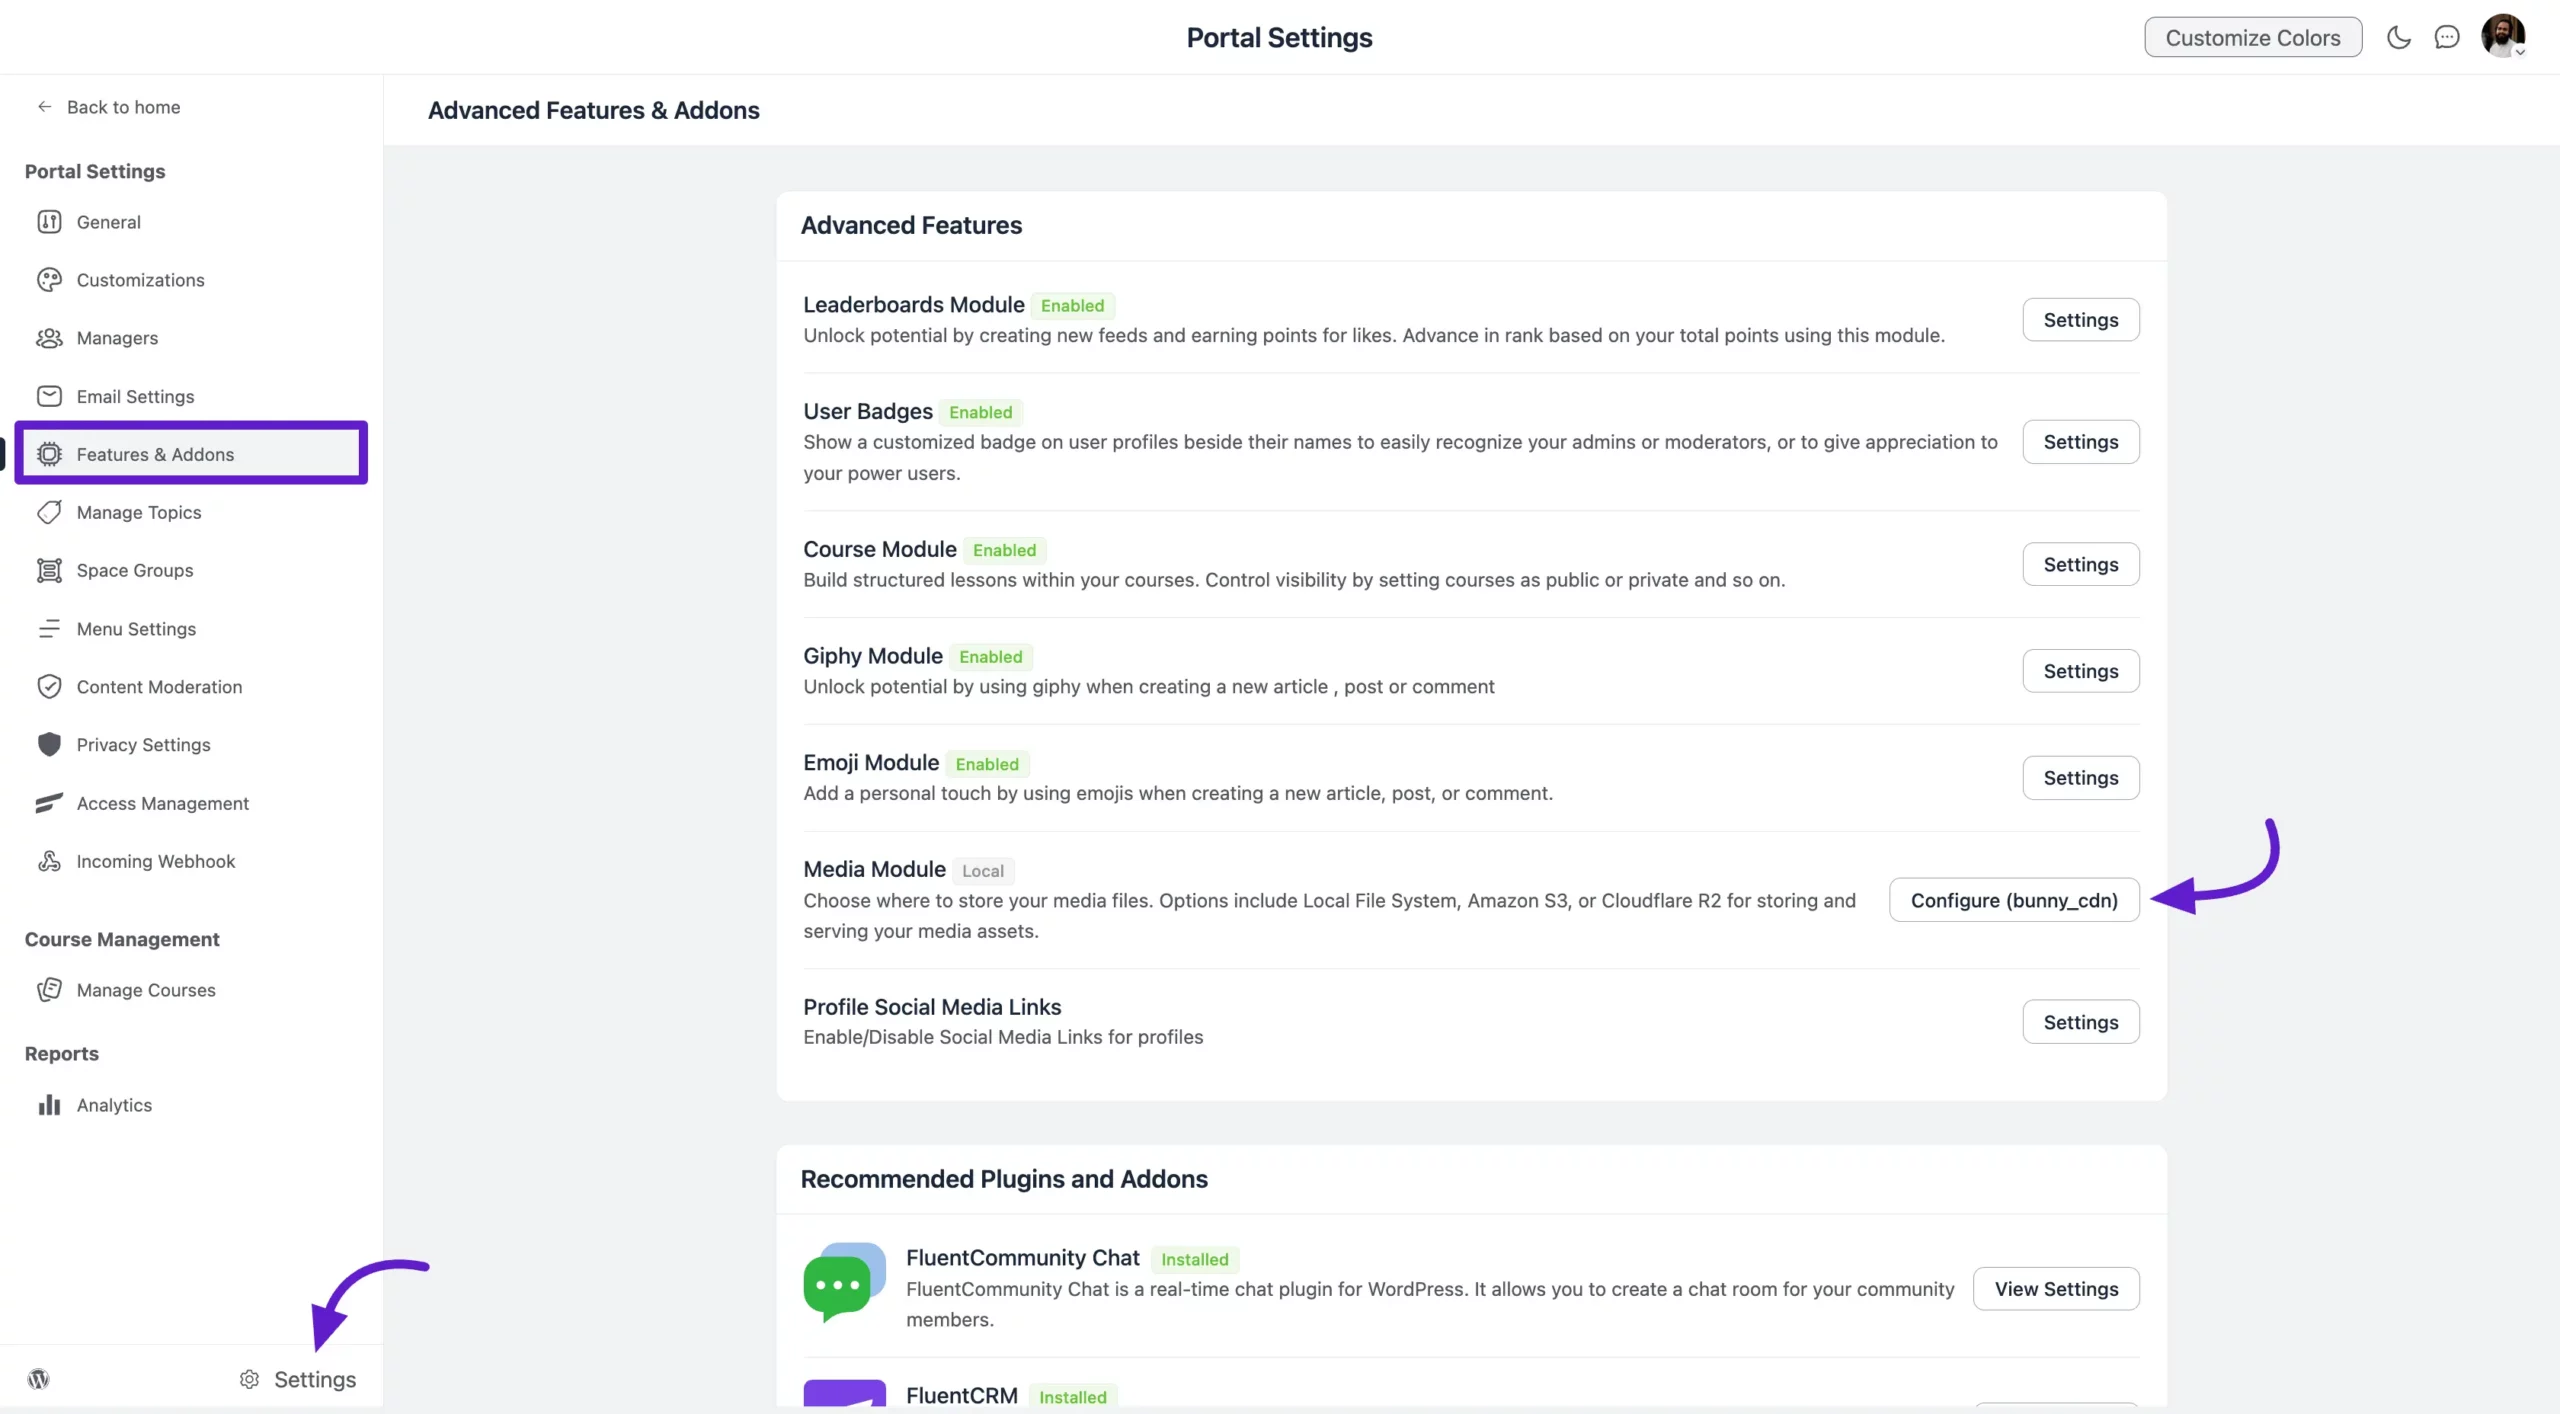
Navigate to FluentCommunity Settings, then click on Features and Addons from the left sidebar. Find the Media Module and click the Configure button next to it.
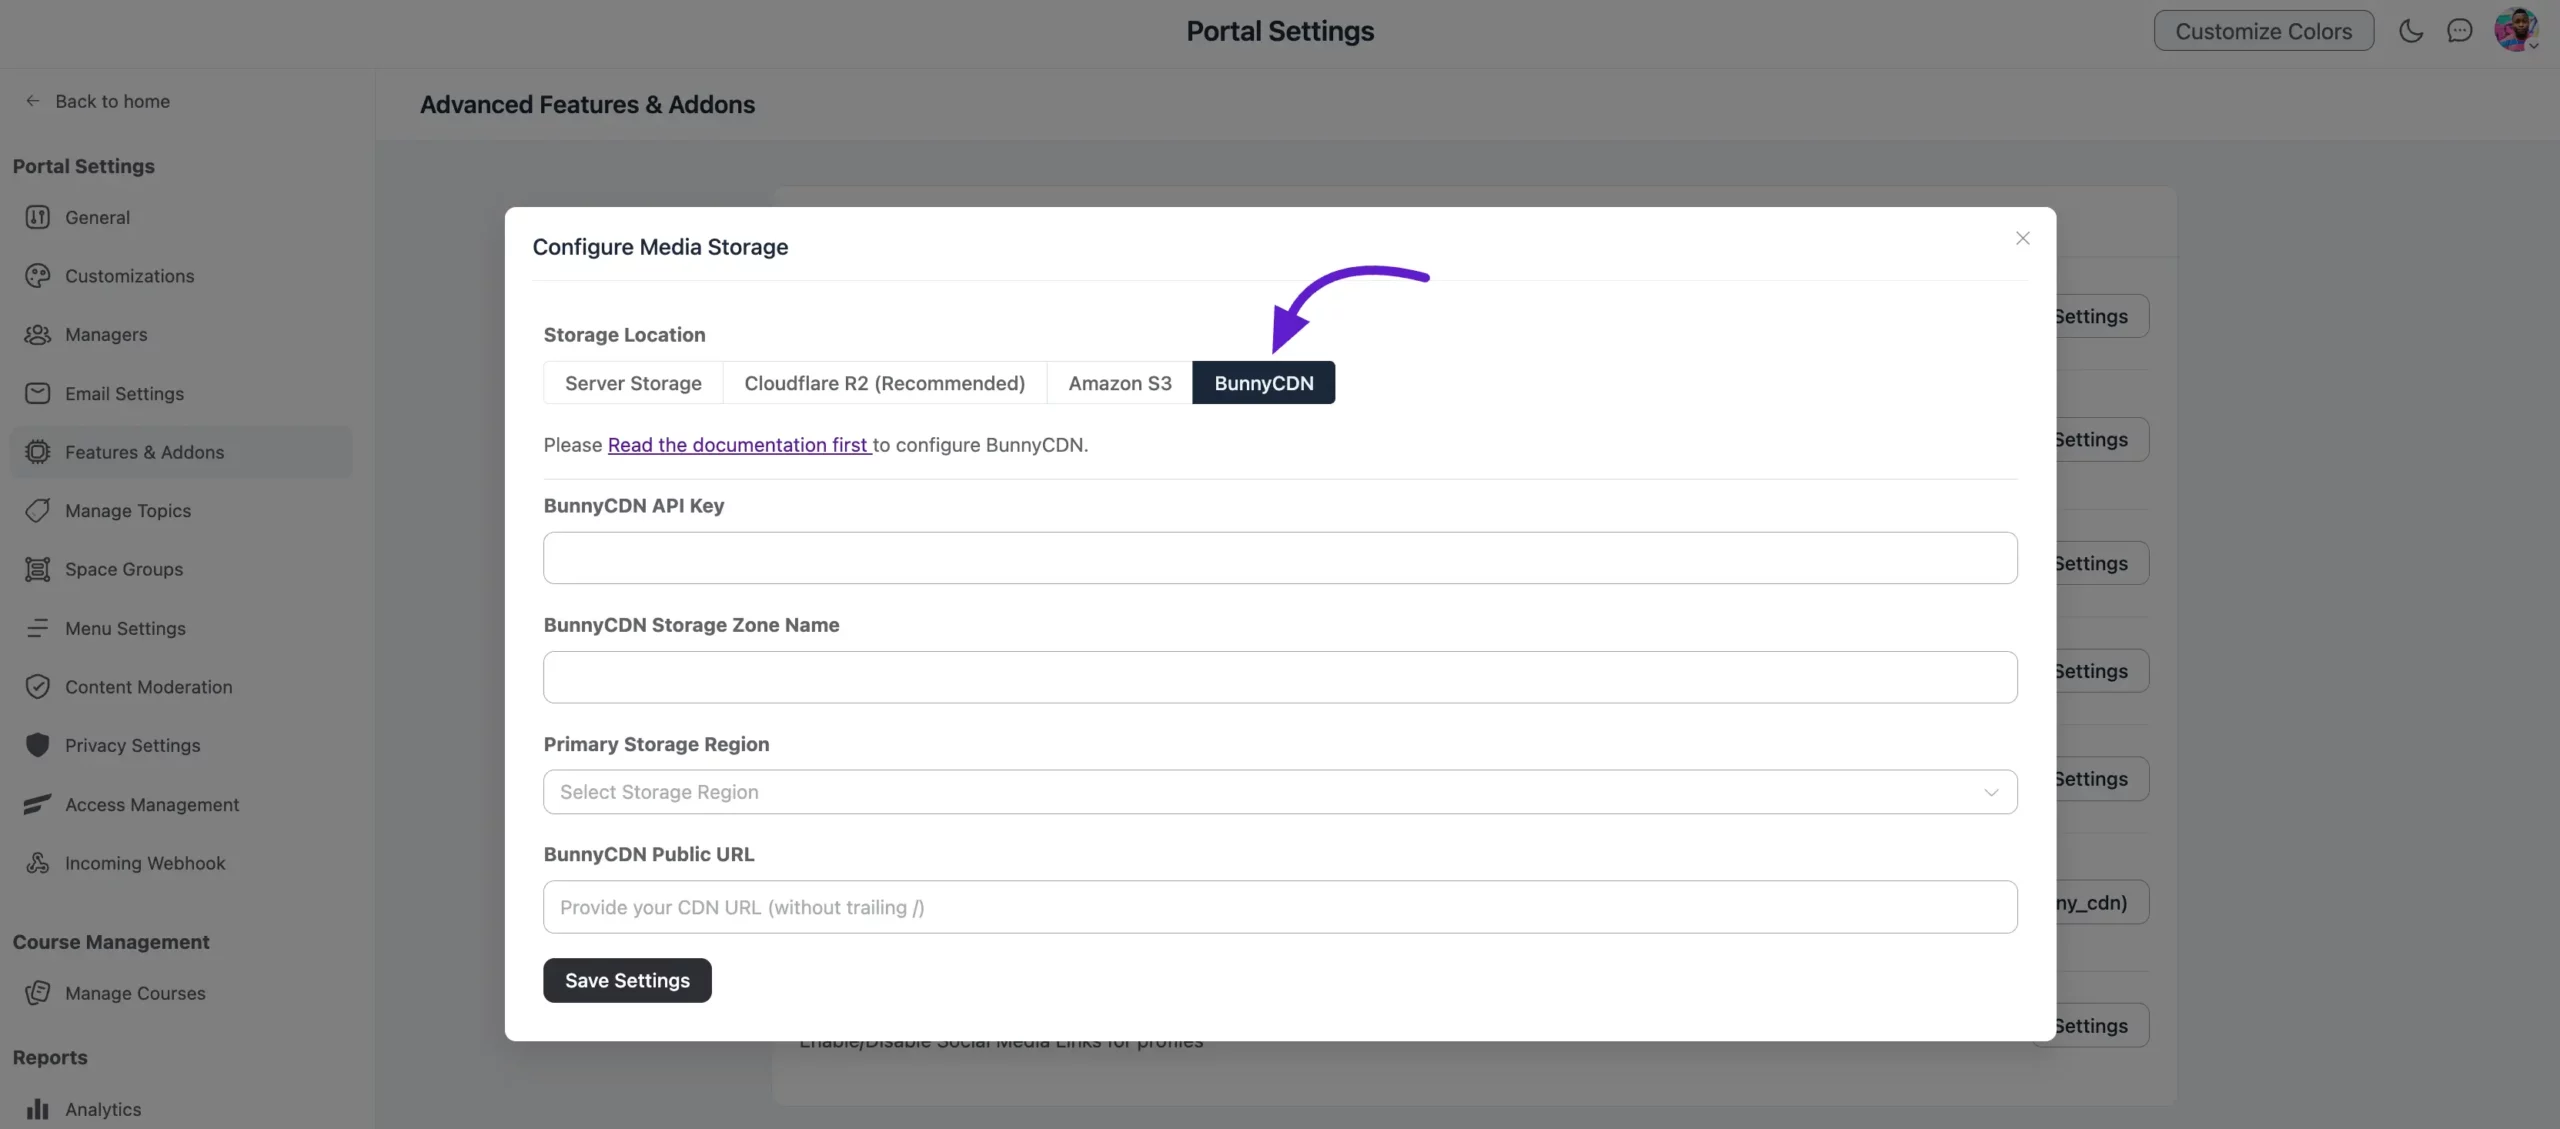
A pop-up will appear, showing that you need API credentials to connect FluentCommunity with BunnyCDN. You can find these credentials in your BunnyCDN account.
Get API Credentials from BunnyCDN
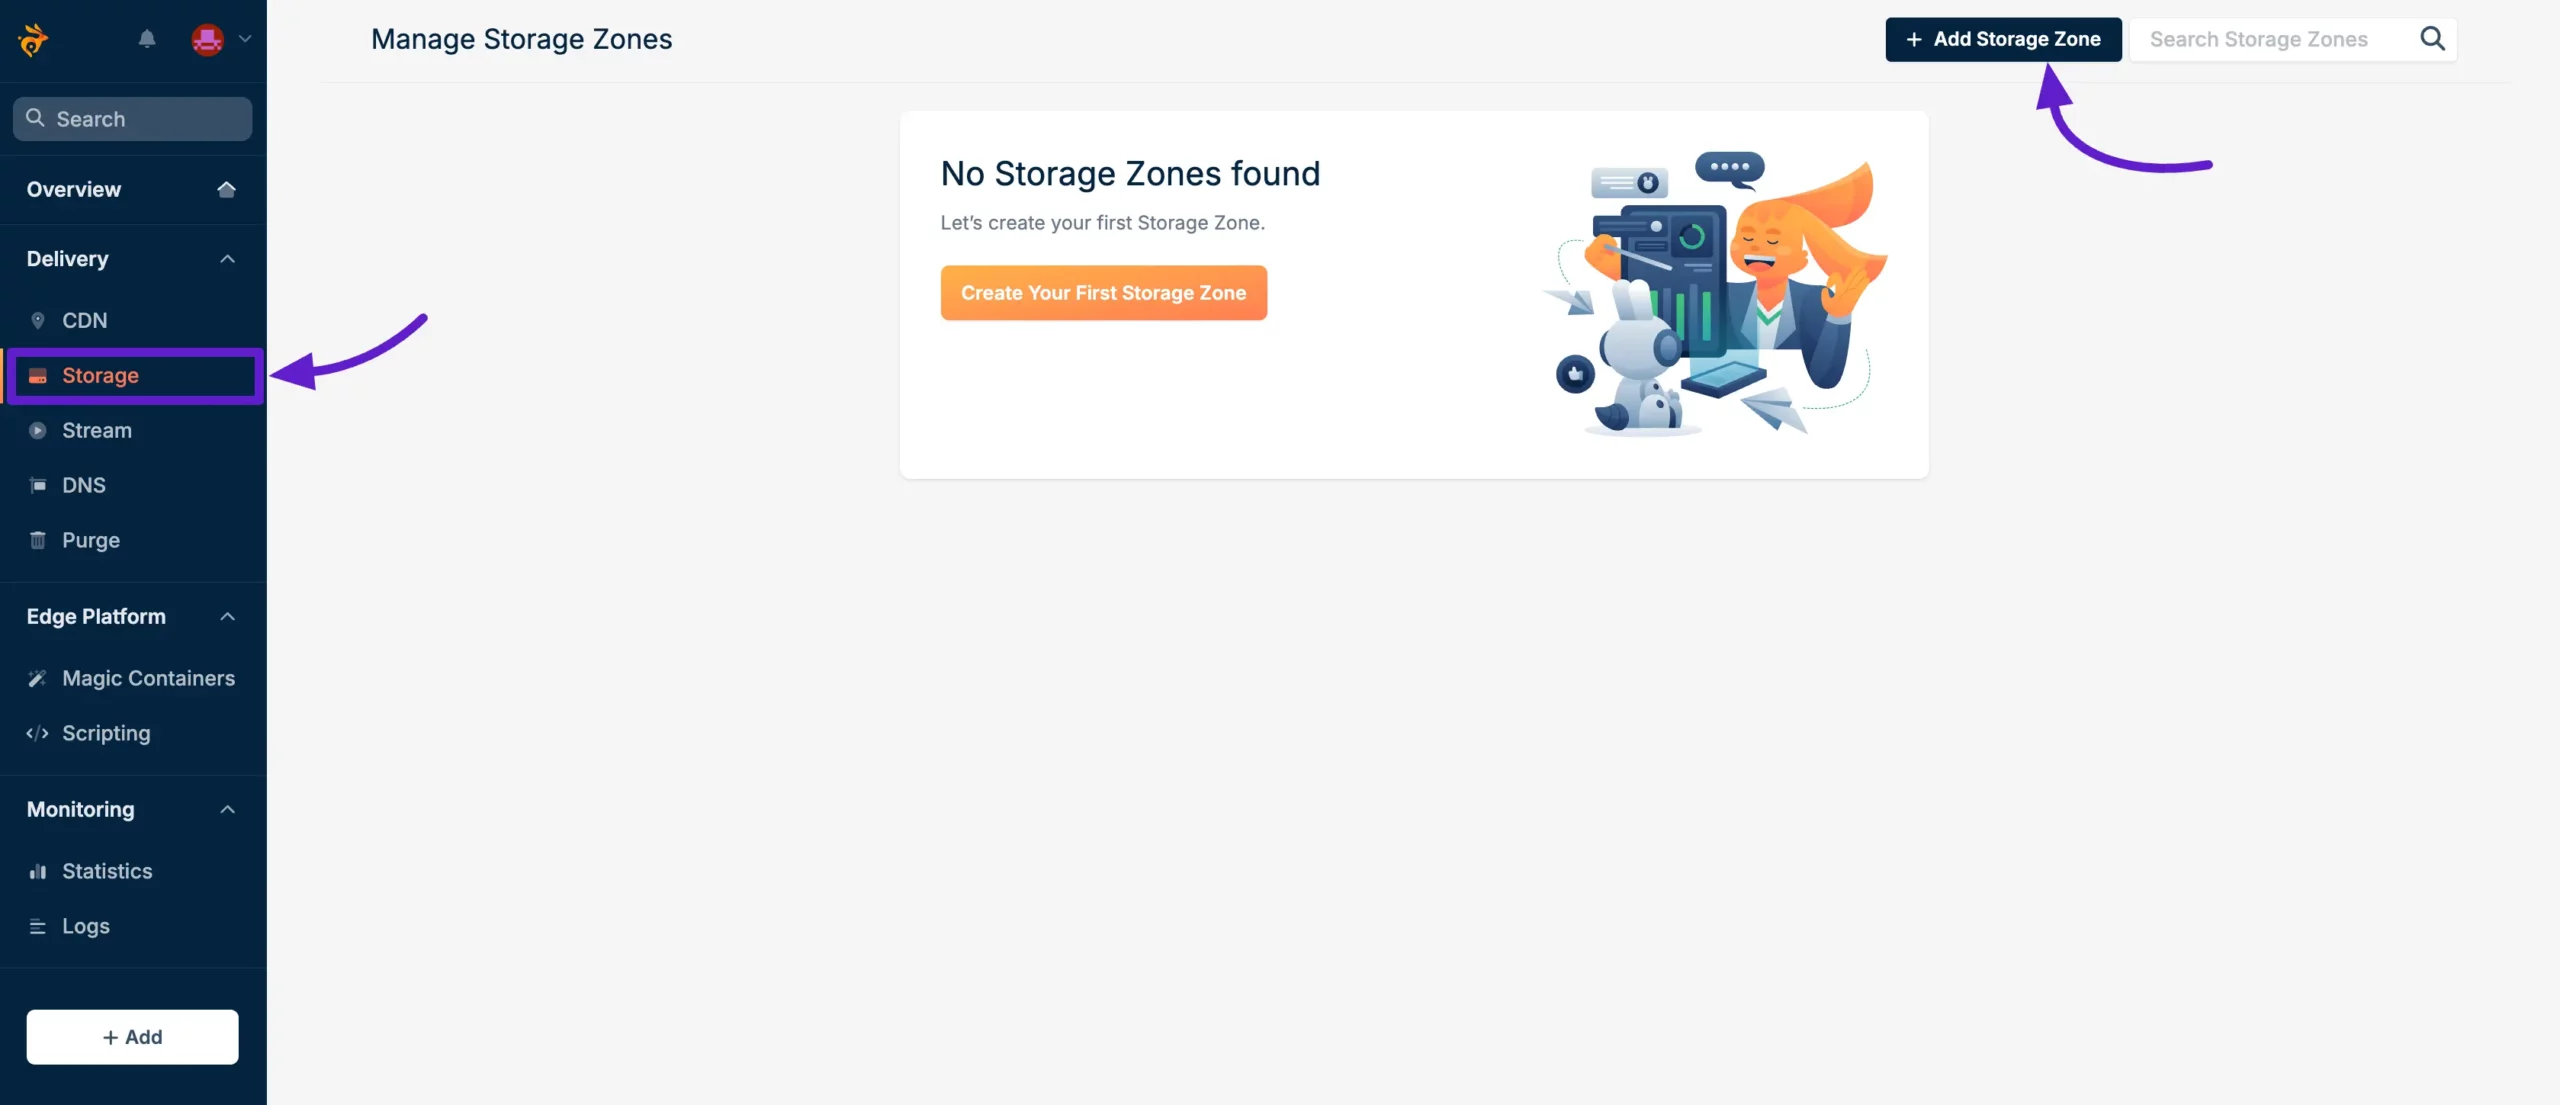
First, log into your Bunny account, then go to Storage from the left sidebar and click on Add Storage Zone.
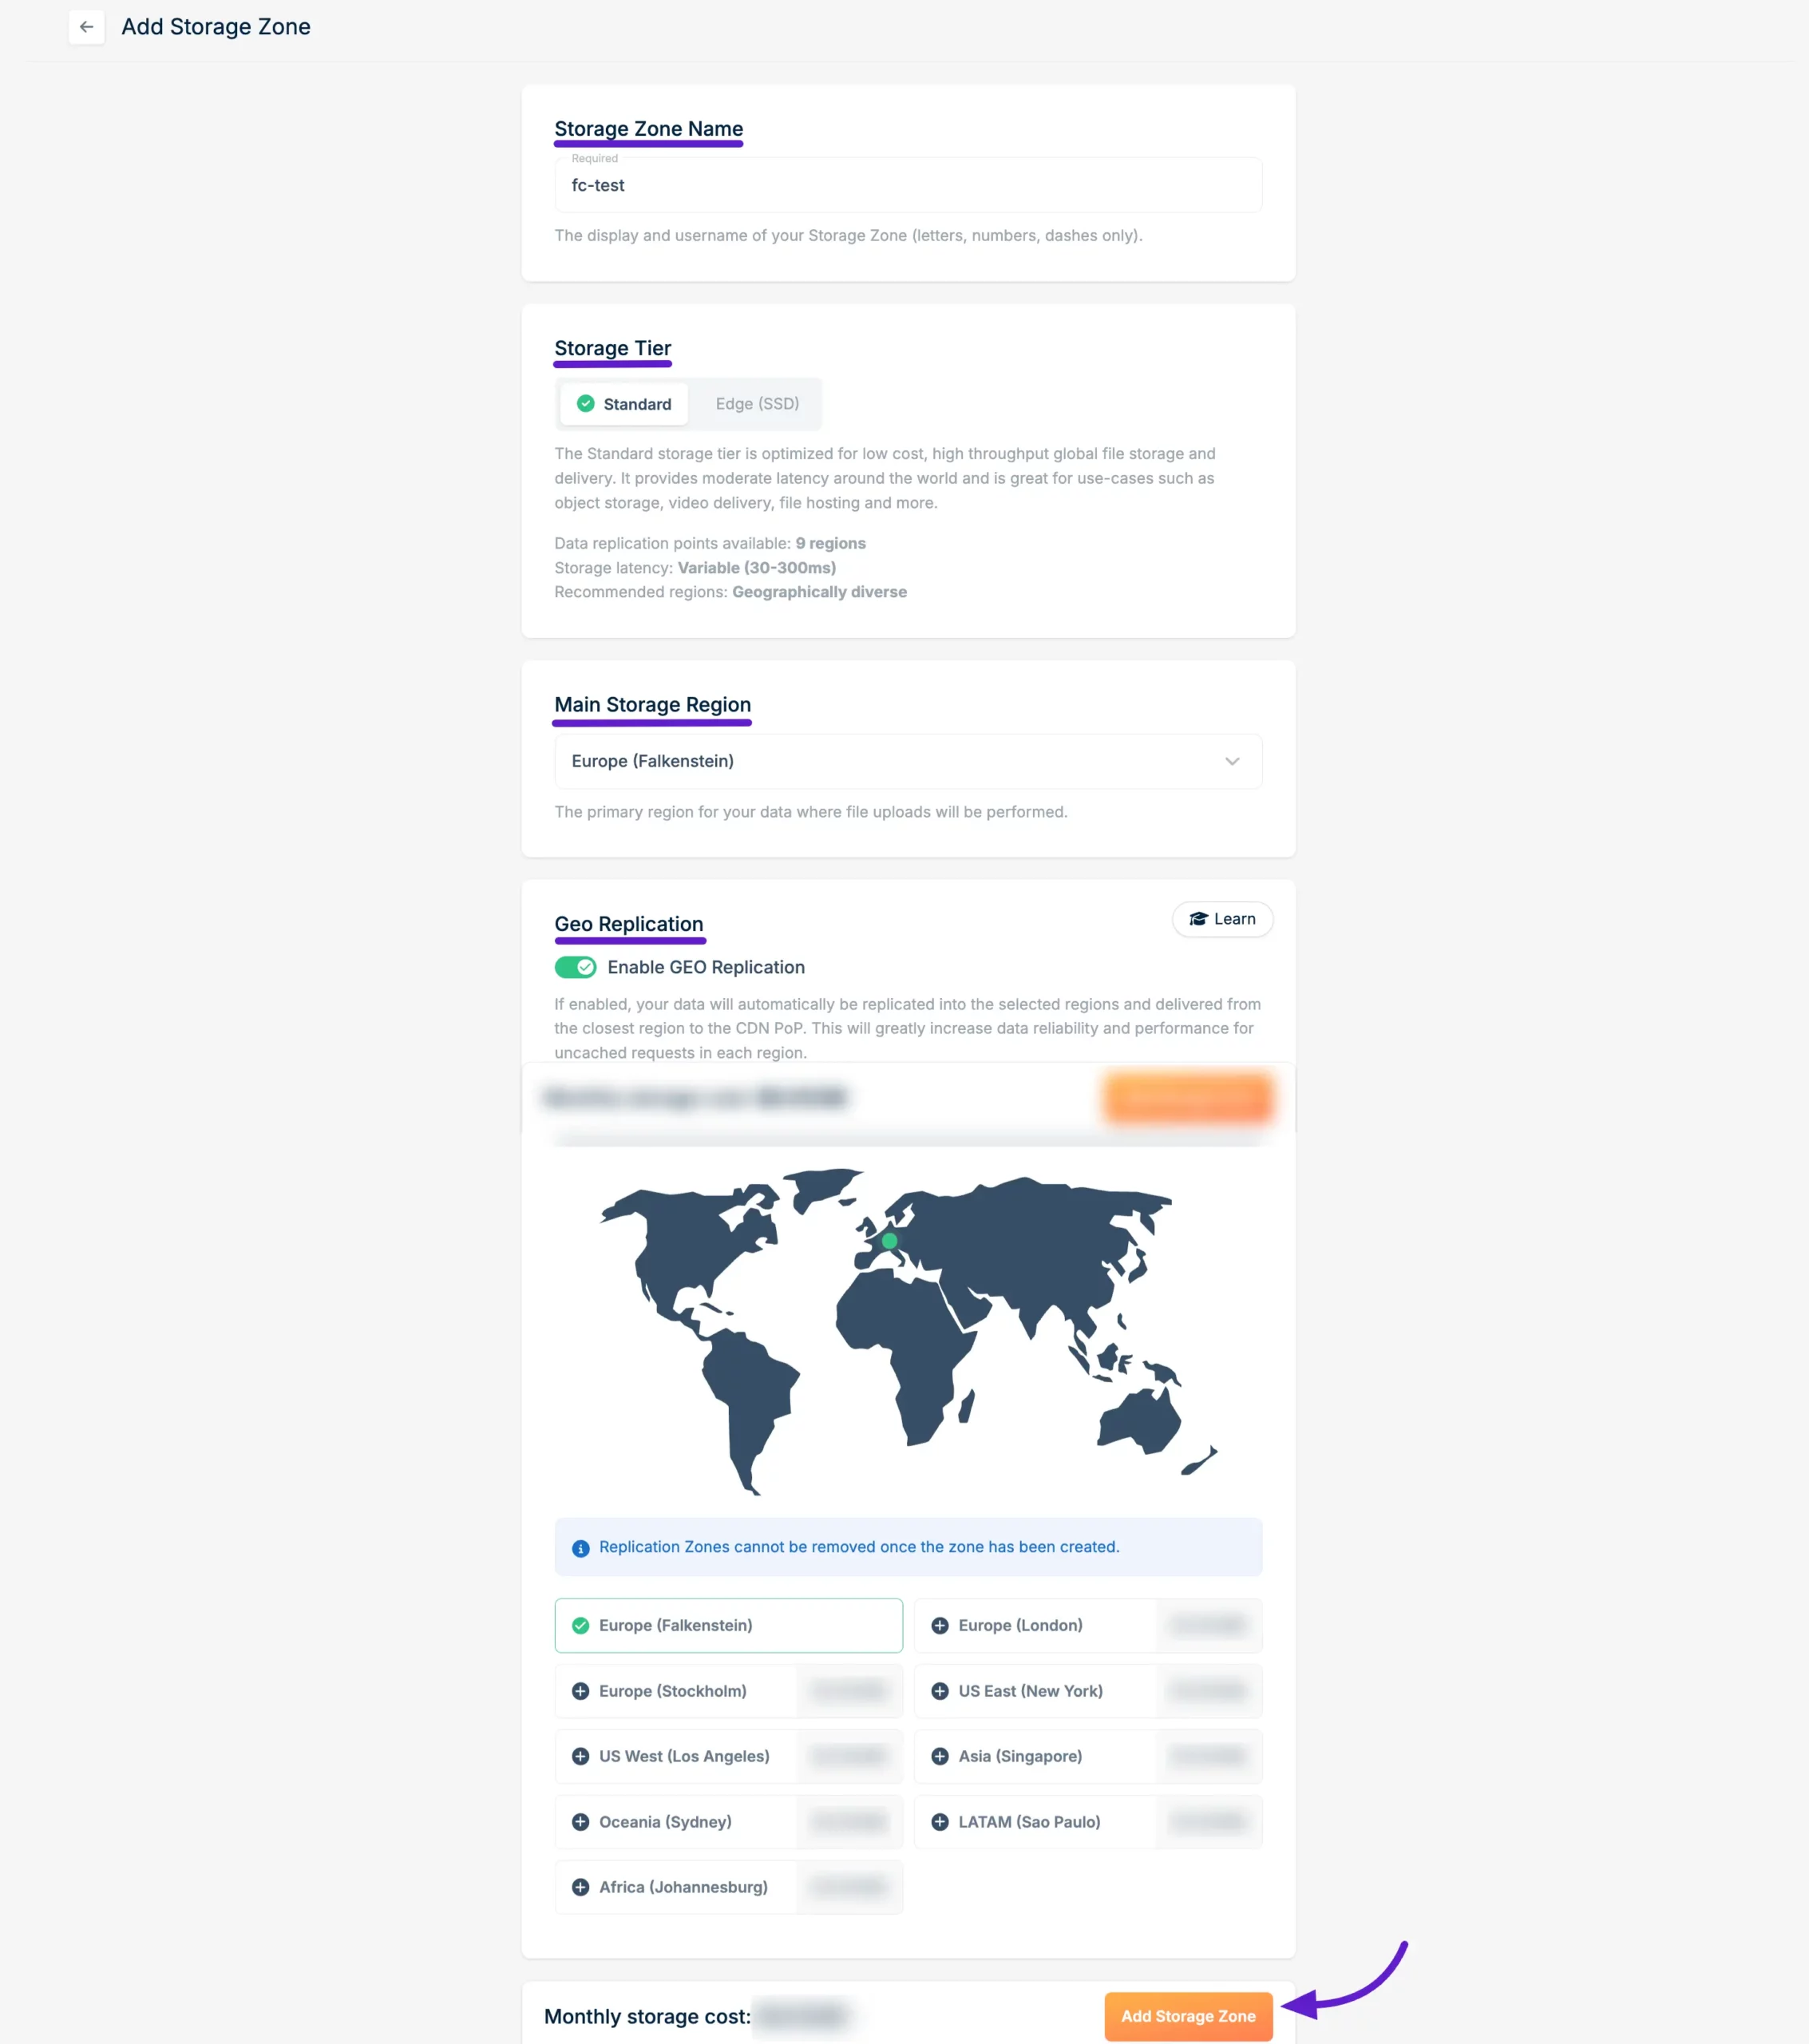
A pop-up will appear to set up the Storage Zone settings. Choose your preferred Storage Tier (we have selected Standard). Then, select the Main Storage Region based on your users' location. Finally, click on the Add Storage Zone button.
Note: Keep track of the Main Storage Region you select, as you'll need this information later when configuring BunnyCDN with FluentCommunity.
Connect Pull Zone
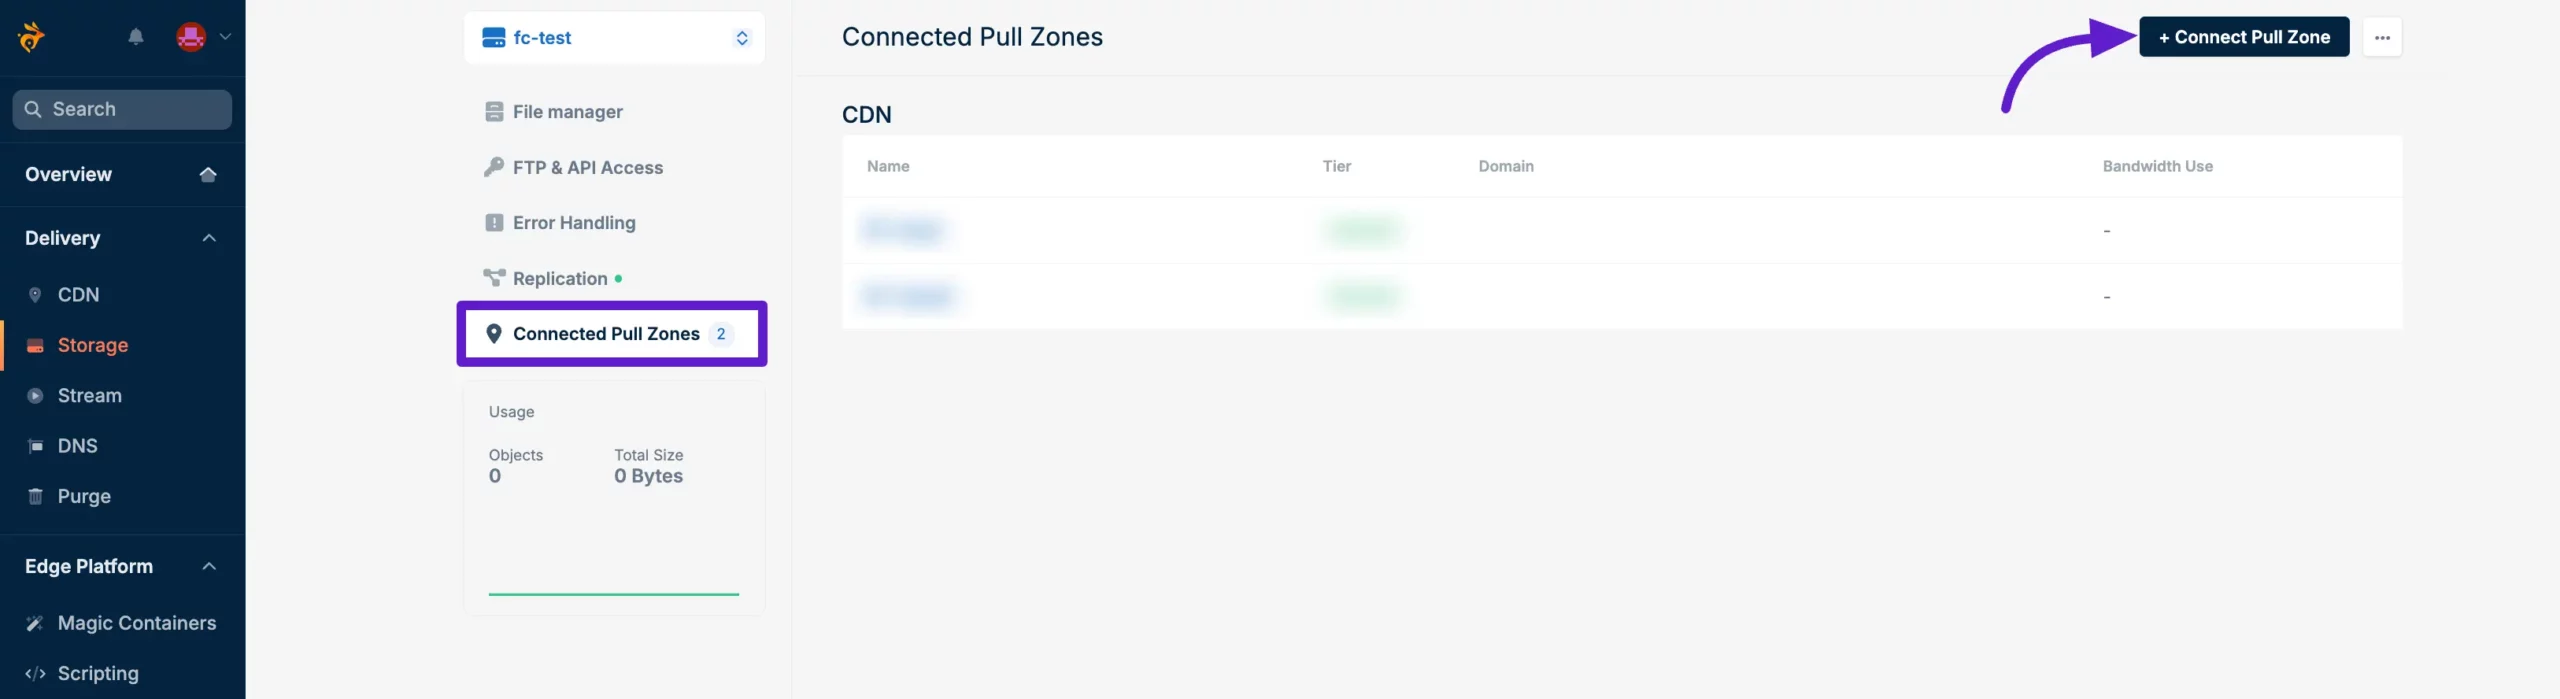
Go to the Storage Zone you just created, then select Connected Pull Zones from the left sidebar. Now, click on the + Connected Pull Zone button.
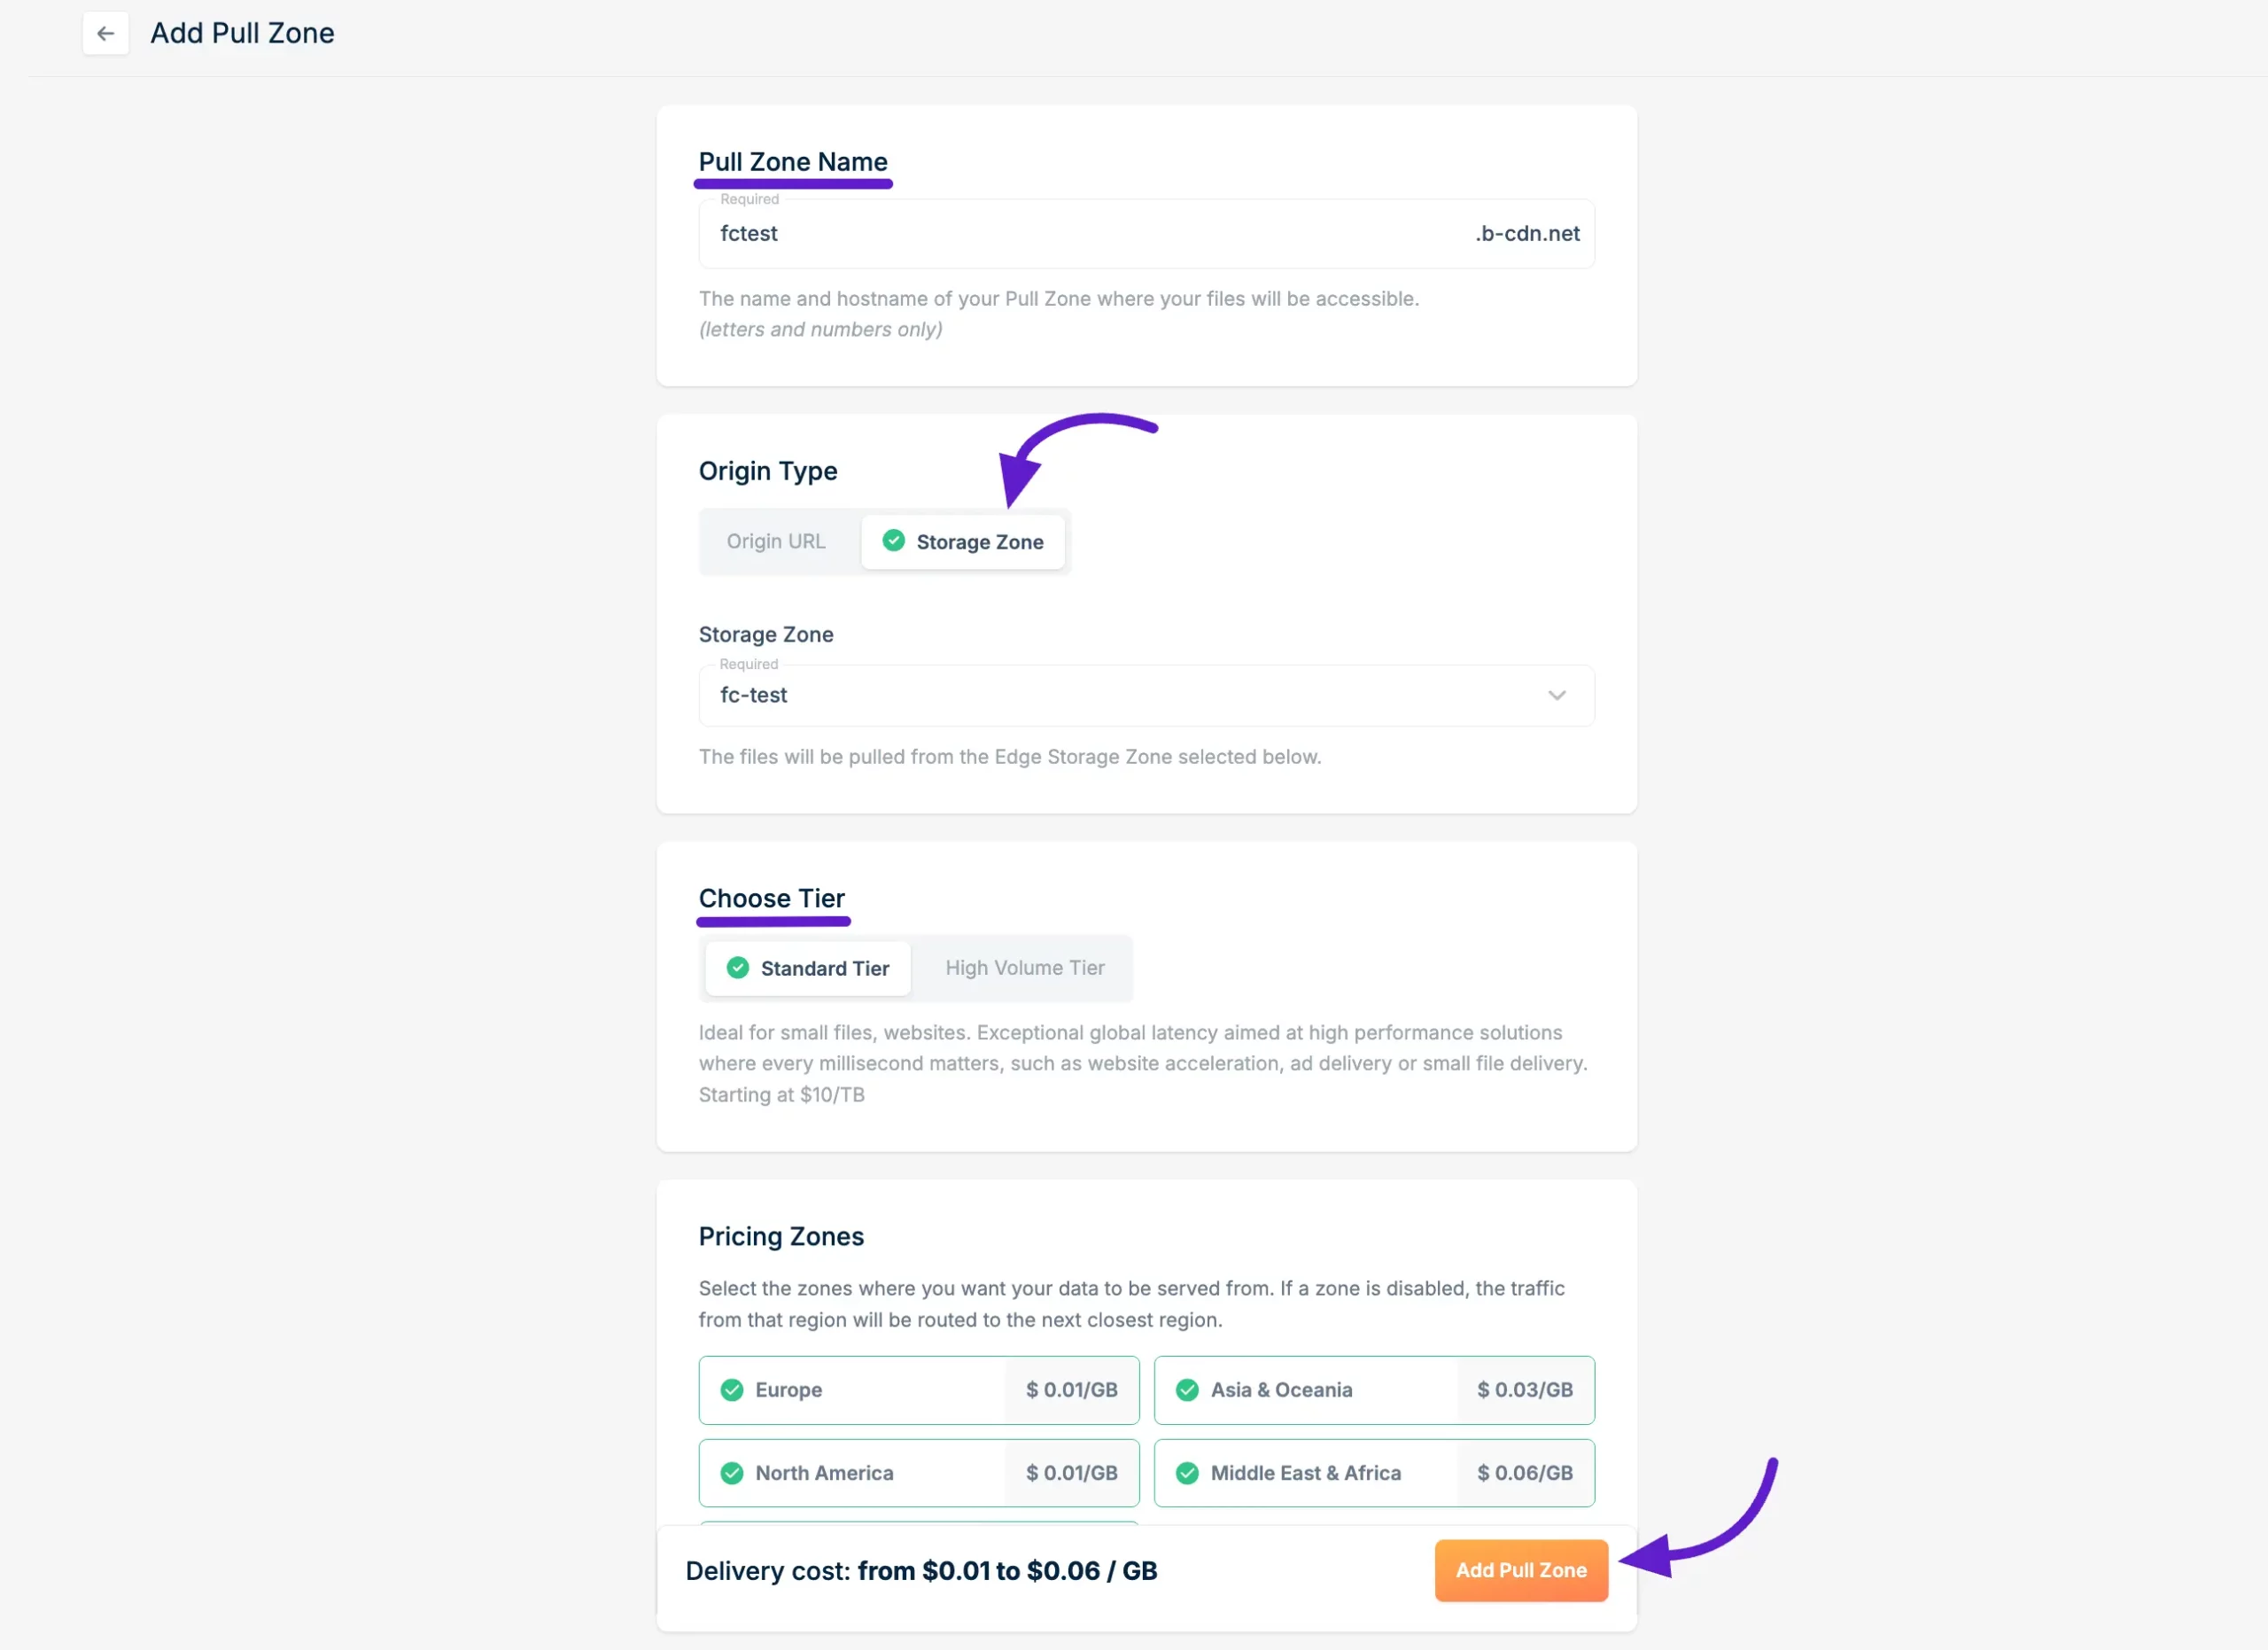
A Pull Zone setup pop-up will appear. First, enter a name for your Pull Zone. Then, in the Origin Type, select Storage Zone and choose the Storage Zone you created from the dropdown.
Select the Tier as per your preference. Finally, click on the Add Pull Zone button to save.
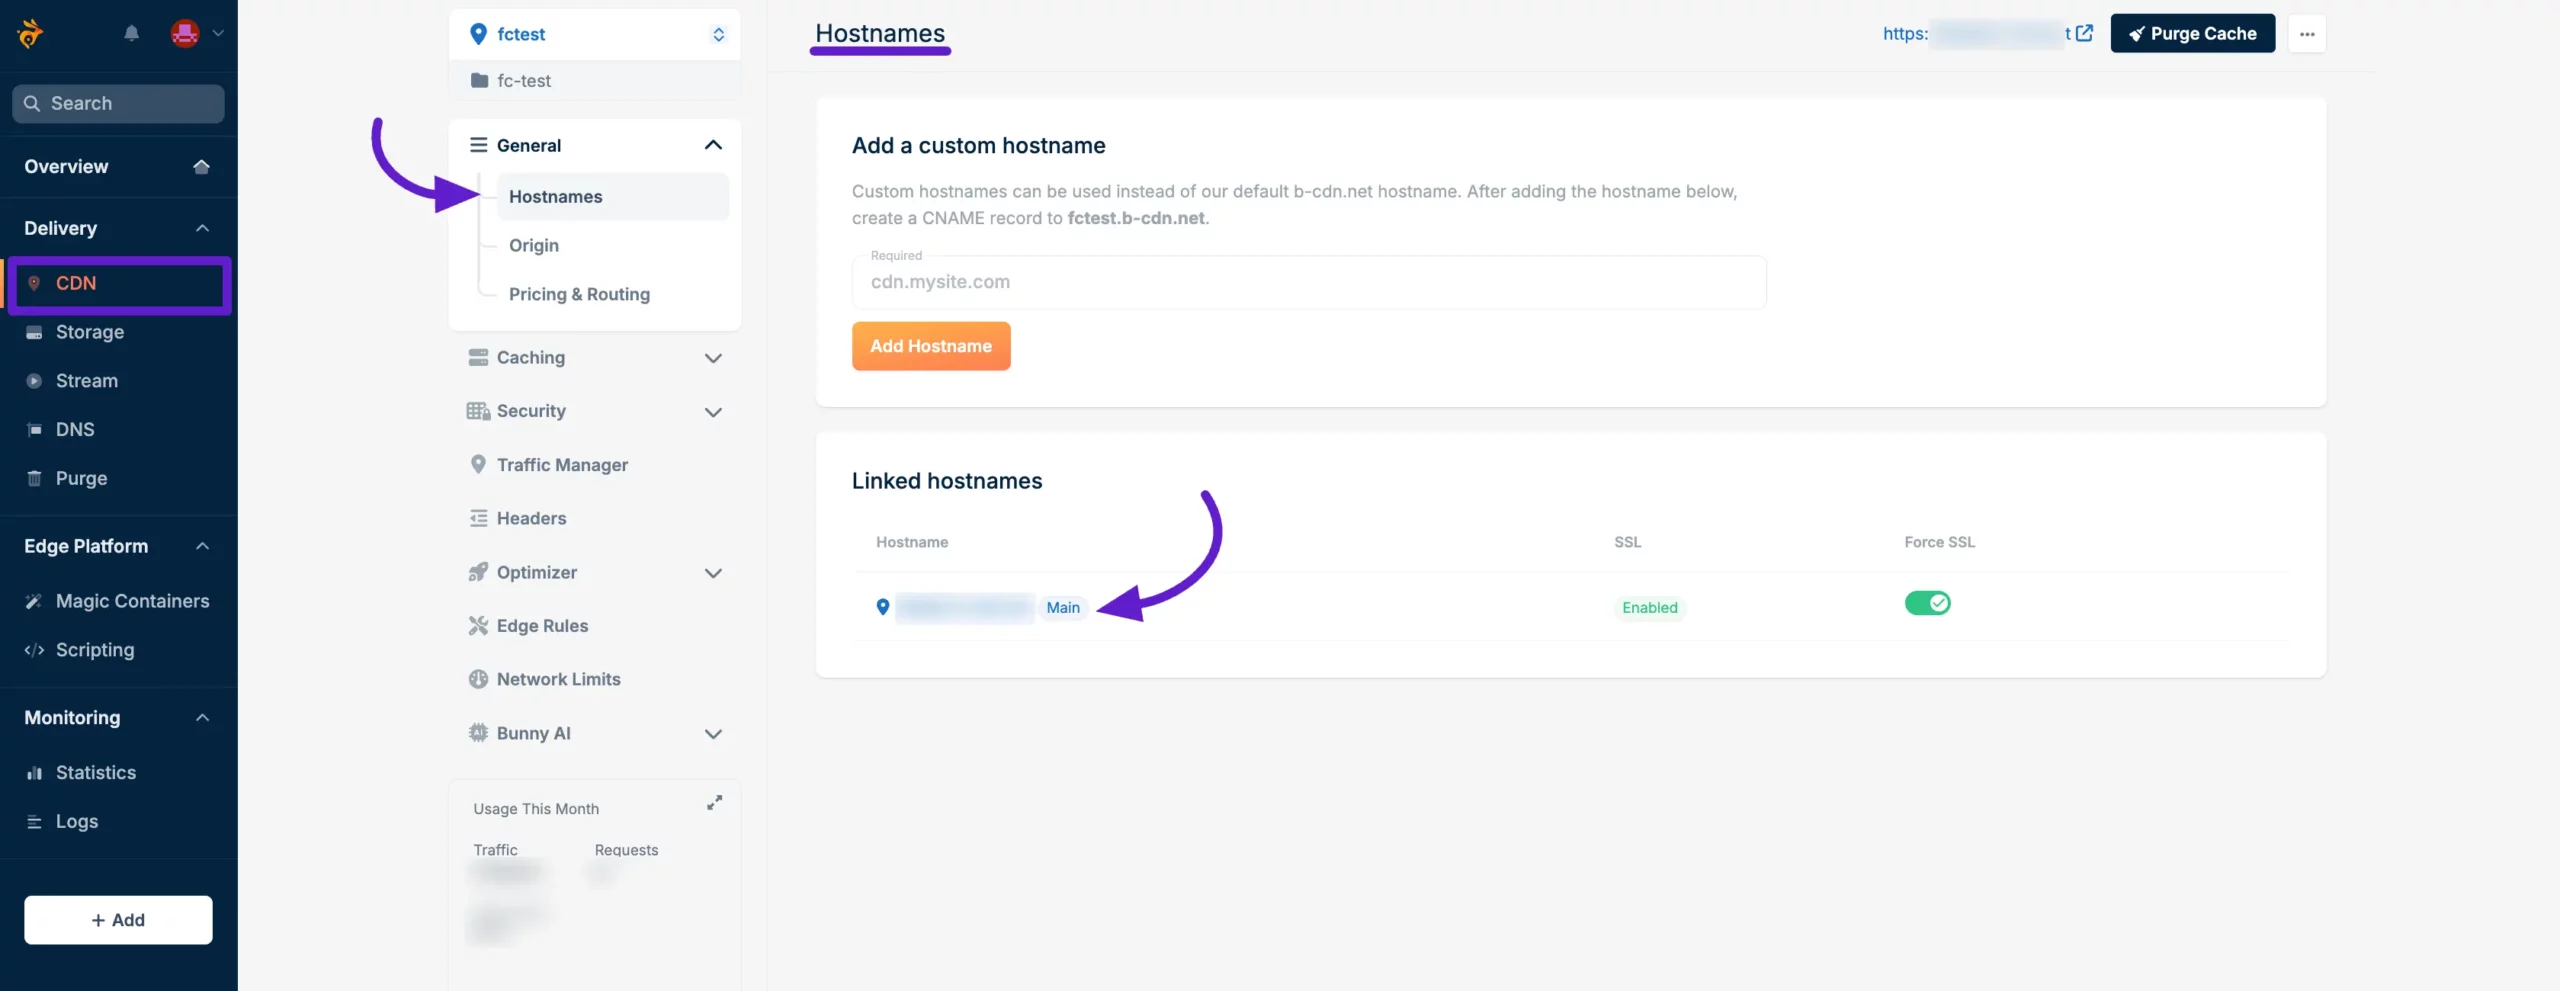
You will now see your Pull Zone Hostname. Copy the Hostname and save it to your clipboard for later use.
Note: This Hostname is the BunnyCDN Public URL that you'll need to enter on the FluentCommunity Bunny configuration page.
API & Credentials
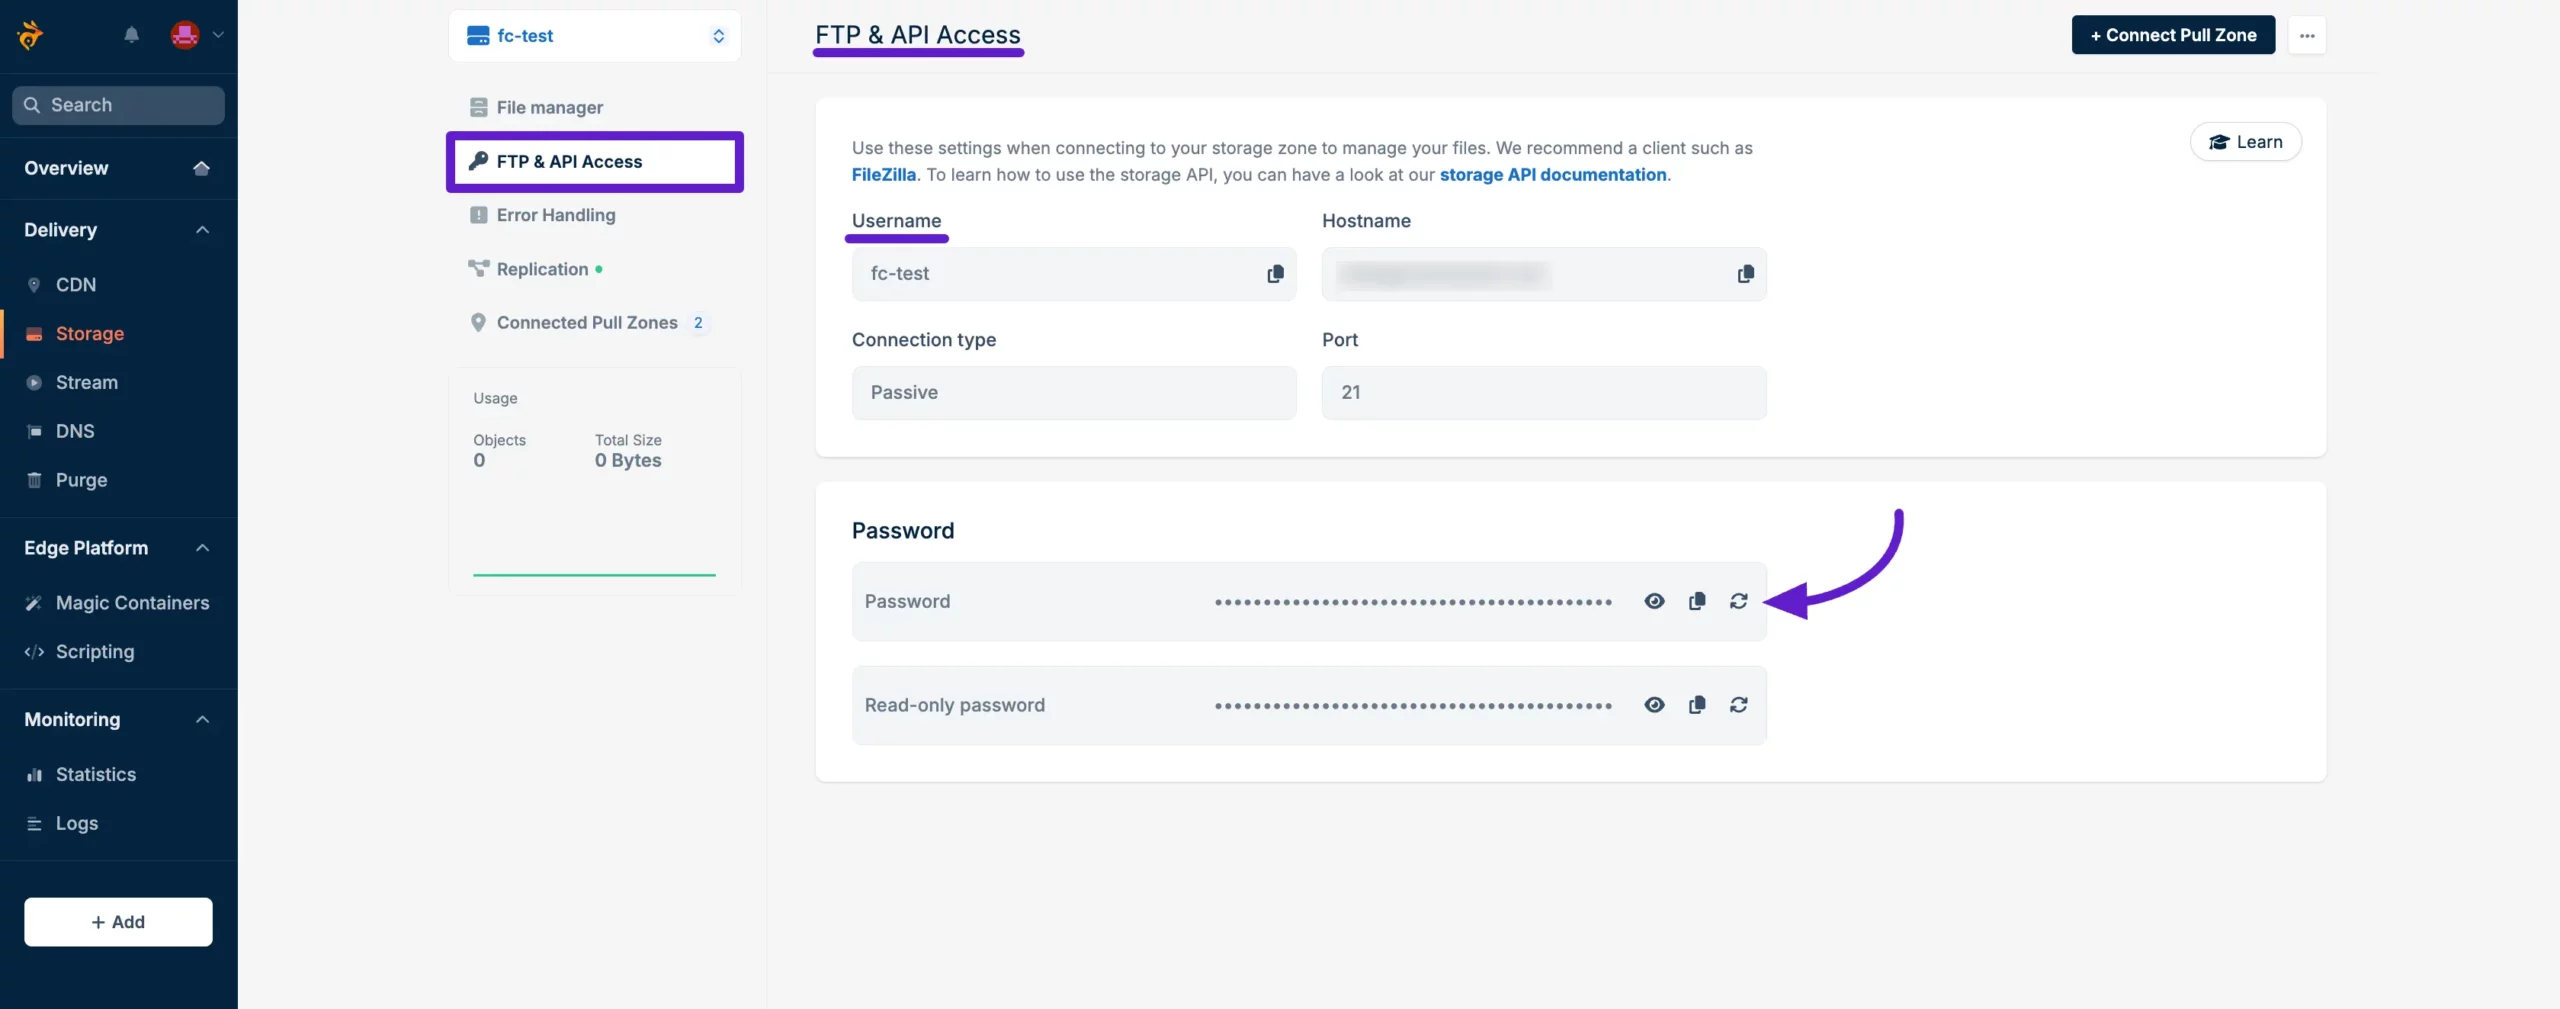
Go to the Storage Zone you just created and click on the FTP & API Access tab from the left sidebar. Here, you'll find the Username and Password. Copy these two items for later use.
Note: The Username is the BunnyCDN Storage Zone Name, and the Password is the BunnyCDN API Key that you'll need for the Bunny configuration page in FluentCommunity.
Connecting Bunny Using the Plugin UI
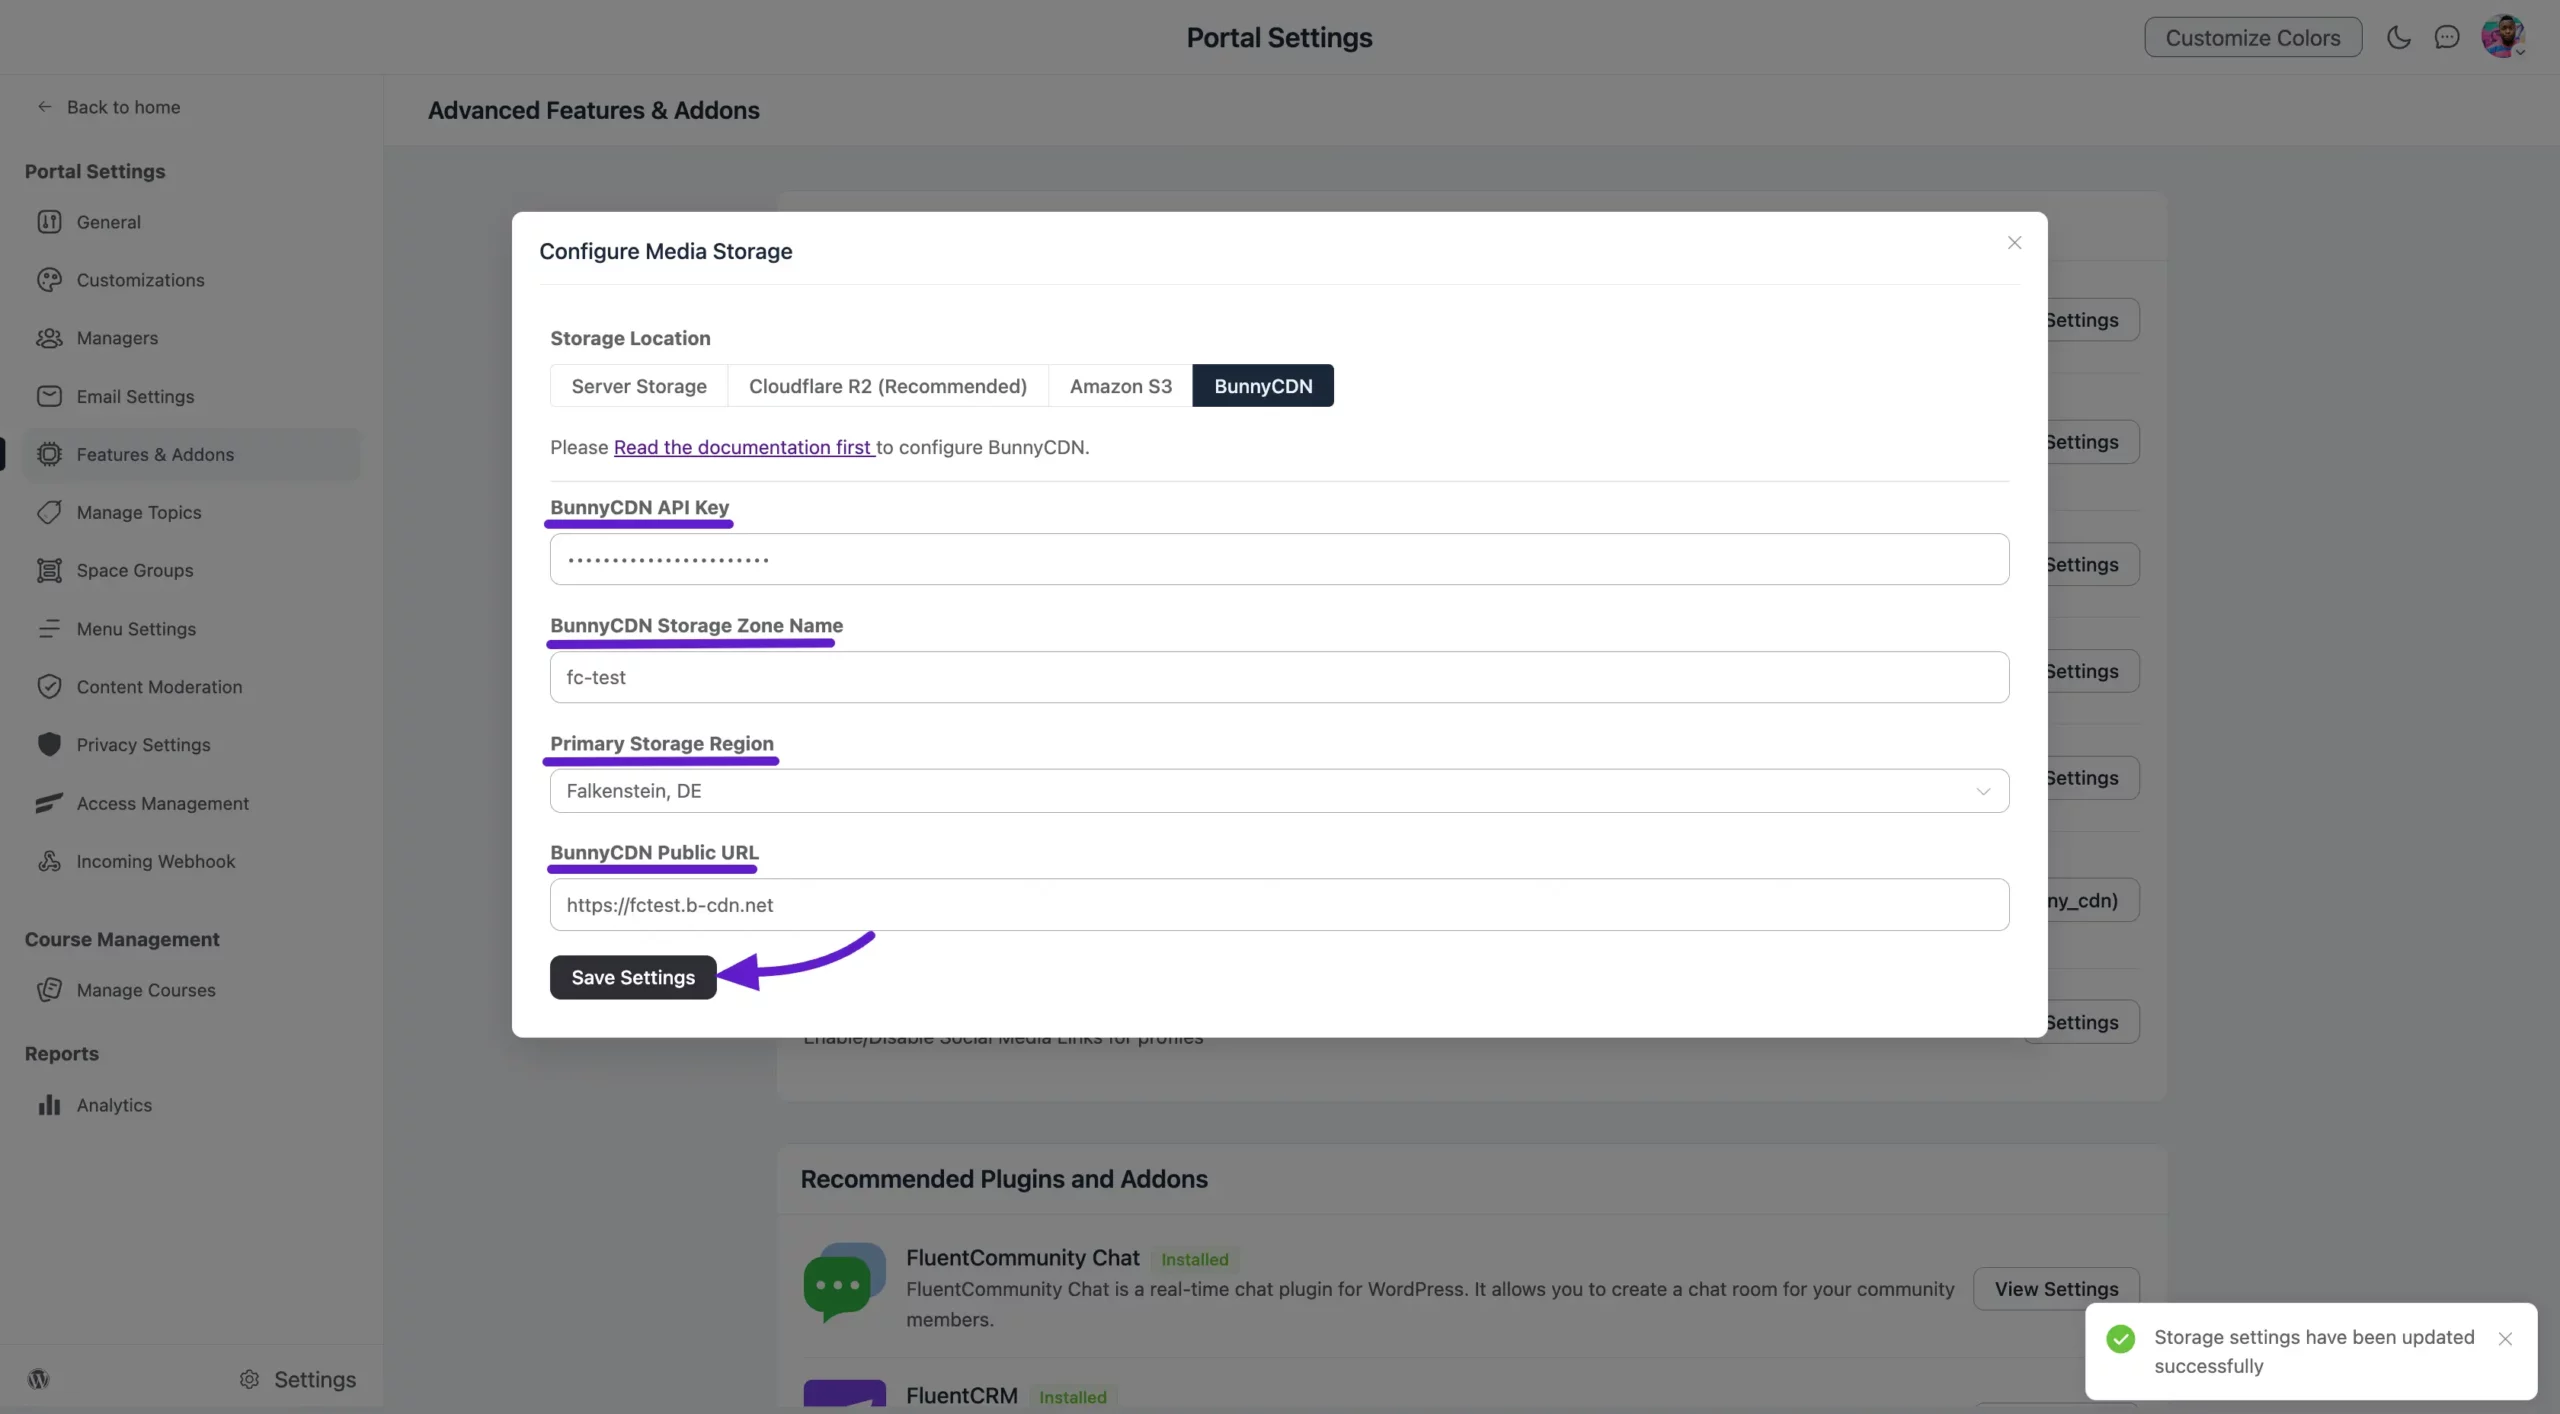
Now, go to the FluentCommunity Bunny Configure page and paste the credentials into the following fields:
BunnyCDN API Key: Paste the Password of your Storage Zone here.
BunnyCDN Storage Zone Name: Paste the Storage Zone Name here.
Primary Storage Region: Select the Primary Storage Region you previously chose for your Storage Zone in the Main Storage Region.
BunnyCDN Public URL: Paste the Hostname of the Pull Zone here, making sure to add https:// at the beginning.
Finally, click the Save Settings button to save your changes.
Preview
Now, post anything in your FluentCommunity and attach a media file.
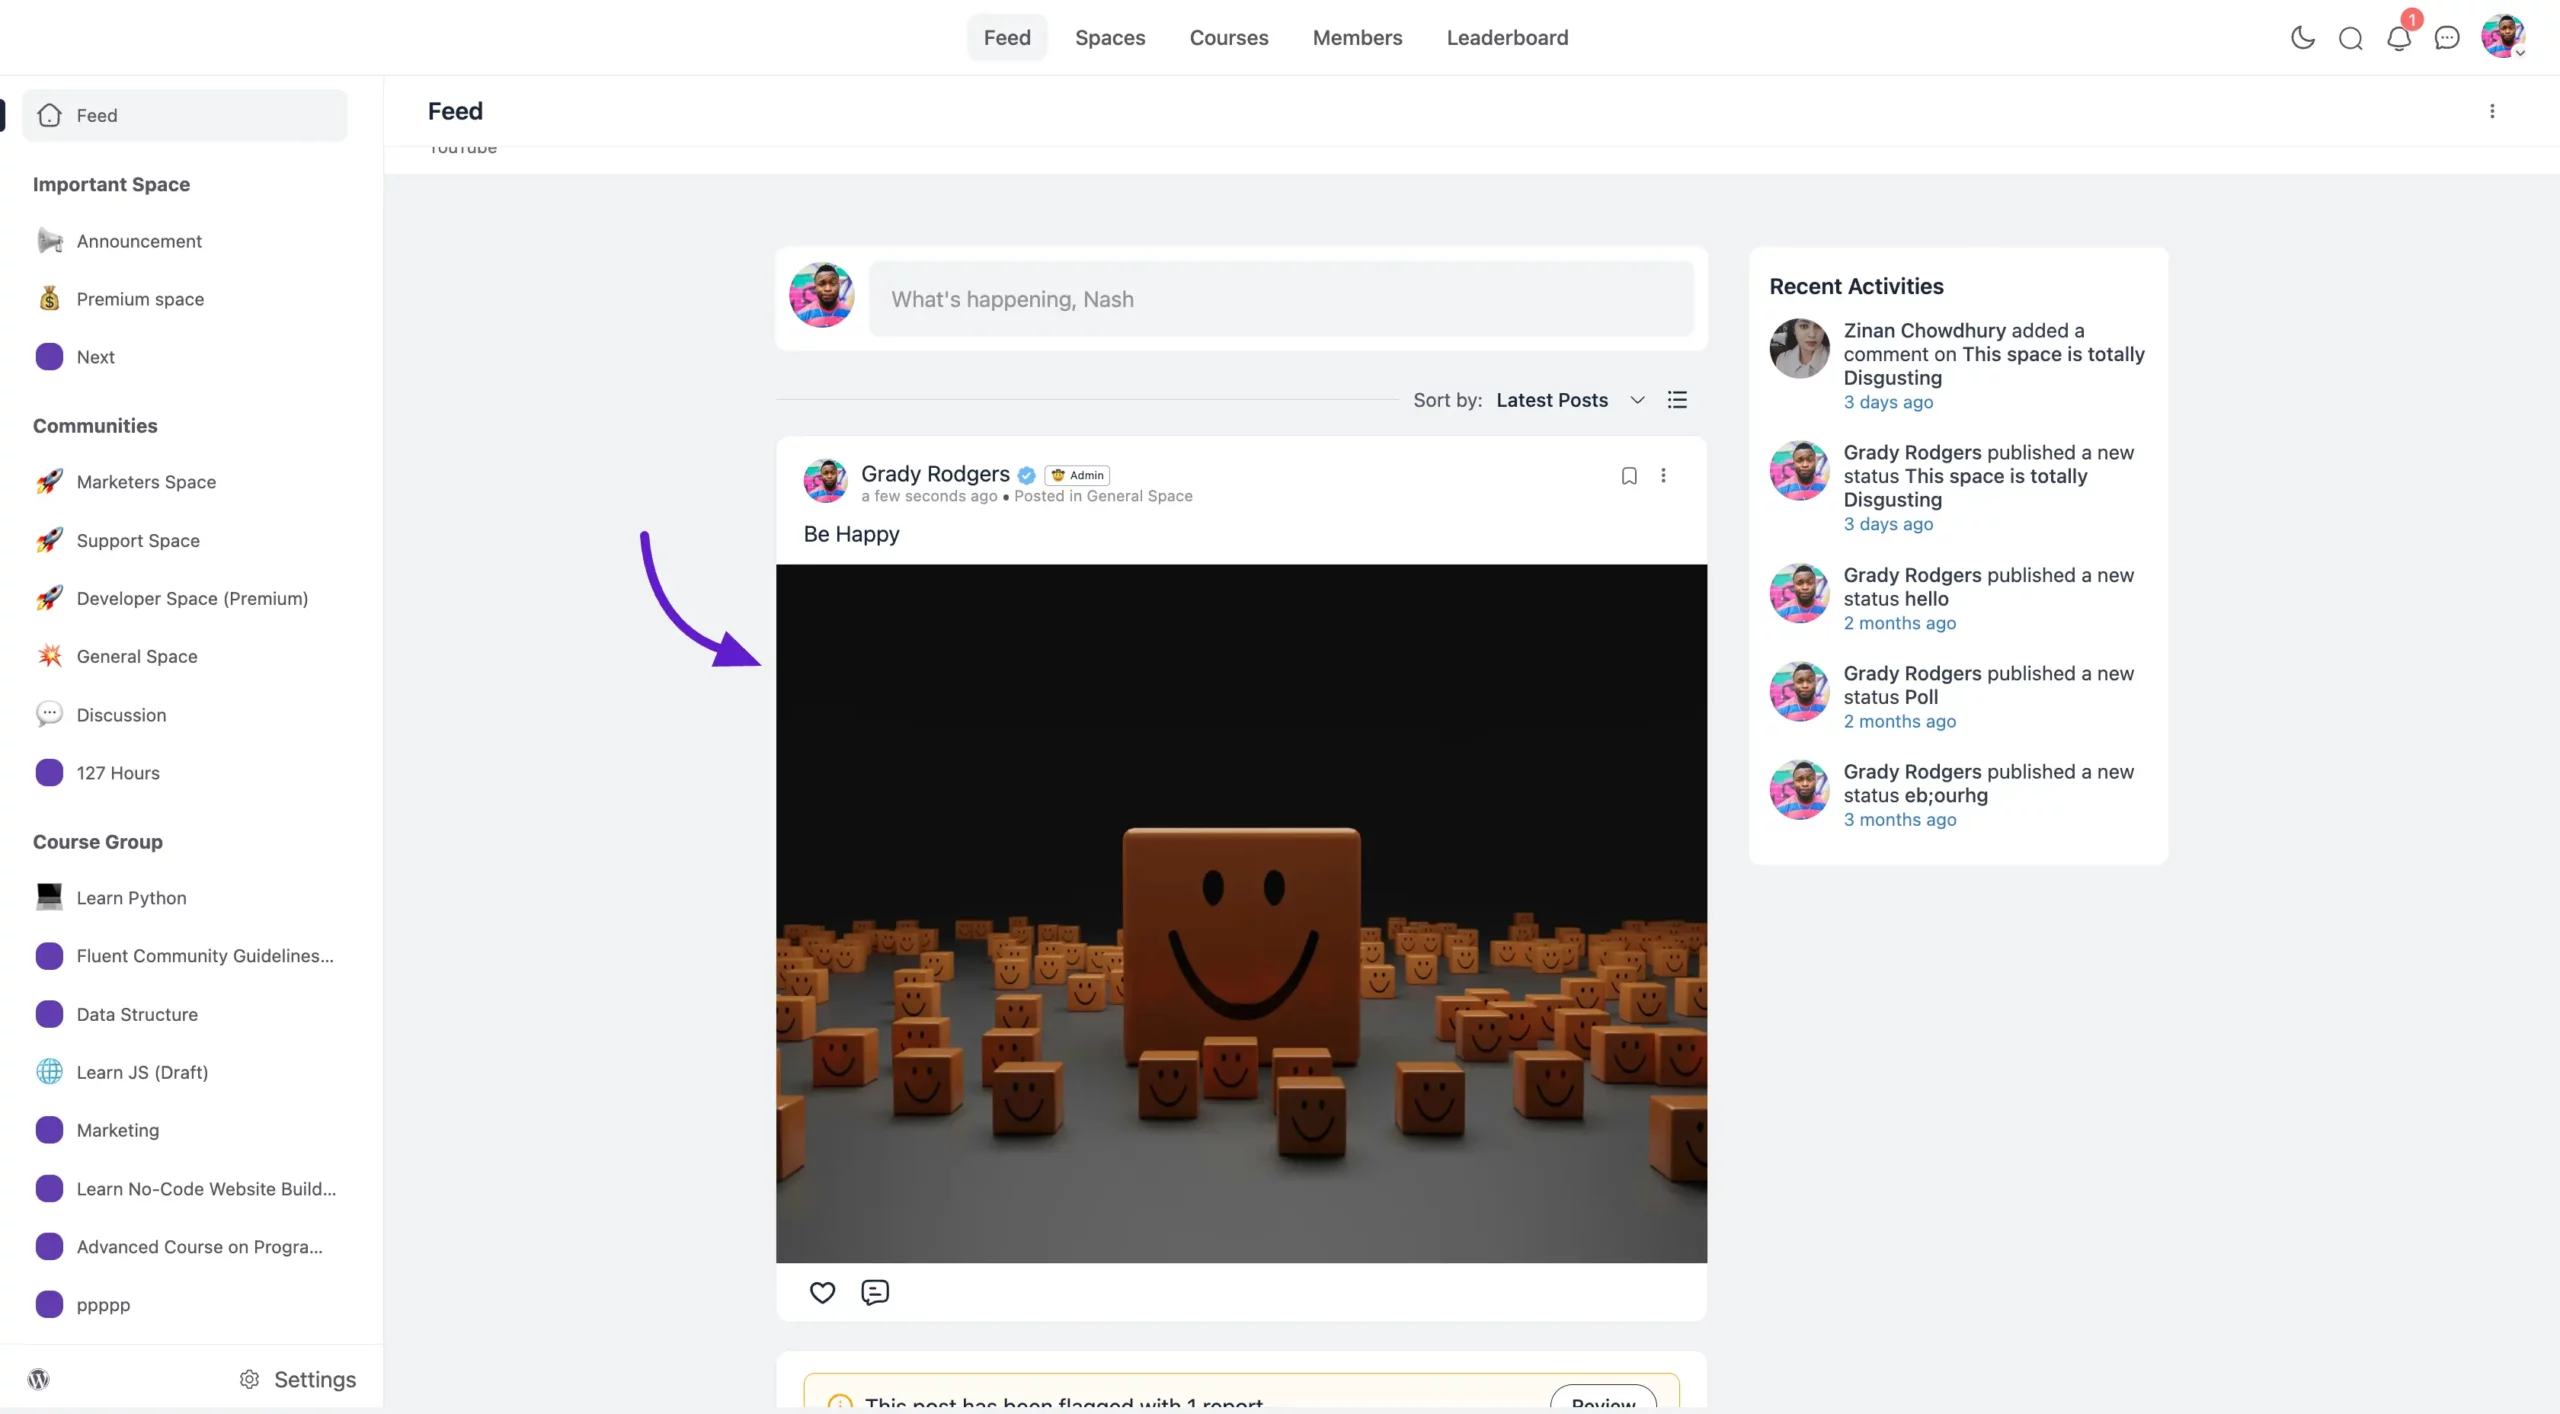
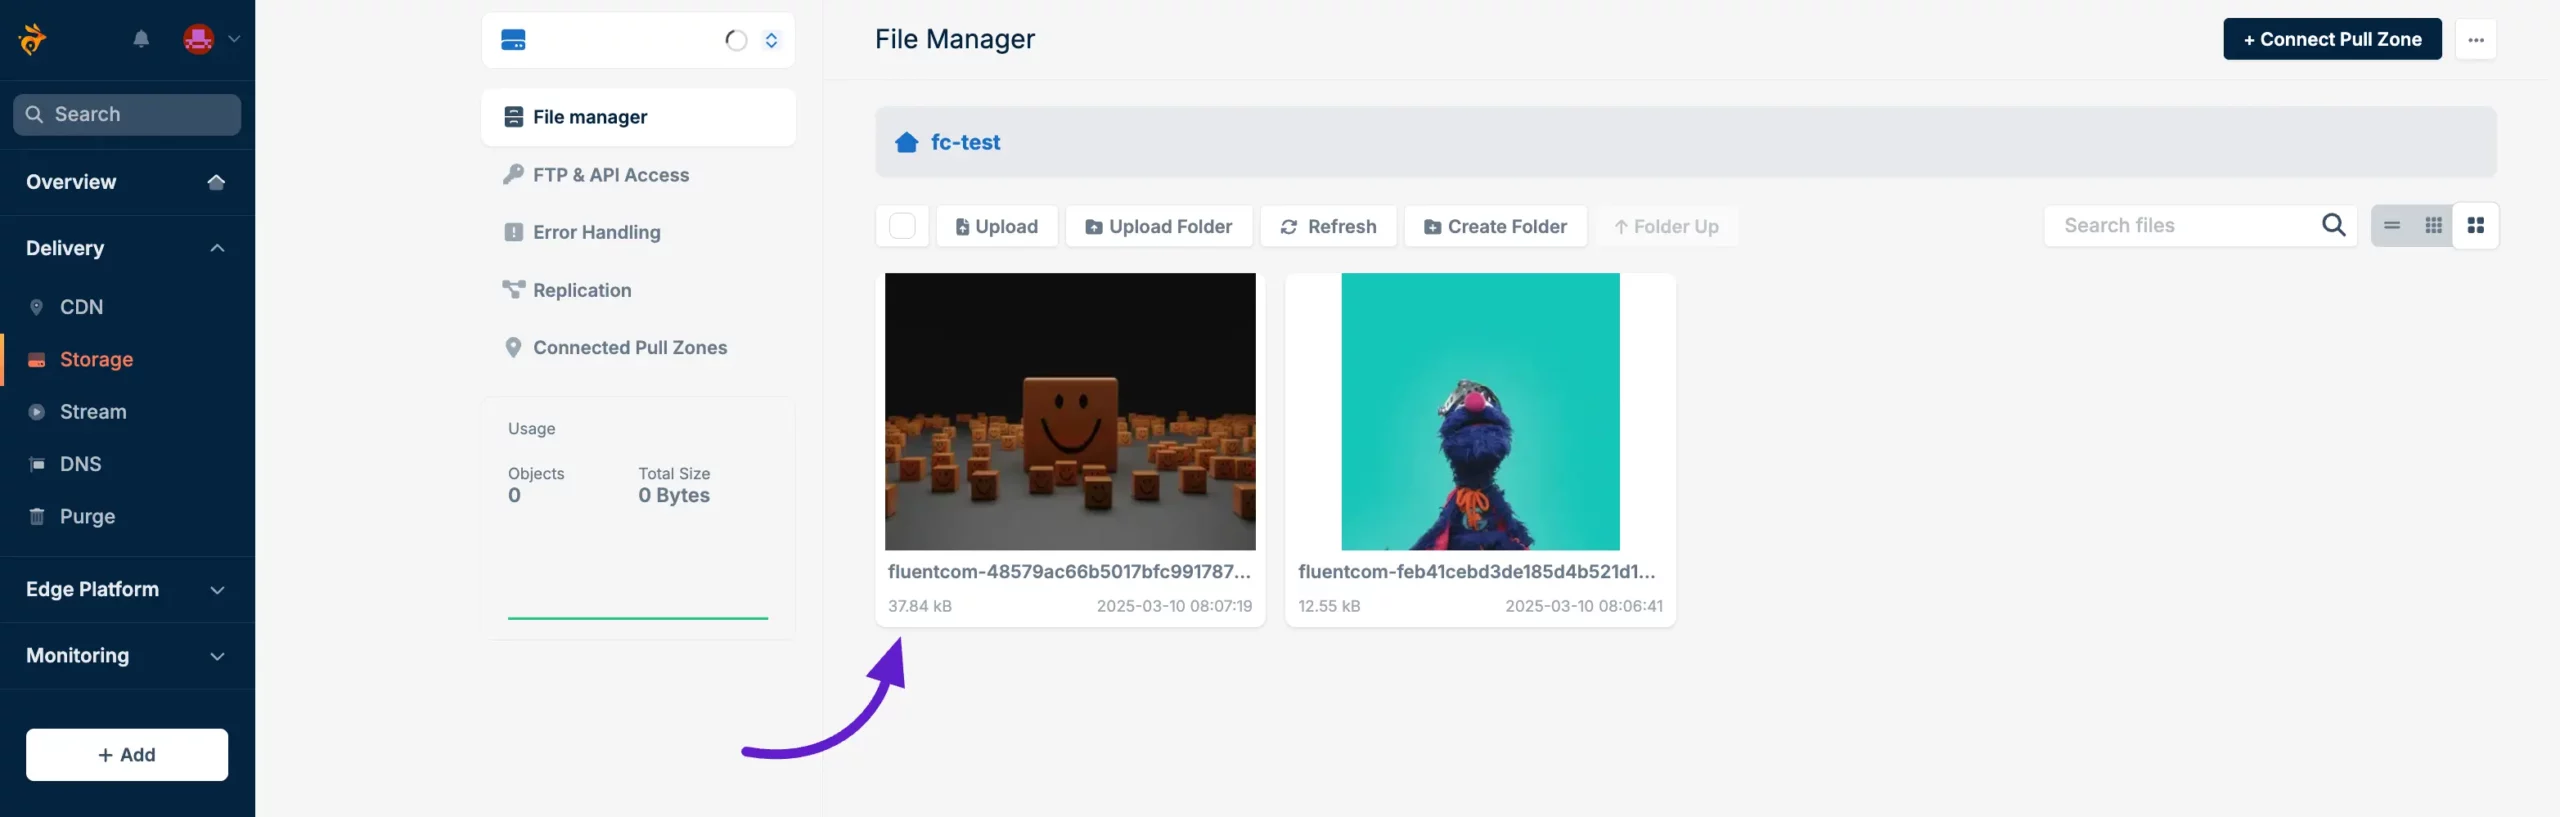
You will see that the file is automatically stored on BunnyCDN storage.
Using wp-config.php
Add the following definitions to your wp-config.php file, adjusting the values according to your BunnyCDN setup:
php
// Amazon BunnyCDN Configuration
define('FLUENT_COMMUNITY_CLOUD_STORAGE', 'bunny_cdn');
define('FLUENT_COMMUNITY_CLOUD_STORAGE_S3_REGION', 'storage.bunnycdn.com'); //  change with your region.check the next section
define('FLUENT_COMMUNITY_CLOUD_STORAGE_ACCESS_KEY', 'PASSWORD'); // Your Storage Zone Password
define('FLUENT_COMMUNITY_CLOUD_STORAGE_BUCKET', 'STORAGE_ZONE_NAME'); // Your Storage Zone Name
define('FLUENT_COMMUNITY_CLOUD_STORAGE_PUBLIC_URL', 'https://PULL_ZONE.b-cdn.net'); // Your BunnyCDN Public URL
Maps for FLUENT_COMMUNITY_CLOUD_STORAGE_S3_REGION
Please use the value for FLUENT_COMMUNITY_CLOUD_STORAGE_S3_REGION based on the region you selected when creating your Storage Zone:
Falkenstein, DE => storage.bunnycdn.com
London, UK => uk.storage.bunnycdn.com
New York, US => ny.storage.bunnycdn.com
Los Angeles, US => la.storage.bunnycdn.com
Singapore, SG => sg.storage.bunnycdn.com
Stockholm, SE => se.storage.bunnycdn.com
São Paulo, BR => br.storage.bunnycdn.com
Johannesburg, SA => jh.storage.bunnycdn.com
Sydney, SYD => syd.storage.bunnycdn.com
Notes
If you use both methods, the wp-config.php settings will take precedence over the UI settings.
The UI method is more user-friendly and doesn't require direct file access to your WordPress installation.
The wp-config.php method is more secure as it keeps sensitive information out of the database.
Ensure that all the credentials are correctly entered, regardless of the method you choose.
Limitations
BunnyCDN is not fully S3-compatible and does not support ACL. As a result, if you use the Document upload feature, the full URL will still be served via the CDN.