

Appearance
Course Layouts & Enrollment
FluentCommunity gives you flexible options to control how your course content is presented and how students gain access to it. This guide covers the Layout and Enrollment settings for your courses.
Accessing Course Settings
- Navigate to FluentCommunity → Courses (Pro).
- Create a new course or Edit an existing one.
- In the course editor, look for the main Settings panel, often located in a sidebar.
Course Layout Options
This setting changes the visual presentation of your course for students.
- Classic: A traditional, straightforward layout that focuses on the content.
- Modern: A more contemporary design with updated visual elements.
You can switch between layouts to see which one best fits your brand and content style.
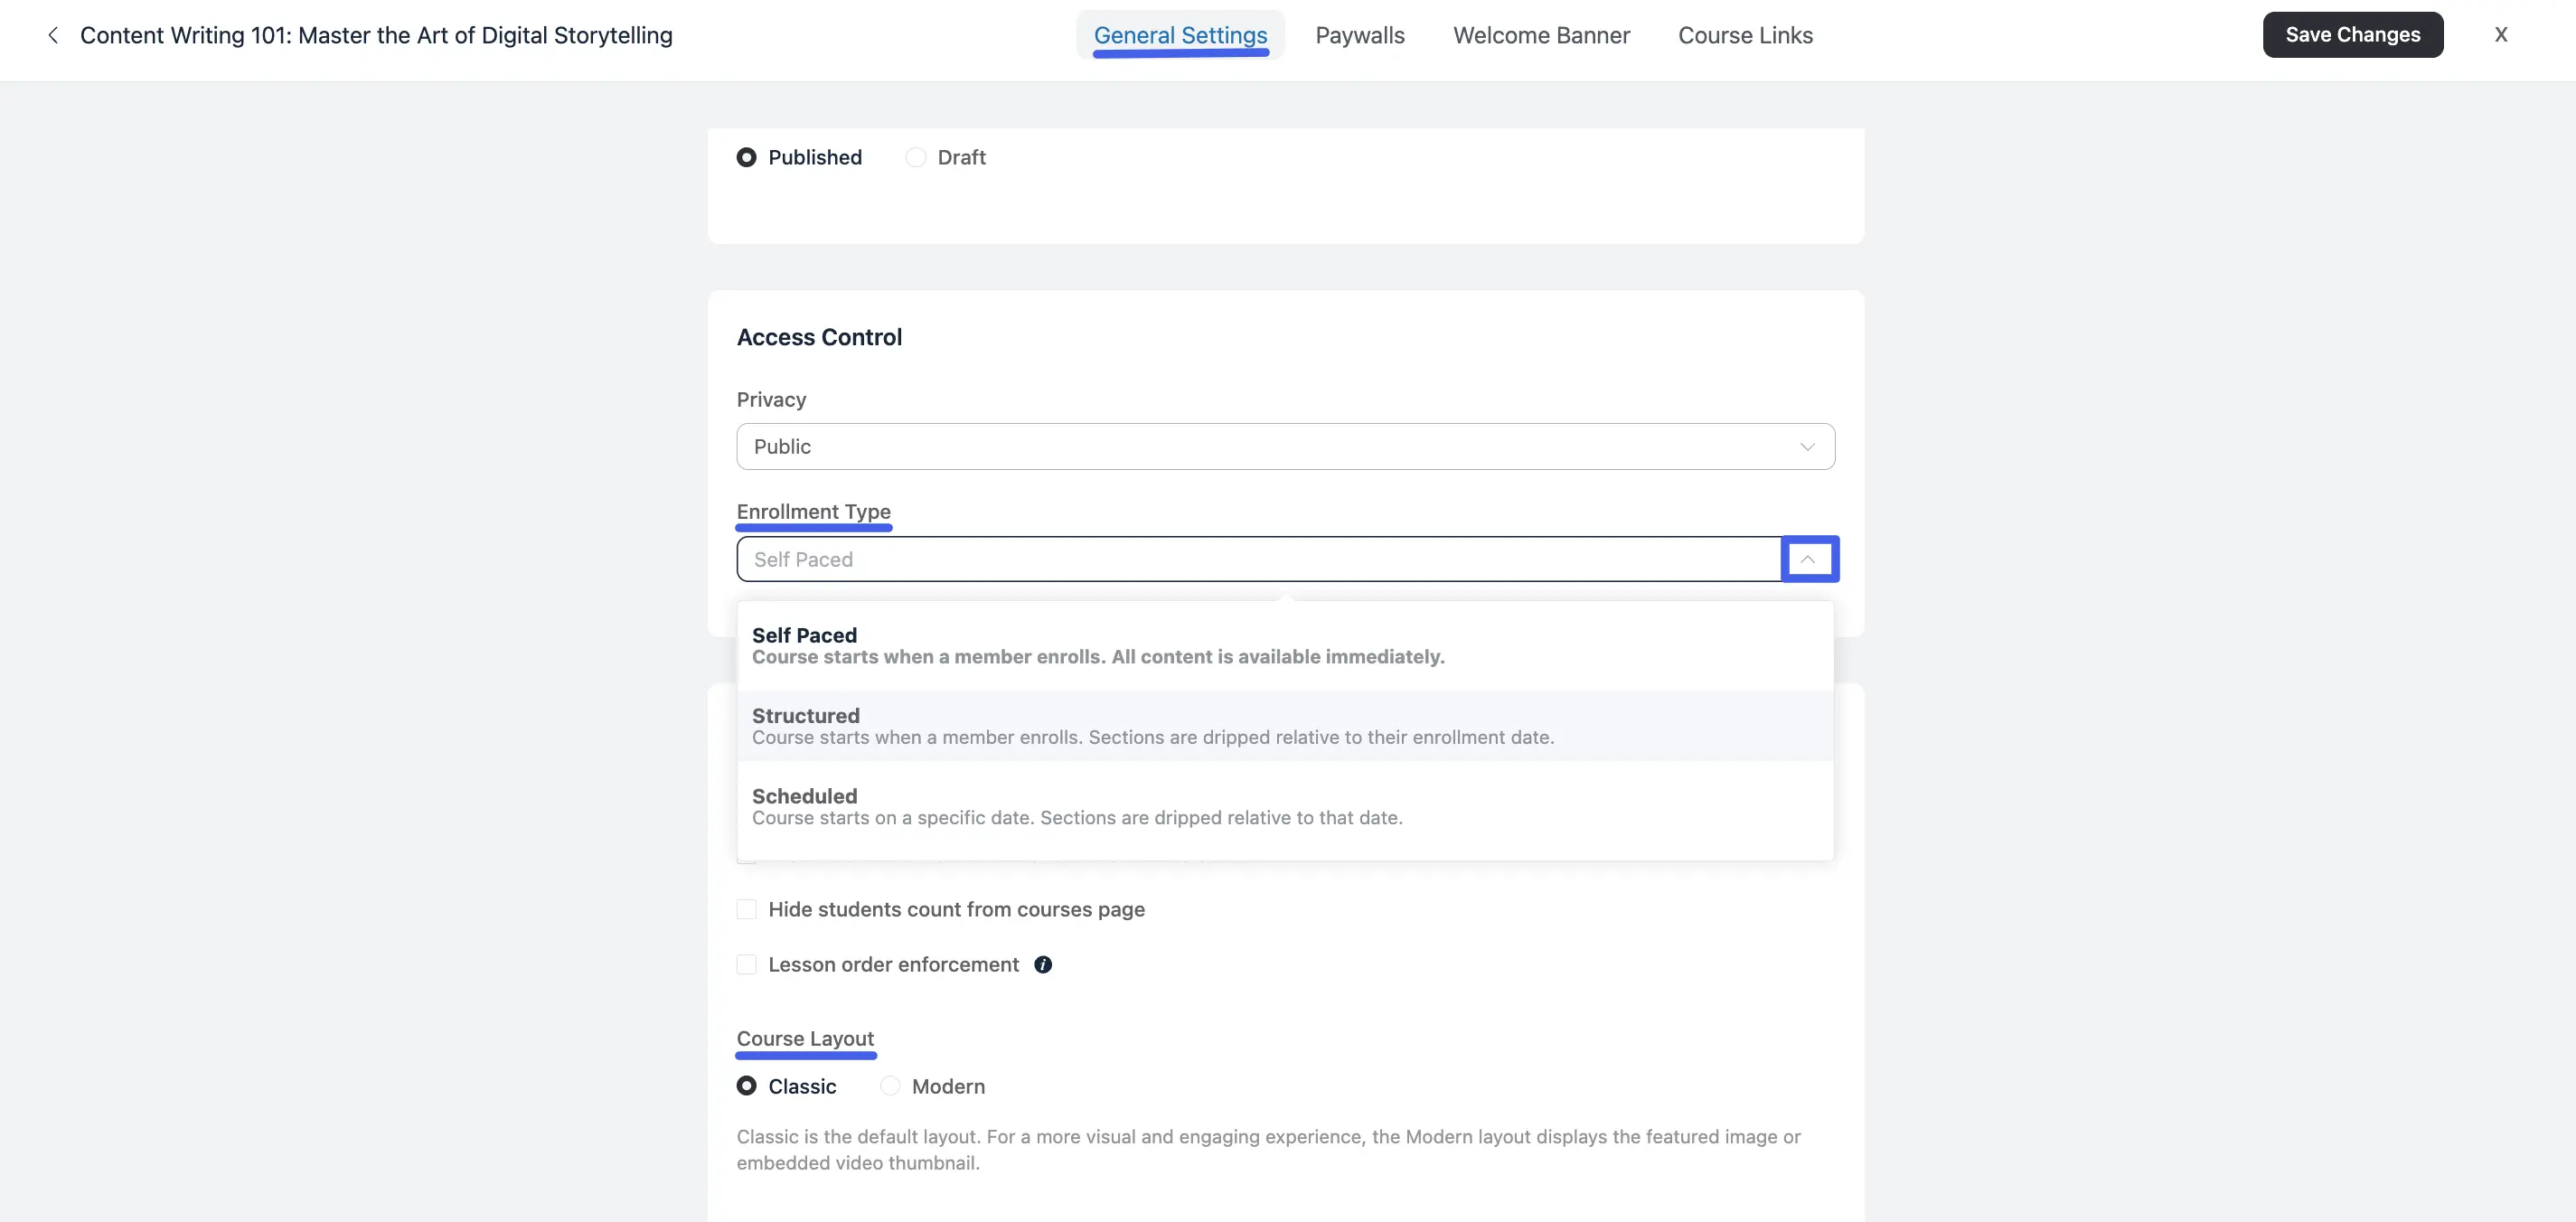
Enrollment Types
This setting defines how your students will progress through the lessons.
- Self-paced: This is the default setting. Students have access to all lessons immediately upon enrollment and can complete them at their own pace.
- Drip: This allows you to release lessons sequentially over time. You can set a schedule, such as releasing a new lesson every 7 days after a student enrolls. This is excellent for keeping students engaged over a longer period.
Use Case: For a 4-week coaching program, you can set up a drip schedule to release a new module each week, preventing students from getting overwhelmed by seeing all the content at once.
- Scheduled: This option allows you to set a specific start and end date for the entire course. All students will progress through the material on the same timeline. This is ideal for running a course with a live cohort.
NOTE
When using the Drip or Scheduled enrollment types, ensure your schedule is clearly communicated to your students so they know when to expect new content to become available.
Choose the layout and enrollment type that best suits your teaching style and click Save changes button to save your settings.
Restarting Course Progress
A student can restart their own progress on a course — resetting completed lessons and quiz results back to not-started, without losing their enrollment. This is useful for a student repeating a cohort or picking a course back up after a long break and wanting a clean slate.
Admins and Moderators can also restart a student's progress on their behalf from the course's Students list.
IMPORTANT
Restarting progress is permanent — completed lessons and quiz attempts are reset and cannot be recovered.